On my last post I showed you how to create a Cupcake Bouquet for Mother's Day or any occasion. I also mentioned I would demonstrate in an upcoming video, how to make a beautiful rose swirl for the top of your cupcakes.
Below is the video I put together just before taking these cookies to an event for Share Our Strength, an organization to help end childhood hunger. I hope you will be able to tell from this video how they're done and be able to recreate your own roses at home.
Enjoy!
Sunday, 29 April 2012

Monday, 23 April 2012
Cupcake Bouquet!

Mother's Day is just about 3 weeks away. As a child I enjoyed creating something to give to my mom and grandmothers. To this day I still love creating a gift that I know my mom will like. If my grandmothers were still around I'd create one for them as well.
How would you like to learn how to make a Cupcake Bouquet? If you have children this would be a fun project to do with them in celebration of Mother's Day. However, if your schedule is hectic but know your children would love to create their own culinary masterpiece to give for Mother's Day, please contact me. I'd be happy to schedule a class in your home to teach them how to make this lovely bouquet. (Continue for recipe and instructions).
I made two different types of cupcake bouquets over the weekend while workmen were ripping out and replacing carpet in our basement - one with regular size cupcakes (shown above) and the other with

mini cupcakes
(my photos don't do them justice)
Note: Although beautiful as is, the mini cupcake bouquet above could be filled with additional cupcakes. However, my family snacked on more than I thought was needed. This bouquet is covered with 7 and I think 9 or 10 cupcakes would have been nice. Whether or not your bouquet is filled with cupcakes the tissue filler is perfect for small gaps. That said, if your cupcakes are too close you risk them touching and ruining the iced flower design. Keep that in mind when filling your bouquet.
These are so much fun to make. Whether you make these with your children, yourself or have me come over to teach you and/or your children - here's the recipe.
Cupcake Bouquet
For this bouquet we are going to make a Rose Cupcake Bouquet. In my opinion it's the easiest and prettiest to master. Who doesn't like a bouquet of roses?
Supplies:
- Clay pot (I used 8") or glazed pot as shown above with the white polka dots (both purchased at Michael's), basket or container to place your cupcakes in.
If you purchase a clay pot you may want to add some spray paint. I used a high gloss spray in white but any color will do.
- Ribbon - if you'd like to add some additional color
- Double-sided tape for adhering the ribbon to the pot
- Tissue paper - your choice of color. I chose lime green to look more like grass or leaves or even some netting.
- Styrofoam - for the 8" pot and 8" ball or flat disc. For the glazed pot I found a 6" Styrofoam ball that fit nicely into it. (If the ball is just slightly too small you can wrap it in tissue paper to secure it to the bowl. I did this with both pots.
Why the plastic cups? Sometimes you may find it easier to staple the cups together in a circle to place inside your pot for added security. Depending on the weight and angle that your cupcakes are inserted into the pot they may seem loose. In which case, the cupcakes can be placed inside the plastic cups. If you do this, I recommend having a flat Styrofoam disc and with a toothpick poke through the center of the cups and attach to the Styrofoam. Then push your cupcake onto the toothpick that's already attached to the Styrofoam. Another alternative would be to staple the cups together in the shape that will fit into the pot.
I'm so sorry that I didn't take step-by-step photos as I did this. I hope you can understand my explanation.
- Favorite cupcake recipe or box mix
- Cupcake liners for regular or mini cupcakes
- Favorite Buttercream recipe. I recommend a slightly stiff recipe (one with solid shortening) so the flowers hold up well.
Decorating tips: For simplicity I recommend making a rose bouquet. It's the easiest to start with and looks the most beautiful, in my opinion. You will need:
- Disposable icing bags - cut and place coupler with decorating tip
Directions:
Make icing adding color of your choice
Place icing in pastry bag fitted with desired size decorating tip
To make roses simply place the decorating tip on the center of your cupcake. Squeeze gently, then in a continuous counter clock wise motion start to swirl the icing moving out towards the edge of the cupcake. When completely covered you should have a rose.
Here is a pictorial demonstration from Wilton on making a rose using the Wilton 1M decorators tip. The 2D is made by Ateco.


For more cupcake bouquet inspiration check out these links:
Friday, 20 April 2012
Jazzed up Cottage Cheese

Do you find you're always rushed for time, getting the kids off to school, doing paperwork, answering the phone, running errands, getting dinner ready, walking the dogs......with barely a minute for yourself let alone time to sit down and have a bite to eat? Well you're not alone.
In today's society we are so wired that even when we do have a few minutes alone, the computer is on, our cell phone is ringing we're getting text messages on our ipad or iphone - that many of us find ourselves grabbing whatever we can to eat. Oftentimes that means something unhealthy. I'm a victim of this as well, unless I think ahead to prepare quick healthy foods on those days I've got a hectic schedule.
My favorite quick healthy fix is Cottage Cheese. I love the stuff and although it may sound boring to you a 1-cup serving provides your body with 28 grams of casein protein. These proteins are slow to digest, which means a person can feel fuller for a longer time sustaining you throughout the day and also perfect if you're trying to lose weight - keeping you full longer means less or no snacking.
Cottage cheese is also high in Omega-3 and Omega-6 fatty acids which are found primarily in freshwater fish and known for their positive effects on brain function, while also reducing the risk of heart disease. In addition, cottage cheese is packed with calcium which helps build and keep our bones strong, selenium, phosphorus and iron, Vitamin A, B-12 with trace amounts of foliate, B-6, thiamine and niacin - that's a mouthful! Since cottage cheese is lower in saturated fat and cholesterol than hard cheeses like cheddar and creamier cheeses like brie, it's a healthier choice for your heart and waistline.
Cottage cheese is fresh cheese made from whole, part-skimmed or skimmed pasteurized cow's milk. "Sweet curd" cottage cheese the most popular, has a mild flavor due to the fact the curds are washed, removing most of the cheese's natural acidity. The texture of cottage cheese is usually quite moist and comes in three forms: small-curd, medium-curd and large-curd.
So if you're like the person I described above or have a hectic day now and then, whip yourself up a batch of my jazzed up cottage cheese. Oh, and besides all the great benefits of cottage cheese, when you add these other fresh, bright colored and healthy veggies, your body will be loving you!
Jazzed up Cottage Cheese
1 (24 oz.) container of Cottage Cheese (whatever fat content you desire)
1 red pepper, chopped brunoise style
1 yellow pepper, bruniose style
1 stick of celery, sliced 1/4 inch
1 carrot stick, brunoise style
2-3 scallions, sliced 1/4 inch
fresh ground pepper to taste
Combine all ingredients, blend and serve chilled.
Enjoy this cottage cheese for a snack, a meal, alone, or with some fresh fruit. It will make you feel great!
Tuesday, 17 April 2012
Kitchen Facial

Now that winter is over and spring is here, I feel like I could use a facial. Although there are numerous places to get one, most start at around $95. It's wonderful spending a morning or afternoon getting pampered at a spa but I don't always have the time or feel like spending the money.
Did you know you can give yourself a facial with ingredients you have in your kitchen? That's right! There are 100s of homemade recipes from facials to foot scrubs you can create in the privacy of your home for a fraction of what it would cost at a spa.
I know this isn't the typical recipe I post, but it's food, it's fresh and it's great for your skin and well-being.
My skin appeared dry today and I was tired, so I decided to pamper myself. With a cucumber and limes in the refrigerator, plus a full jar of honey in the cabinet, I decided to whip up a nice soothing facial for myself. One that heals, softens and moistures my skin, while promoting new cell growth. Just in time for the spring sunshine.
Who needs to go to the spa to have machines work on your skin, when you can let what nature has provided, gently revive it?
Here's a simple and nourishing facial recipe to enjoy, with ingredients you probably have at home already.
Honey-Cucumber Facial
For the Scrub:
8 oz. (1 cup) honey
10 drops fresh lime juice
1 medium cucumber, thinly sliced (I use a mandoline - perfect slices every time)
Steps:
- Cleanse your face with warm water and a clean wash cloth
- Mix the honey and lime juice together and massage into your face for 15 minutes. It will have a sticky, slippery sensation, but feels incredible! The lime peels away surface cells and the honey softens the skin.
- Wipe away the residue of honey with a wet, warm cloth. Pat dry.
- Neatly place the cucumber slices over your face and neck (you can cover your eyes and mouth if desired, but not necessary). Now relax, listen to some music - feel the coolness of the cucumber while it tightens your skin and replenishes moisture. You'll probably fall asleep!
- After a nice rest, remove the cucumbers and finish with a delicate moisturizer, if desired.
ENJOY!
Thursday, 12 April 2012
Flower Power - Cupcakes!

The flowers have been so beautiful lately lining the streets of our neighborhood, that I decided to create my own. Since I don't consider myself to be the best at gardening, maybe because I've never done much of it, I decided to make flowered cupcakes.
My idea was to create large chocolate flowers on the top of cupcakes. I played around with this idea in the ktichen last night trying one thing and another. I had planned to post about my flower creations but wasn't sure if they were post worthy - even though I loved the way they looked. Then my husband came in the kitchen and mentioned they were cute and asked where I purchased them? My neighbor stopped by today and asked the same thing in a "wow that's pretty" kind of tone, so I thought I'd go ahead and share them.
Here's how I made my Flower Power Cupcakes:
Make your favorite cupcakes, stuffed or unstuffed. I like to stuff mine with chocolate filling, lemon or lime curd - YUM! Then top with a favorite icing. I colored mine to look like grass.
For the flower part, I used:
Confectioners Coating (white), you can also purchase colored ones
Large non-pareils - I like these because they have multi-colored sprinkles on top, most have white
Chefmaster Candy Colors
2 microwave safe dishes - for the confectioners coating
1 small bowl for coloring the icing
Place a handful of the confectioners coating in a microwave safe bowl. The amount will depend on how many cupcakes you're designing.

Microwave 3 times in increments of 30 seconds, stirring between each until smooth.


Once smooth add several drops of your desired color. I chose yellow and orange for the petals.
(I microwaved the confectioners coating in 2 separate bowls for 2 separate colors).
I then placed each color, once melted and blended, into a pastry bag, and cut the tip so just enough of the melted coating could come out. Keep the hole small otherwise too much coating will ooze out and make a mess. You can also use a zip lock baggie, cutting one tip.

My first plan was to make a flower template in one entire piece.

However, after doing that I felt like it looked too flat.

So then I made individual petals in yellow and orange, that I would insert into a thick layer of icing and place the milk chocolate non-pariel in the center. I liked this idea.
I piped these free hand and as you can see they aren't all perfect. You could make a template by drawing the petals on paper, then covering with parchment. Be sure to tape this all down to a table though so it doesn't move. Don't pipe directly onto the pencil marks, they will come off on the confectioners coating.
.jpg)
(outside photo)
Then I strategically placed my petals at varying levels and centered my non-pariel. Here you have it!

(inside photo)
This may not be the most beautiful flower cupcake but it was fun to make. Best part - you can eat the petals individually or do: "he loves me, he loves me not!" Well maybe your teenagers will want to do that.
Enjoy!
Monday, 9 April 2012
Sonoma Chicken Salad

Have you ever had a dish that you crave and love to eat, but know you shouldn't eat it? I hate when that happens. For those of you that follow my blog you know I enjoy going to Whole Foods Market. Oftentimes, during the afternoon when I'm running around I'll go there to pick up lunch. A favorite is their Sonoma Chicken Salad, although if I purchase any, it's a small amount. Why?
Typically chicken and tuna salads purchased in stores or restaurants are high in fat. They almost always use full fat mayonnaise and oftentimes combined with full fat sour cream. I mean, what's not to love? Let's face it, fat tastes good and flavorful but it's not so great for the heart, cholesterol and our waistlines.
Yet, I broke down this weekend and bought a small container of their Sonoma Chicken Salad. However, before I had a chance to eat much, my family tried it. Of course, they loved it as well, leaving me only a bite - which was fine, since I didn't want to over indulge.
That's when I decided to make a fat free or low fat version for myself.
Scouring the internet I found Whole Foods recipe for Sonoma Chicken Salad. I knew this was it since the ingredient list matched what was on my container. With recipe in hand, I duplicated it, substituting Fat Free Miracle Whip. Quite frankly, I couldn't tell the difference. (Of course feel free to use full fat mayo, light mayo, canola mayo, full fat or light which I enjoy or fat free mayo). I was in heaven and apparently so was my husband since he ate almost the entire bowl.
You are aware, that's the drawback of eating fat free? Less fat doesn't fill you up or satisfy you as much as full or low fat - which often means eating more of the dish. In turn, you often consume more calories than if you'd eaten full fat.
That said, portion control can be an issue and has to be maintained.
This Sonoma Chicken Salad is the perfect spring dish. Great for a women's luncheon, bridal, wedding or baby shower, outdoor lunch on the terrace, afternoon brunch or even for dinner like we had this evening.
Served with fresh fruit, popovers or muffins, ice cold lemonade or iced tea and you've got a perfect meal. Then top it off with some smooth homemade Mango Sorbet - which I'll be posting later this week.
From now on I'll be making this weekly to keep on hand, and I'm sure you will as well once you try it!
Sonoma Chicken Salad
Serves 6
Ingredients:
Dressing
1 cup fat free mayonnaise
4 teaspoons apple cider vinegar
5 teaspoons honey
2 teaspoons poppy seeds
Salt and freshly ground pepper to taste
Salad
2 pounds boneless, skinless chicken breasts
3/4 cup pecan pieces, toasted
2 cups red seedless grapes
3 stalks celery, thinly sliced
1 cup fat free mayonnaise
4 teaspoons apple cider vinegar
5 teaspoons honey
2 teaspoons poppy seeds
Salt and freshly ground pepper to taste
Salad
2 pounds boneless, skinless chicken breasts
3/4 cup pecan pieces, toasted
2 cups red seedless grapes
3 stalks celery, thinly sliced
Method:

In a bowl, combine mayonnaise, vinegar, honey, poppy seeds, salt and pepper. Refrigerate until ready to dress the salad. This can be prepared up to 2 days ahead.

Preheat oven to 375°F. Place the chicken breasts in one layer in a baking dish with 1/2 cup water. Cover with foil and bake 25 minutes until completely cooked through. Remove cooked chicken breasts from pan, cool at room temperature for 10 minutes, then cover and refrigerate.


When the chicken is cold, dice into bite-size chunks and transfer to a large bowl. Stir in pecans, grapes, celery and dressing.
Serve with fresh fruit, popovers or muffins and a tall glass of iced tea or lemonade. Follow with my luscious smooth Mango Sorbet that I'll be posting later this week. So please come back to check that out.
Enjoy!
Friday, 6 April 2012
Passover Macaroons!

Wednesday I posted a video for making cute little bunny cupcakes, so today I wanted to post a recipe for the jewish holiday Passover.
Tonight marks the beginning of Passover one of the most important holidays of the Jewish faith, an eight-day commemoration that overlaps in date with Easter.
Passover or Pesach is the holiday which celebrates the Exodus from Egypt and the next stage in the unfolding biblical story of the Children of Israel.
After centuries of slavery, Passover celebrates the passage into freedom for an entire people. The specific "passing over" for which the holiday is named refers to the way in which God passed over, or protected, the homes of the Israelites during the night they prepared to leave Egypt, as the last of the Ten Plagues was being visited upon the Egyptians.
When the Pharaoh freed the Israelites, it is said that they left in such a hurry that they could not wait for bread dough to rise (leaven). In commemoration, for the duration of Passover no leavened bread is eaten, for which reason it is called "The Festival of the Unleavened Bread". Matzo (flat unleavened bread) is a symbol of the holiday.
The Macaroons that I have made contain no flour but also no corn syrup, which is against the dietary laws for Ashkenazi tradition but are allowed in the Sephardic communities for Passover. They can be made with or without corn syrup depending on what you believe. I made these without the corn syup but left that ingredient in the recipe below.
This recipe is from Sarabeth Levine who owns and operates her own bakery in New York, Sarabeth's Bakery. These little coconut cookies are heavenly and you don't have to be jewish to like them! In fact, I'm sure you'll love them!
Orange-Coconut Macaroons
Makes 2 dozen macaroons
Passover macaroons are made without flour (which is not used at Passover time). They are crunchy on the outside and have a softer texture on the inside. I add orange zest to tame the signature sweetness of these traditional holiday cookies. I love the toasty pieces that fall to the sheet tray while scooping them into their shape. When the trays come out of the oven, we fight for them at the bakery, and believe me, so will you. Don't reserve these plump and easy cookies for Passover, they are excellent any time of the year. Sarabeth Levine
BAKERS NOTE: Macaroons are nothing if not chewy and moist, so I make mine with a syrup that ensures the desired texture. For the best flavor, use desiccated coconut, available at natural food stores, and not the standard sweetened coconut flakes.
1 1/2 cups sugar
1/3 cup water
2 teaspoons light corn syrup
Pinch fine sea salt
Seeds from ½ vanilla bean or ½ teaspoon pure vanilla extract
Grated zest of ½ orange
5 cups (1 pound) unsweetened desiccated coconut
3 large egg whites, at room temperature
1. Position a rack in the center of the oven and preheat to 325°F. Line a half-sheet pan with parchment paper.
2. Combine the sugar, 1/3 cup water, corn syrup, and salt in a heavy-bottomed medium saucepan. Bring to a boil over high heat, stirring just until the sugar dissolves. Pour into the bowl of a heavy-duty mixer. Add the vanilla seeds and orange zest and stir to combine.
3. Attach the bowl to the mixer and affix the paddle attachment. With the mixer on low speed, gradually add the coconut. Then, gradually pour in the egg whites and mix into a dough. Let stand for 10 minutes.

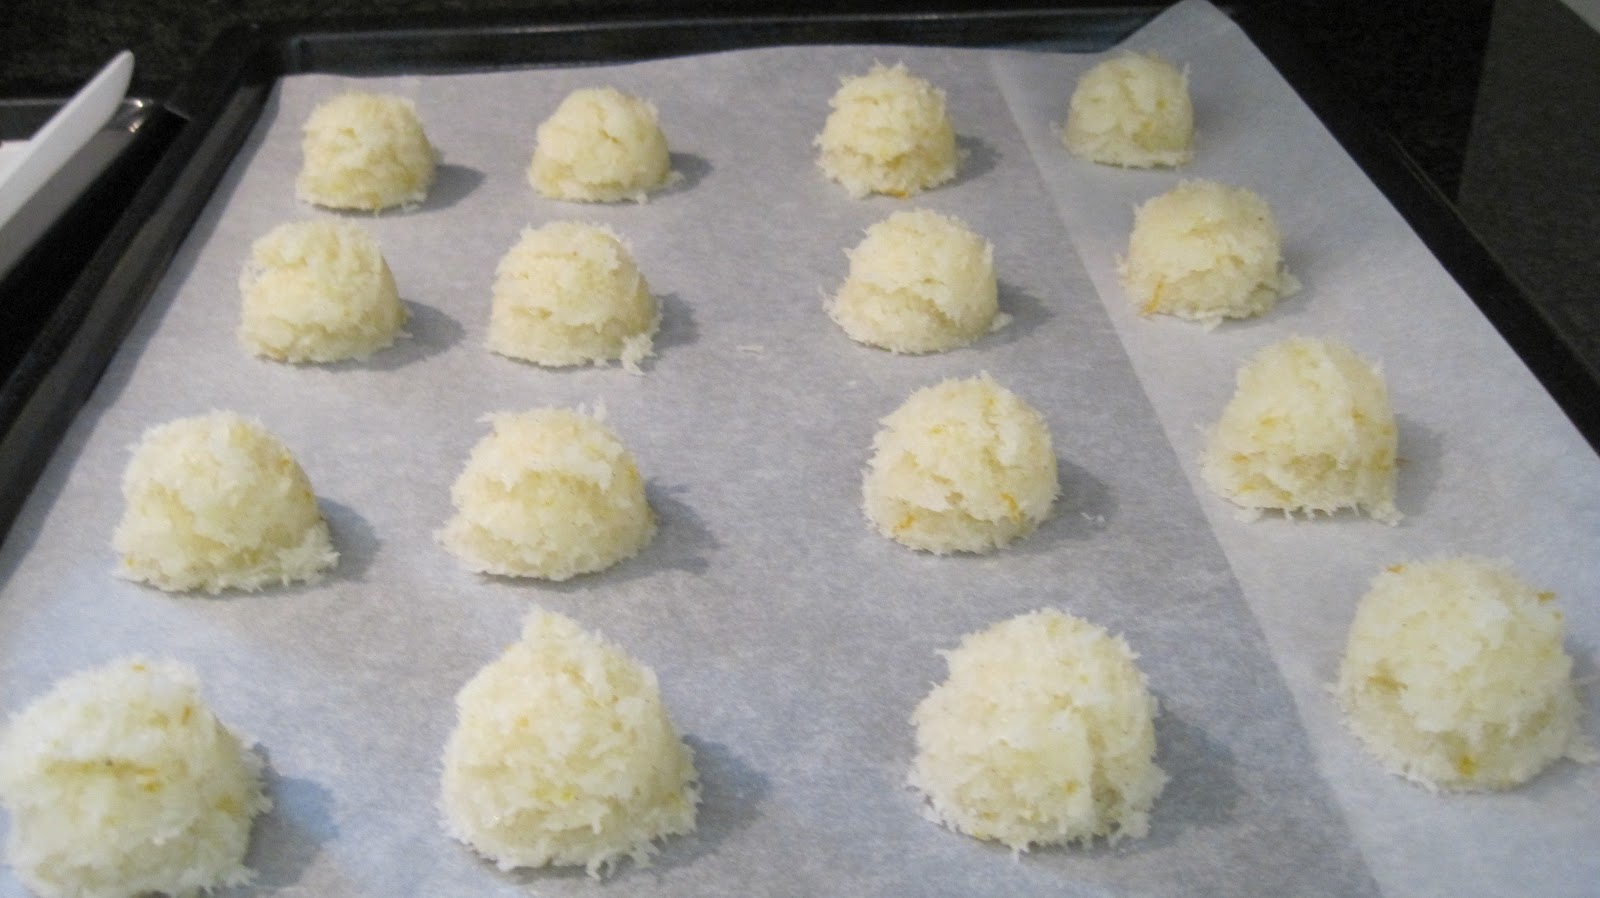
4. Using a 1 1/2-inch-diameter ice-cream scoop, portion the coconut mixture. With your other hand, lightly compress the mixture into the scoop so it will hold its shape better when released onto the half-sheet pan. Release the coconut mixture onto the pan. Repeat with the remaining mixture, spacing the mounds about 1 inch apart.
5. Bake until the macaroons are light golden brown, about 20 minutes. Cool completely on the pan. (The cookies can be stored in an airtight container at room temperature for 5 days.)
Enjoy!
Subscribe to:
Posts (Atom)