Pages

Showing posts with label How To. Show all posts

Sunday, 5 May 2013

Chocolate Pretzel Basket Video!

It's still not too late to add more fun treats for Easter.  Here's an adorable Chocolate Pretzel Basket that even your kids will have fun creating.  Fill with your favorite goodies or fresh fruit, for all to enjoy.  Before you know it the entire basket will disappear!

Watch my video below, then head to the grocery store to gather the few supplies needed to make this special treat.  Whether for Easter, a fun or elegant centerpiece - you'll have everyone smiling when they feast their eyes on your creation.


For detailed recipe view below........

Chocolate Pretzel Basket
Adapted from Chocolate Holidays by Alice Medrich

Ingredients for large basket:

12 oz. package chocolate chips (whatever type you prefer)
7 oz. thin salted pretzel sticks

Equipment:

2 quart bowl or other container to use as a mold
2-3 quart bowl for mixing

Chocolate-coated pretzel "twigs" lend themselves to elegant centerpieces filled with plain or chocolate dipped fruit, chocolate truffles, or meringue mushrooms. Or make a little nest for each child filled with jellybeans or chocolate robin eggs.  Let the kids play with the sticky chocolate-coated pretzels on sheets of waxed paper...and don't be surprised to see miniature log cabins, stick figures, and edible skyscrapers.

Directions:

Prepare the mold:  

Spray bowl (mold) with non-stick spray.  Line entire bowl with plastic wrap allowing for plenty of overhang. You may need two sheets to cover the entire bowl, just be sure to overlap plastic wrap. Press wrap as smoothly as you can, covering bottom and sides of bowl.

Bring an inch of water to a simmer in a saucepan.  Set other bowl over simmering pot and place chocolate chips in bowl.  Using a silicone spatula stir until chocolate has just melted and is a fluid consistency.  Remove bowl from heat.  Wipe moisture off bottom of bowl with a towel - be sure not to get any moisture or water in the chocolate. The chocolate should be warm and fluid, not hot.  Add pretzels to chocolate.  At this point the chocolate will be cooler.  Using a rubber or silicone spatula carefully fold the pretzels in the chocolate, adding more pretzels if necessary, until all pretzels are lightly coated.  It's okay if some of the pretzel shows through the chocolate.  If needed, use your fingers!

If chocolate is too warm, pretzels will slide down sides of mold rather than staying in place when building your basket.

Put a handful of pretzels into the lined mold (bowl) and spread them out to form bottom of basket.  Build sides of basket by adding handfuls of pretzels and arranging them against sides of mold.

When pretzels are arranged to your satisfaction, refrigerate until chocolate has hardened, at least an hour, or until needed.  To unmold, lift ends of  plastic liner to remove basket from mold (bowl).  Set basket onto counter and gently peel off plastic wrap.  Store, basket on plastic sheet and return to mold, cover, and refrigerate until needed.

To serve, place on serving platter - fill with Robin Eggs as shown in video, or strawberries - plain or chocolate dipped, truffles, jellybeans, etc.  

For a more decorative look, surround with fresh leafy branches or sprigs of green, if desired.

Wishing you and your family a very Happy Easter!

Monday, 10 September 2012

Giveaway & How to Make Limoncello!


In June of 2007 we took an extended vacation to Italy. We started in the northern part of Italy - Milan, and made our way to the southern tip of the Amalfi Coast - Sorrento. Exhausted by the end of the month, the Amalfi Coast was the perfect setting for relaxation.

The turquoise waters were breathtaking and crystal clear.  We traveled by boat or ferry to many of the nearby islands for a taste of what each had to offer.  Universal, was the famous Limoncello (Lemon Liqueur), displayed in every shop on the coast in tall skinny neck bottles, with bright yellow liqueur filled to the brim.  Lemons grow in abundance on the Amalfi Coast and Limoncello is just one of the many things they use them for.

A famous culinary school in Ravello on the Amalfi Coast is Mamma Agata's Cooking School.  Although I was unaware of her school at the time, I was fortunate enough to discover it online years later.  I hope to make my way back someday soon to take one of her classes, and even arrange a culinary tour where others will join me.

Mamma Agata's cooking course is held in a state-of-the-art outdoor kitchen on a terrace in Ravello. The town of Ravello is located high above the Amalfi Coast, with views that stretch to Capri and beyond.


It is a town famous for its music and culture as well as gastronomic events.

Mamma Agata has a vast experience in traditional southern Italian cuisine.


Her life experience includes cooking for both Italian Heads of State and American celebrities that frequented Ravello in the 1950's and 60's, such as Humphrey Bogart, Elizabeth Taylor, and Jacqueline Kennedy and many others. She has been a private chef for international journalists, writers and politicians such as Susanna Agnelli.

Papa Salvatore married Mamma Agata in 1964.  They met at Villa Civita when Mamma was 14 years old, where Salvatore worked as a driver and a part-time gardener, and Agata worked as a personal cook. He later left Villa Civita to start a career as a waiter in a hotel restaurant.  After much hard work and long hours he became the Maitre d'hotel and continued in the business for more than 40 years.  It was with Salvatore's expertise gained through the hospitality industry that gave their family the essential knowledge, vital to opening the cooking school - which they call their Hidden Treasure.


Now Salvatore spends Monday through Saturday from 7:30am - 8:00pm working in the gardens with short breaks for lunch in the heat of the day, then still finding time to take care of their farm animials.  It is through his hard work, nurturing, passion, and devotion that their Hidden Treasure produces the most genuine organic vegetables, fruits and herbs, allowing Mamma Agata to create incredible dishes for her family, friends and guests.  Papa Salvatore is the families REAL TREASURE!

Chiara Lima, Mamma Agata's daughter, also lives in Ravello on the Amalfi Coast, where she teaches classes along with her mother, sharing her experiences with others.


Chiara is married to Gennaro who is the Sommelier of the family - with whom they share two lovely children - Mario and Paola.


Upon discovering Mamma Agata's cooking school I browsed their website and found they've published a beautiful cookbook that I'm thrilled to say I use in my kitchen to create luscious masterpieces, while reading their wonderful family stories at bedtime.  I feel like I know each member of their family, yet I've never met them.

I have communicated with Chiara numerous times and look forward to the day I finally meet her.  She is so warm and kind I feel like I've known her forever.  Everyone should be like Chiara!


Besides their cooking school and beautiful cookbook they also make their own olive oil, and pasta, among other items in their shop. I planning to make their Farmer's Spaghetti next, then drizzling the Extra-Virgin Olive Oil over the top - a dish I'm certain my family will adore.

With so many incredible Italian family recipes in this book, I'm finding myself like Julie Powell (Julie & Julia) following each and every recipe, page by page.  Recipes like Eggplant Parmesan with homemade tomato sauce, eggplant rolls (I love eggplant), stuffed zucchini flowers, Gnocchi - various versions,


numerous pasta dishes each one more tempting than the last, risotto, pork, veal, Mamma's famous Lemon Chicken, mouth watering meatballs in tomato sauce, vegetable dishes, her famous Lemon Cake and so much more.


Plus, their special Limoncello that I'm going to share with you today.

Even more, are the beautiful photos on every page, with stories to go with them.  I have to say, each time I see the photos of Chiara and Gennaro's children displayed throughout the pages of this book, I smile.  They are positively beautiful and look so sweet.

I can't say enough about Mamma Agata "Simple and Genuine" cookbook.  I love every page, photo and story that is shared.  It's truely a book to cherish!

I'm excited to tell you that Chiara was kind enough to let me offer one as a GIVEAWAY today!

However, if you don't win, you can always purchase a signed copy of Mamma Agata "Simple and Genuine" directly from Mamma Agata in Ravello, Italy.  Plus, if you'd like to see Chiara and Gennaro cooking, you can view their videos here.

Here's what you need to do to enter the GIVEAWAY:    Plus read more for the Limoncello recipe!


  • "Like" Mamma Agata on Facebook
  • "Like" At Home with Vicki Bensinger" on Facebook & Pinterest
  • Tell me what your favorite Italian dish is - (MANDATORY)
By commenting each time that you did one of the above, it will increase your chances of winning.

The winner will be selected at Random on Sunday, September 16th.  Be sure to leave a link to your email address so I can reach you, in the event you are the winner.

I won't keep you in suspense any longer.

I decided to share Mamma Agata's recipe for Limoncello today, since the holidays are just a little more than 3 months away.  I love gifting homemade treats for the holidays, they mean so much more than store bought.  Plus, it's an affordable way to give to so many, and with great results.  I know you'll love this for yourself and to share.

Homemade Limoncello


You will need a large glass jar

Ingredients:
  • zest of 6 or 7 large organic lemons
  • 1 litre or quart of pure grain alcohol or vodka
  • 5 cups (1250 ml) water
  • 3 cups (700 gr) sugar


Instructions:
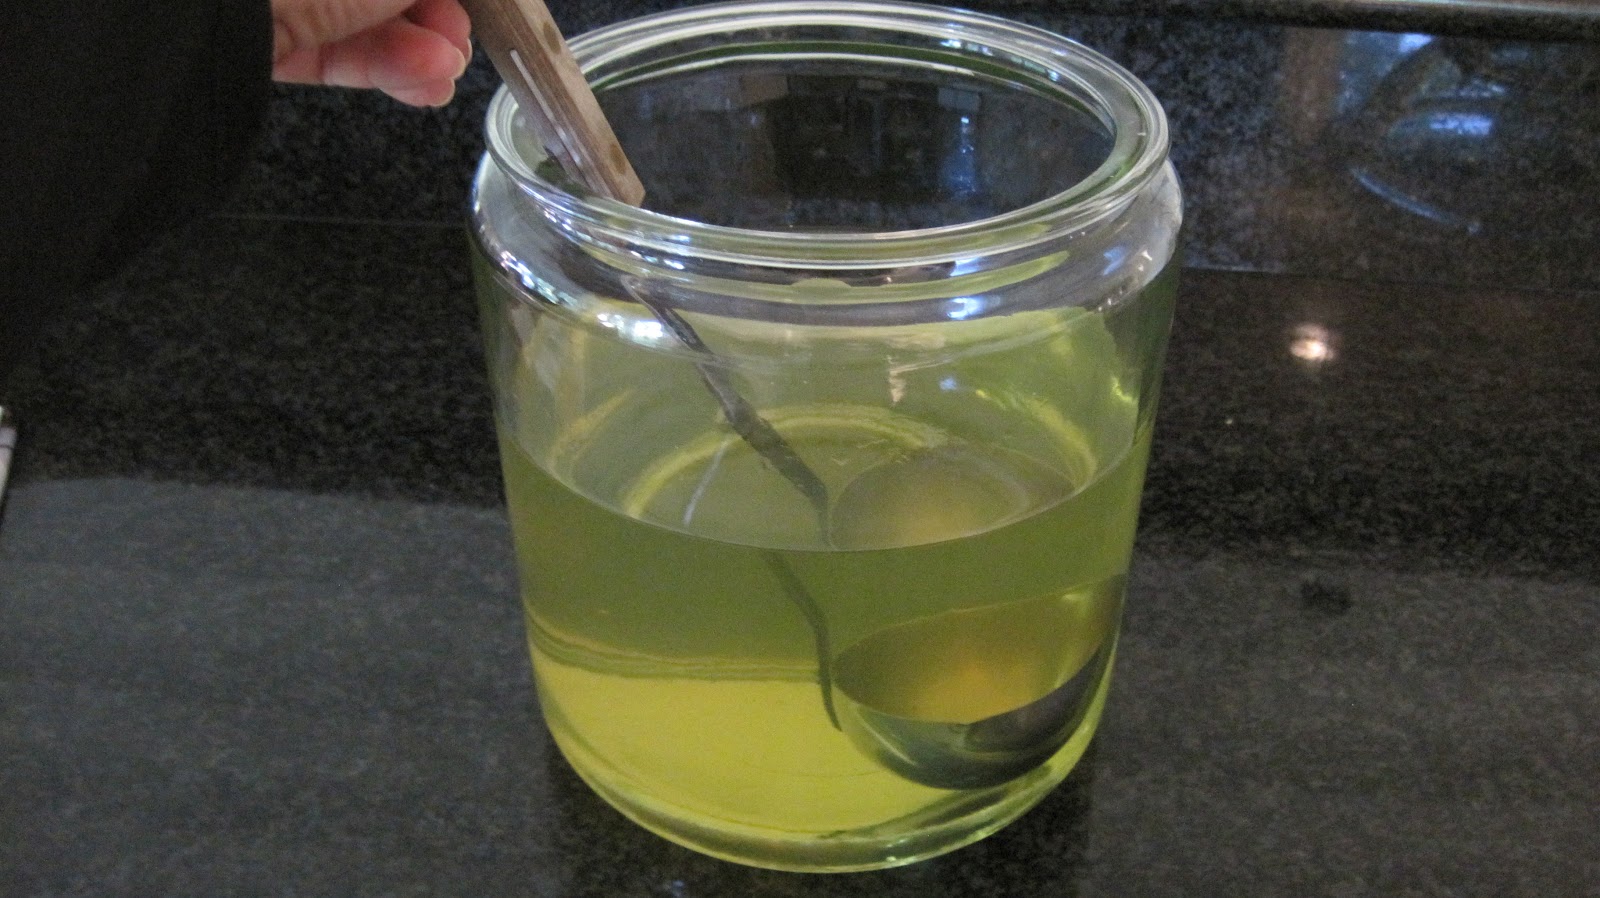
Peel the zest from the lemons with a vegetable peeler and place them into a large glass jar.


Try to avoid the bitter white pith of the lemon skin, under the yellow zest.

Add the alcohol to the jar with the lemon zest.


Cover the glass jar with plastic wrap and store it in a cool place for 7 days.

On the sixth day: 
  • Boil the water and add the sugar to the boiling water (creating simple syrup).
  • Stir the sugar until it is fully dissolved in the water. 
  • Set the sugar syrup aside to let it cool over night.

On the seventh day:


Strain the lemons peels from the alcohol and discard the peels.


    Pour the sugar syrup into the glass jar with the alcohol and stir well.


    Serve chilled, from the refrigerator or freezer.


    NOTE: This Limoncello will keep for one to two years. Store the Limoncello in bottles with a cap or cork in your bar or cellar. When you want to drink it, chill the Limoncello in the refrigerator or freezer before serving. 


    ENJOY FOR YOURSELF OR TO GIVE AS A GIFT!


    Congratulations!  The winner of the giveaway is:
     Savoring Time in the Kitchen.  


    The winner was selected at Random and although it  shows 41 comments I posted 3 replies so there were actually only 38 comments.

    Thank you for all your comments.  Mamma Agata's book "Simple and Genuine" is a beautiful book that I recommend to purchase for yourself or a gift.

    Happy Cooking!

    Monday, 13 August 2012

    How to Make "Preserved Lemons" for Moroccan Cuisine


    Moroccan cuisine is the culinary star of North Africa. At the crossroads of many civilizations, the cuisine of
    Morocco is a mélange of Arab, Berber, Moorish, French, Middle Eastern, Mediterranean African, Iberian, and Jewish influences. 


    Moroccan cooking is enhanced with such fruits as, dried and fresh -- apricots, dates, figs, and raisins. Lemons preserved in a salt-lemon juice mixture are unique to many Moroccan dishes. Nuts are prominent; pine nuts, almonds, and pistachios.  Moroccan Sweets are rich and dense confections of cinnamon, almond, and fruit perfumes that are rolled in filo dough, soaked in honey, and stirred into puddings.  

    Spices are used extensively in Moroccan food. Common spices include karfa (cinnamon), kamoun (cumin), kharkoum (turmeric), skingbir (ginger), libzar (pepper) , tahmira (paprika), anis seed, sesame seed, kasbour (coriander), maadnous (parsley), zaafrane beldi (saffron) and mint. Spices are the defining point to any authentic Moroccan meal and are also known to be used for their medicinal value. It's the special blend of spices that makes Moroccan cuisine taste so good. One special blend is the Ras El Hanout.

    The ten spices considered the most important to Moroccan cuisine are:
    Cayenne (felfla), cinnamon (karfa), turmeric (quekoum), ginger (skinjbir), black pepper (elbezar), aniseed (nafaa), sesame seeds (jinjelan), cumin (kamoon), paprika (felfla hlouwa), and saffron (zafrane).

    A trip to a Souk will find you the essentials needed for your kitchen and home.


    A Souk is a market, which may be held in a designated commercial quarter, or in an open-air location. Souks are an important part of life in the Middle East and their merchants carry a wide assortment of products from rugs to vegetables, just the place to find ingredients for your Moroccan recipes.

    Moroccan dishes are fragrant and full of flavor.  Many include preserved lemons which can be purchased, but difficult to find in the U.S. However, making them is easy.

    Preserved Lemons can take up to 30 days to prepare and can be stored in the refrigerator for up to 1 year.  A quick preserving method can be used but they will only last 2 days.

    I'm going to share how to make Preserved Lemons using the 30 day method from Paula Wolferts cookbook, "The Food of Morocco."  Then, next Monday I will share with you a wonderful recipe using these Preserved Lemons, so when yours are ready you'll have a luscious recipe to use them in.

    Here's the recipe:


    Quartered Lemons, Juice, Salt and Jar with Tight Fitting Lid
    Quartered Lemons placed in Jar with Salt and Juice Sealed Tightly


    Taken Directly from The Food of Morocco


    Don't forget to try this simple recipe for Preserved Lemons and meet me back here next week, for another recipe to use them in.  Until then......

    HAPPY COOKING!


    Wednesday, 13 June 2012

    Video: How to Make Chocolate Cups

    Since posting Special Dessert for Dad on Monday, I've had several people email me, asking exactly how to deflate the balloon, and wishing they could view a live demonstration.  Originally I recorded a video while making these, but had trouble uploading it due to size.  After receiving these emails I decided to shorten the length to share with you.

    I hope after viewing "How to Make Chocolate Cups," you will feel more confident creating them in your kitchen and even inviting your kids and grandkids to help.

    For written step-by-step instructions view Special Dessert for Dad.

    Remember, the possiblities are endless for these cute little cups.  Sprinkle colors, drizzle with other chocolates, and fill them to your hearts content.

    Here's the video: "How to Make Chocolate Cups"


    Enjoy!

    If you make these please share your creations!

    Monday, 11 June 2012

    Special Dessert for Dad!


    Father's Day is this coming Sunday.  It was always one of my favorite days to celebrate and show my dad just how special he was to me.  We'd put on the old Big Band music, his favorite, and my sisters and I would all take turns dancing with our night and shining armor - OUR DAD!  He was the best, and for those of you still fortunate to share this day with him "do it up chocolate" as my daddy would say!

    Since I always like to make a fuss about those near and dear to me, my dessert is sure to put a smile on your dads face and everyone else gathering around the table.

    This dessert is so simple to prepare.  However, if you want to make it all from scratch (chocolate cups, ice cream, topping), then start several days ahead and assemble everything just before serving.

    The results: A fun dessert with infinite possibilities. 

    I hope you enjoy it!


    Chocolate Cups Filled With Anything You Desire

    dark chocolate chips
    10 ounces dark chocolate chips
    balloons
    8 small balloons (water bomb style)
    Set aside a baking sheet lined with parchment paper.
    Blow up 8 balloons (about 4 to 5 inches in diameter when fully inflated).
    In a medium microwave-safe bowl add the chocolate and microwave in 30-second intervals until melted. Stir until smooth.
    Spoon 1 teaspoon melted chocolate onto prepared pan to form a small disk.
    Dip balloon in the bowl of melted chocolate, coating about one-third of the balloon. Rock balloon from one side to another, going about 1/2 way up, forming a scalloped or tulip effect.
    Place dipped end on chocolate disk. Repeat with remaining balloons and chocolate. Transfer the pan to the refrigerator to set, about 30 minutes.
    To release air from the balloons, pinch each balloon just under the knot, and cut a small hole in the surface between your fingers and the knot. Gradually release the air; if air is released too quickly, the cups may break.
    chocolate cups
    Carefully peel the deflated balloons from the chocolate cups, and patch any holes with the remaining chocolate.
    If desired, heat up some white chocolate to drizzle over the hardened chocolate cup for more pizazz!
    Return the chocolate cups to the refrigerator until ready to use.
    Note: You can make the chocolate cups up to 5 days ahead. Refrigerate until ready to use.


    To Serve:

    Fill chocolate cups with your favorite treat.  I've filled ours with frozen vanilla yogurt, Heath bar, non-pariels, topped with chocolate sauce and whipping cream.

    Other variations:


    Strawberry, Raspberry or Chocolate Mousse
    Favorite Candy
    Homemade ice cream
    fresh berries

    What will you fill yours with?

    Enjoy!

    Sunday, 29 April 2012

    Video - How to Make a Rose Swirl!

    On my last post I showed you how to create a Cupcake Bouquet for Mother's Day or any occasion.  I also mentioned I would demonstrate in an upcoming video, how to make a beautiful rose swirl for the top of  your cupcakes.

    Below is the video I put together just before taking these cookies to an event for Share Our Strength, an organization to help end childhood hunger.  I hope you will be able to tell from this video how they're done and be able to recreate your own roses at home. 


    Enjoy!

    Monday, 23 April 2012

    Cupcake Bouquet!


    Mother's Day is just about 3 weeks away.  As a child I enjoyed creating something to give to my mom and grandmothers.  To this day I still love creating a gift that I know my mom will like.  If my grandmothers were still around I'd create one for them as well.

    How would you like to learn how to make a Cupcake Bouquet? If you have children this would be a fun project to do with them in celebration of Mother's Day.  However, if your schedule is hectic but know your children would love to create their own culinary masterpiece to give for Mother's Day, please contact me.  I'd be happy to schedule a class in your home to teach them how to make this lovely bouquet.  (Continue for recipe and instructions).


    I made two different types of cupcake bouquets over the weekend while workmen were ripping out and replacing carpet in our basement - one with regular size cupcakes (shown above) and the other with


    mini cupcakes
    (my photos don't do them justice)

     Note: Although beautiful as is, the mini cupcake bouquet above could be filled with additional cupcakes.   However, my family snacked on more than I thought was needed. This bouquet is covered with 7 and I think 9 or 10 cupcakes would have been nice.  Whether or not your bouquet is filled with cupcakes the tissue filler is perfect for small gaps.  That said, if your cupcakes are too close you risk them touching and ruining the iced flower design. Keep that in mind when filling your bouquet.

    These are so much fun to make.  Whether you make these with your children, yourself or have me come over to teach you and/or your children - here's the recipe. 


    Cupcake Bouquet

    For this bouquet we are going to make a Rose Cupcake Bouquet.  In my opinion it's the easiest and prettiest to master.  Who doesn't like a bouquet of roses?


    Supplies:
    • Clay pot (I used 8") or glazed pot as shown above with the white polka dots (both purchased at Michael's), basket or container to place your cupcakes in.
    If you purchase a clay pot you may want to add some spray paint.  I used a high gloss spray in white but any color will do.

    • Ribbon - if you'd like to add some additional color
    • Double-sided tape for adhering the ribbon to the pot
    • Tissue paper - your choice of color.  I chose lime green to look more like grass or leaves or even some netting.
    • Styrofoam - for the 8" pot and 8" ball or flat disc.  For the glazed pot I found a 6" Styrofoam ball that fit nicely into it.  (If the ball is just slightly too small you can wrap it in tissue paper to secure it to the bowl.  I did this with both pots.
    • Toothpicks to secure cupcakes to Styrofoam or 2 ounce shallow plastic cups (for regular size cupcakes and 1 ounce for mini cupcakes) with toothpicks.

    Why the plastic cups?  Sometimes you may find it easier to staple the cups together  in a circle to place inside your pot for added security.  Depending on the weight and angle that your cupcakes are inserted into the pot they may seem loose.  In which case, the cupcakes can be placed inside the plastic cups.  If you do this, I recommend having a flat Styrofoam disc and with a toothpick poke through the center of the cups and attach to the Styrofoam.  Then push your cupcake onto the toothpick that's already attached to the Styrofoam.  Another alternative would be to staple the cups together in the shape that will fit into the pot.

    I'm so sorry that I didn't take step-by-step photos as I did this.  I hope you can understand my explanation.
    • Favorite cupcake recipe or box mix
    • Cupcake liners for regular or mini cupcakes
    • Favorite Buttercream recipe.  I recommend a slightly stiff recipe (one with solid shortening) so the flowers hold up well.

    Decorating tips: For simplicity I recommend making a rose bouquet.  It's the easiest to start with and looks the most beautiful, in my opinion.  You will need:
    • 2D large star tip or 1M for regular size cupcakes
    • 30 for mini cupcakes, can also use the 2D

    Directions:

    Bake cupcakes
    Make icing adding color of your choice
    Place icing in pastry bag fitted with desired size decorating tip

    To make roses simply place the decorating tip on the center of your cupcake.  Squeeze gently, then  in a continuous counter clock wise motion start to swirl the icing moving out towards the edge of the cupcake.  When completely covered you should have a rose.


    After completely all the cupcakes place into the pot as described above under supplies.

    When completed you will have a beautiful bouquet of flowers.

    Later this week I will post a video on how to make a rose using the 2D decorating tip


    This is a fun project that's not only beautiful but delicious.  I hope you enjoy creating your bouquet and remember if you live in St. Louis I'm happy to come to your home to teach you and/or your children how to make a lovely Cupcake Bouquet!


    For more cupcake bouquet inspiration check out these links:


    Saturday, 11 February 2012

    Raspberry Napoleans - Valentine's Day Dessert!


    Valentine's Day is one of my favorite days of the year.  It's a day devoted to sharing your heart with those special to you, whether it's your significant other, child, parent or friends.  If you're not one to share your feelings much, Valentine's Day gives you reason to do so. Of course, this has never been an issue for me - I make no bones about sharing my feelings anytime.

    If you get my monthly newsletter then you've already seen a special Valentine's Day dessert plus this one.  However, if you don't receive it, then here's a wonderful dessert that looks difficult but is quite simple.  Taking no time to prepare the end result is tasty, pretty and the perfect expression of your affection!

    Although I'm demonstrating this dessert in a heart shape, you could cut it to be any shape from squares, triangles, to holiday shapes.  Add raspberries, strawberries, blueberries, blackberries - any type of berry or blend of berries to suit your taste.

    Here's a how-to video I put together to assist, when you're ready to make Raspberry Napoleans -blended with one of my favorite love songs by Anita Baker, called "Rapture." 

    Below the video is the recipe.  I hope you enjoy it!


    (Music: Antia Baker, "Rapture")

    Raspberry Napoleans

    Ingredients:
    1/4 cup granulated sugar
    1-2 sheets frozen puff pastry, thawed (depending on shape used)
    1 pound fresh sliced strawberries, raspberries, blueberries, and/or blackberries
    Sugar to taste
    1 cup whipping cream
    2 Tablespoons Chambord or Framboise liqueur
    1/4 cup powdered sugar
    Directions:
     Preheat oven to 375 degrees F.
     Sprinkle work surface with the granulated sugar.  Unroll puff pastry and place on sugar.  Drizzle with additional sugar, and roll out puff pastry to 1/16 - 1/8 inch thick.  Prick entire surface with a fork. This is called, "docking" and will keep the puff pastry from rising too much.   Cut into desired shape. Transfer to baking sheets lined with parchment paper.
     Bake for 15 minutes or until golden brown. Check the dough about mid-way through the cooking. If it's puffing up, poke it with a fork to deflate it. When done, transfer to a rack to cool. Puff Pastry shapes can be made 1 day ahead and kept in an airtight container.
    Mix desired berries with sugar to taste - can smash lightly with a fork to get the juices to macerate quickly.  Cover and set aside for 1 hour. You can prepare the berries several hours in advance.
     Just before assembling the dessert, whip chilled cream at high speed until soft peaks start to form. Add powdered sugar and liqueur. Whip until the peaks firmly hold their shape.
     To assemble, add a teaspoon of whipped cream on a plate and top with one of the puff pastry shapes - this will act like glue to hold the Napoleans in place. Top with whipped cream then berries. Repeat 2 more times until you have a 3 layered Raspberry Napolean.   Serve immediately!


    Monday, 28 November 2011

    How to Make a Candy Wreath!


    I hope everyone had a wonderful Thanksgiving surrounded by family, friends and good food!  We had a great time and as always ate way too much.  Over the past week I had 3 dinner parties and to say the least, I'm pooped!  Never the less it's time to gear up for the  holidays. 

    I enjoy purchasing gifts to give to everyone in my family but when it comes to those that provide me with a service I often like to bake or make them something.  One of my favorite things to do is to make a Candy Wreath.  It's a fun gift that can be displayed in your home or business for all to indulge in, by simply cutting a piece of ribbon that's attached to some candy and then secured onto a wire ring.

    My candy wreath pictured here has lots of colors, but you could use just one or go with a particular theme.  You can make them with Christmas colors (as shown here), Chanukah colors, for a birthday party for either adult or child, or baby shower.  You get the point?  For some creative ideas check out this website that's devoted to making candy wreaths.

    These take about 3-4 hours to put together.  I did mine in 4 evenings while sitting in front of the tv at my kitchen table.  The time went by quickly especially while watching a favorite show.

    Here's what you'll need:

    Ingredients:


    or

    • hanger (stretched and shaped into a circle)
    • curling ribbon - color(s) of your choice
    • 3 pounds of wrapped candy I used Royals purchased from General Candy (came in 6 lb packs)
    • Large decorators ribbon to tie onto the top of your wreath
    • small scissors (to hang from wreath that will cut ribbon on candy from wreath)
    Instructions:

    Cut curling ribbon for each piece of candy about 10-12 inches in length to tie onto one end of the candy.  You can use any type of candy or gum, etc. that is wrapped and twisted at least at one end.


    Once the ribbon is tied onto the piece of candy (no need to knot it, just one tie around) wrap it onto the wire ring and make a knot so that it can't fall off.  Continue doing this, bunching the candy tightly together as you go.


    Continue until you have a about 1/2 inch of space left.  This is where you will add your decorators ribbon.  However, prior to adding the large ribbon take the sharp side of a scissors and curl each piece of ribbon.  Once you've done this - using an extra long piece of curling ribbon, attach a small child-like scissors to it, and tie onto the 1/2 inch open space at the top of the ring.  You will want the scissors to hang about 6-8 inches below the bottom of the wreath.  This is what everyone will use to cut off a piece of candy with.

    Then tie your large ribbon on, making a pretty bow.  To that, connect another piece of large ribbon, wrapping around the center knot of the bow making a large loop.  This is where you hang the candy wreath onto a hook or nail.


    Note:  If you decide to use a wire hanger, one that you hang your clothes on - be sure it's a heavy duty hanger.  Shape into a large circle leaving the hook at the top.  The hook will act as the hanger.  I recommend decorating that with decorators ribbon.

    If you go to a candy supply store like I did you can get a great value.  The candy I purchased came in a 6 pound bag for just under $23.  Enough to make 2 candy wreaths.  A fabulous gift for a reasonable price.

    That's all there is to it!  This is a great project to do while sitting around.  Your kids will love to help.  In fact, we use to do an assembly line and the whole family got involved. 

    Enjoy!


      Tuesday, 15 November 2011

      How to make Popovers?


      For years I've been making popovers to go with our Thanksgiving dinner.  In my opinion they're the perfect bread to go with a heavy meal.  They're light, airy and delicious.

      My first encounter with popovers was while dining at The Zodiac Room in Neiman Marcus.  I thought they were incredible and when I would take my children (now 22 & 25) with me, they loved them as well, especially slathered with their heavenly strawberry butter.

      Over the years I've perfected making these airy little puffs, getting rave reviews from all who try them.  I get so many requests for this recipe I posted a video last year on my blog for the Thanksgiving holidays and decided I would post it again.

      I hope you enjoy my video.  I've posted the full recipe below.  I know you'll love them, just as my family does.


      Here's the written recipe for you to follow:

      Perfect Popovers
      Makes 12 small or 6 large

      Ingredients:

      3 eggs, room temperature
      1 cup milk, room temperature (I use skim)
      3 Tbsp. Canola Oil
      1 cup, all-purpose flour
      1/2 tsp. kosher salt
      Instructions for cooking in Convection mode and Bake mode:

      Preheat oven to 400 degrees in either convection/bake mode or just bake.

      While preparing the batter spray your popover pan with a non-stick cooking spray and place in the oven to heat up.

      If eggs and milk are not at room temperature heat eggs (removed from their shell) for approximately 12 -15 seconds and milk for about 20-30 seconds in the microwave.

      Whisk eggs, milk and oil together. Sift flour and add to the egg mixture. Add the salt and beat mixture together until it's smooth and free of any clumps.

      Take popover pan out of the oven and place a small bit of butter into each popover cup (as shown in the video).

      Pour batter 3/4 way full into each popover cup. If you run short and one of the cups is empty add water filling up about 1/2 way.

      Place filled pan into the 400 degree oven and bake for:

      Convection/Bake 20 minutes

      Bake: 30 minutes

                 (After 20-30 minutes of cooking)

      Then, leaving the oven door closed, reduce heat to 325 degrees.

      At this time if you were cooking in the convection mode switch to BAKE. Cook for an additional 5-15 minutes keeping a close eye on the popovers.

      You'll know that they are done when they turn a nice golden brown, as seen in my video and at the top of this page.

      Note: You can use a muffin pan if you like, but the popover pan produces a much prettier popover.

      Popovers are best when baked just before serving. Serve hot with butter, strawberry butter, pumpkin butter, plain or with whatever you desire.

      As always, if you have any questions while preparing these, don't hesitate to contact me. I'm always happy to help.

      Enjoy!

      Monday, 8 August 2011

      The Art of Eating an Orange!

      I'm not sure there really is an Art to Eating an Orange, but it's the way I grew up eating one.  I honestly believe it's the best way to savor each and every drop of juice that pours into your mouth, feel the threads of the carpels as you sink your teeth into the meat of the orange while juice oozes from the vesicles, all while you delicately grasp this round, somewhat uneven textured, piece of fruit.

      When I was a little girl each and everyday I came home from school my snack of choice was an orange and a pickle.  I know, it sounds weird but I loved having the sweet with the sour, I suppose.  What else could it be?

      The way I ate the orange then and now are different however, not by choice.  One day my husband walked into the house just as I was eating my orange the way I like it.  He looked at me and said, "What on earth are you doing?"  I said, "eating an orange."  He said it was so disgusting the way I ate it, that I quit eating it that way, unless of course no one is at home.

      I mean, I don't want to look disgusting while eating it but then again, why not enjoy it the way I like to, at least in the privacy of my own home!  So when no one is at home, I'll eat it that way, otherwise I conform when in public.

      I know I've peaked your curiosity with the way I savor this orange, baseball looking piece of fruit, so I'll share my eating method but, don't hold it against me.  In fact, do me a favor - try an orange this way.  PLEASE, report back, with your own critique! 

      The Art of Eating an Orange

      First, wash the skin of the orange to get off any pesticides.  Of course, when I was a child we didn't know about these things, so I never washed it unless it was covered with dirt.

      Slice the orange in half, perpendicular to the stem.

      Then, holding one half in your hand, place an edge of the cut side into your mouth and with your upper teeth proceed to scrape the meat of the orange into your mouth.

      Once you have gone all the way around the orange doing this, you then squeeze the remaining orange juice into your mouth!

      That's not it, there's still more?  Now turn the orange inside out, so the remaining meat is arched outward.

      With your teeth, peel off the remaining meat and tissue.  Eat and enjoy!

      When I was growing up I would toss the skin away.  However, now I use the zest of an orange in a variety of recipes.  If this is something you like to do as well, I'd suggest zesting the orange before devouring the insides.

      How awful is this eating method?  Honestly I wasn't raised in a barn but for some reason this is how I ate them.  No one taught me, it just happened to be the way I found the most satisfaction from my oranges.

      How do you eat an orange?  Do you peel the skin away, sectioning out each segment, then placing each half moon in your mouth?  Do you eat it like I've described above or do you have your own special way? 

      If you've never tried eating an orange the artsy way, like I love to, then please do, and report back to me, right here. I'd enjoy hearing what you think.

      Do you have a favorite way of eating fruit that you would never reveal in front of others?  If so, please share it with us.  We won't judge you, after all we all have something odd that we do, right?

      Words of Caution if eating an orange this way!  Watch out for spurts of juice in your eye and don't forget the floss, your teeth will need it when your done.  But hey, it's all worth it.  It's the most fun you'll ever have eating an orange. At least I think so!