Pages

Monday, 26 March 2012

Vegetarian Pasta with Roasted Campari Tomatoes


Do you ever have those days where all you want are veggies?  That was me today.  I'd been doing a lot of work at home and was craving fresh vegetables.  I checked to see what ingredients I had on hand and fortunately I was well stocked.

I had some beautiful Campari Tomatoes that I purchased yesterday, and zucchini, among other items, so decided to make a vegetarian pasta with roasted Campari tomatoes. 

This dish is so simple to prepare and can be doctored up by adding chopped nuts, fresh herbs, freshly grated cheese and other roasted veggies.  In addition I added grilled chicken for my husband to round out the meal for him.

So light and luscious served as an entree or side you won't believe how incredible it tastes. This isn't pasta in the true sense - I think it's better!

Vegetarian Pasta with Roasted Campari Tomatoes
serves 2

Ingredients:

2 large Zucchini
1 (16oz) container Campari Tomatoes
olive oil
kosher salt

Tools Needed:

Mandoline

Directions:

Remove tomatoes from their stems and rinse.  Cut in half and place on a sheet pan lined with heavy duty foil. 

Drizzle olive oil lightly over tomatoes and toss to coat.  Lay tomatoes cut side up.  Roast in 400 degree oven for approximately 20 minutes or until start to wilt. View details for Roasting Campari Tomatoes.

While tomatoes are roasting rinse then cut ends off zucchini. 

Lay zucchini on mandoline fitted with thin julienne slicer.  Slide zucchini back and forth creating thin spaghetti-like pieces.

Place julienned zucchini on individual plates and top with roasted Campari tomatoes. 

Garnish with fresh grated cheese, chopped pistachios or other nut, or fresh herbs, if desired.

This will quickly become your new favorite. 

Enjoy!

Wednesday, 21 March 2012

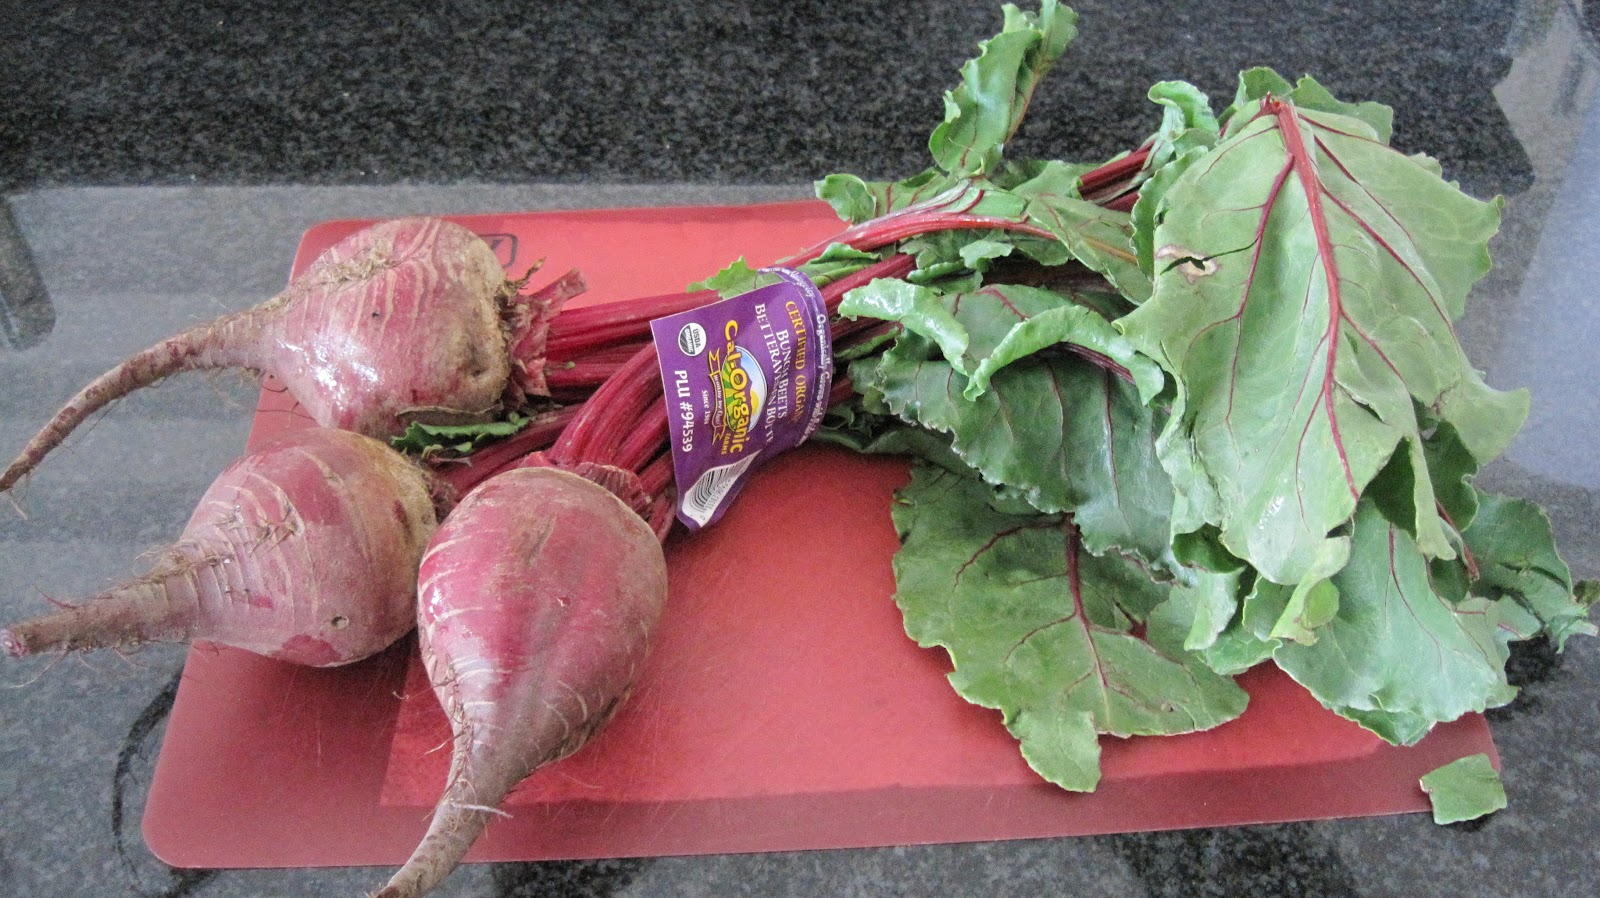
Roasted Beets and Butternut Squash Salad!


For years I hated beets.  As a child I use to eat Borscht and loved it, but then one day I had a bad batch and well, I don't even want to tell you what they tasted like, let alone smelled like. 


It wasn't until this past year that I had the pleasure of tasting fresh Roasted Beets.  They're delicious and highly nutritious. It's been found red beets help lower blood pressure the same way nitroglycerin does –by relaxing blood vessels lowering it by as much as 10.4 points within one hour of drinking 2 cups of beet juice and maintaining that over a 24 hour period.


Nearly half of all adults have high blood pressure, putting them at risk for developing heart disease.  If you have high blood pressure, you may be able to avoid the use of drugs by including blood pressure-lowering foods like beets in your diet.  You can do that by drinking beet juice, eating canned beets or best of all roasting your own.  

In addition to being heart-healthy beets contain vitamin A, C, K, E and small amounts of vitamin B.  They also host a list of minerals and are high in essential amino acids. Despite having the highest sugar content of any vegetable, beets are low in calories, at about 35 calories per half cup.  As you can see this unpopular vegetable should find a place on everyone's table.


Below is a simple recipe for a Roasted Beet & Butternut Squash Salad with Arugula, Goat Cheese and a simple Champagne Vinaigrette. 

If you're not a fan of beets please give them a try anyway.... from one who detested them until trying fresh roasted beets.  The blend of both veggies with goat cheese makes for a very light, nutritious lunch or side salad. 

How to Roast Beets


Directions:

Rinse beets and trim off the leafy tops (save tops for other uses).


Wrap each beet loosely in aluminum foil and place in the oven. You can rub the beets prior to placing in the oven with olive oil or simply wrap dry, in foil.  Roast until tender and easily pierced with the tip of a paring knife, about 1 hour.


Remove from the oven and take off foil. Set aside to cool.
When cool enough to handle, slice off leaf end and remove skin.  If skin doesn't pull away easily place in oven for an additional 10 minutes.

Your fingers will get stained with beet juice but it does wash off with soap and water.  However, I highly recommend wearing an apron when doing this.  Removing beet juice stains from clothing is difficult!

Slice beets in strips or cubes like I did and place on greens. 


I didn't measure ingredients for this salad so just eyeball it.  Use your favorite greens or a blend.  I used Arugula topped with the cubed Roasted Beets, cubed Roasted Butternut Squash, Goat Cheese and a simple Champagne Vinaigrette.

Champagne Vinaigrette
serves 2

3 tbsp. Extra-Virgin Olive Oil
1 tbsp. Champagne Vinegar
1 tsp. honey
1/2 tsp. Grey Poupon
salt & pepper to taste
Blend and serve over salad.

Note: Beet greens and stems can be used in pesto, soups, smoothies.  They can be sauteed, braised, steamed, boiled and pureed.  The list is endless with 100s of recipes to be found online.

ENJOY!


Tuesday, 13 March 2012

Ultimate Rice Cooker Cookbook Giveaway


Last week I posted a recipe for Wheat Berry Salad with Orange Glazed Chicken.  Many of you are well aware when cooking certain types of grains it can take hours.  It wasn't until I prepared this Wheat Berry Salad that I learned I could utilize my rice cooker to do the task. I thought rice cookers were just for rice!

Babysitting my stove for 1 1/2 hours isn't my idea of fun, especially if walking away can lead to stuck burnt grains on the bottom of my pot.  But, I was thrilled to read that there is a cookbook dediciated to all the foods you can prepare in your rice cooker.  Now my rice cooker doesn't have to be an appliance that collects dust most of the time but one that can be used often.

Beth Hensperger and Julie Kaufmann who wrote "The Ultimate Rice Cooker Cookbook" share 250 No-Fail recipes from breakfast dishes straight through to dinner and dessert all using your handy little rice cooker.

For those of you that don't have a rice cooker I highly recommend getting one.  Up to now I used mine most often when teaching sushi classes to make sushi rice or at home for jasmine rice.  Rice comes out perfect every time, and all I have to do is put in the rice with water and turn on - the machine does the rest.

Rice cookers come in a broad range of prices however, you don't have to purchase the most expensive one.  In fact, I've seen them for as low as $7 at Walgreens and Target and have personally used those with great success.  The one I currently own was given to me as a gift from my sister.  It was a bit pricey but works like a charm.  I've had mine for probably 20 years. 

If you cook any type of grain at all, do yourself a favor - purchase a rice cooker and sign up for my giveaway.  Of course if you've already got one you definitely want to enter for your chance to win this fantastic cookbook. 

In it's 10th Anniversary edition Hensperger and Kaufmann will help you make Risotto, Polenta, Chilis, Soups, Porridges, Puddings, dishes like Steamed Halibut Steaks and Scallops with Sweet Red Pepper Sauce, Tamales, Poached Dried Figs in Red Wine Sauce among so many others.  Who knew your rice cooker could be so versatile?  No me!

For your chance to win The Ultimate Rice Cooker Cookbook simply post a comment letting me know why you'd like to win this cookbook, and if you own a rice cooker what dishes you currently prepare in it?

For a second chance to increase your odds of winning, "Like Me" on Facebook and post in the comments section below.

For a third chance of winning, "Follow By Email" in the top right of my blog and post a comment letting me know.

The giveaway for The Ultimate Rice Cooker  Cookbook will be selected at Random on Monday, March 19th, 2012. Please be sure when posting your comment to provide a link where you can be contacted.  This way in the event you win The Ultimate Rice Cooker Cookbook I'll be able to reach you for your mailing address.

Remember, if you don't win you can always purchase the book on Amazon.

Good Luck!

THE WINNER OF THE ULTIMATE RICE COOKER COOKBOOK IS:


CONGRATULATIONS NAMI!

Sunday, 4 March 2012

Part 2: Orange Glazed Chicken with Wheat Berry Salad


Friday I posted Part 1 of my Orange Glazed Chicken with Wheat Berry Salad detailing how to cook and store Wheat Berries along with the salad recipe.  Today I'm sharing how to make the Orange Glazed Chicken Breasts.  I hope if you take the time to try these recipes you enjoy them as much as my family did.

Orange Glazed Chicken
serves 6

Ingredients:

6 boneless skinless chicken breasts
1/4 olive oil
zest of one orange
juice of one orange
1 tsp. each of salt and pepper

4 Tbsp. orange marmalade
4 Tbsp. Sweet Chili Sauce (found in Asian section at grocer)

Instructions:

Combine 1st five ingredients in a zip lock baggie, squish to coat chicken well and set aside to marinate from 30 minutes - 2 hours.

Combine marmalade and chili sauce and set aside.

Preheat your grill. Once preheated turn to medium heat and place chicken breasts skin side down (skin is removed or left on if you prefer) on the grates.  Cook for 3-4 minutes per side depending on thickness.  Flip breasts over and after about 2 minutes of grill time on the bottom side, spread the sauce over the top of each chicken breast until chicken is done.

Chicken can be baked, broiled or sauteed as well.

If you have trouble telling when your chicken is done check out my tutorial on how to grill perfect chicken.

Plating:

Once chicken is cooked, place a large scoop of the Wheat Berry Salad on a plate and top with Orange Glazed Chicken.  Serve with fresh steamed or grilled veggies on the side.

Leftovers:

If you happen to have any leftovers this makes a great entree salad the next day for lunch.  Simply cut the chicken into bite sized pieces and toss into the Wheat Berry Salad.  It's positively delicious!

Enjoy!

Friday, 2 March 2012

Nutritious Wheat Berry Salad with Orange Glazed Chicken


Have you ever had Wheat Berries?  They are utterly delicious!  This whole grain is nutty, chewy, has a hearty flavor and texture, slightly sweet and so nutritious.

Wheat Berries contain the entire wheat kernel (except for the hull), comprising the bran, germ, and endosperm.   The germ contains natural oils that can go rancid when exposed to air, so proper storage is necessary. 

Wheat Berries have a tan to reddish brown color and are available as either a hard or soft processed grain. Containing beneficial minerals such as iron and magnesium, B vitamins, vitamin E, antioxidants, and fiber.  While fiber isn't digested easily it does help with your digestion and keeps you feeling full longer which is helpful if you're trying to lose a few pounds. 

Having a diet rich in whole grains significantly reduces the risk of heart disease, type 2 diabetes and stroke in addition to reducing the risk of certain cancers and obesity while lowering cholesterol levels.. 

Wheat Berries are often added to salads, baked into bread to add a crunchy texture or added to stews.  It's important to plan ahead when preparing whole grains since many require hours of soaking. 

Hard Red Wheat Berries require soaking 8-24 hours ahead.  I covered mine with water - with about 2 inches above the grains, first thing in the morning.  Two hours before dinner I drained them and placed 1 cup Wheat Berries with 2 1/2 cups water in a rice cooker.  You can cook them in a crock pot, pressure cooker, on the stove top or microwave.  For various cooking methods and instructions view here.  I'm lazy and don't like to stand over them so I used my rice cooker and let it do all the work. 

To bring out their nutty flavor you can even toast them in a skillet prior to cooking. 

I cooked 1 cup of  dry Wheat Berries (that had been soaked)  yielding approximately 3 cups cooked.  If you'd like to make a larger batch to save for later, it would be necessary to store the cooked Wheat Berries in a jar with tight fitting lid, for up to 5 days in the refrigerator.  You can also freeze them for up to 3 months then simply defrost in the microwave or refrigerator overnight.  To reheat in the microwave place in 1/4 inch of water, cover and heat over medium-low until they are softened and warm.

Note: If you forget to soak the Wheat Berries ahead of time you can also use the quick soak method like you would with beans.  Placing Wheat Berries in a pot, covered with an inch of water, bring to a boil and cook for 2 minutes.  Remove from heat, cover and let stand for 1 hour.  Drain and cook as directed.

If you're like me and only cook what you're eating, then I recommend you store your dry Wheat Berries in a jar or container with a tight fitting lid.  Store in a cool, dry pantry for up to several months.  Since whole grains can go rancid,  you could store them in the refrigerator but it's not necessary

Hopefully these tips will help insure that you make perfect Wheat Berries.  On to the recipe!

Back in the late 70s, Julee Rosso & Sheila Lukins came out with The Silver Palate Cookbook which became a bible in everyone's kitchen.  One recipe I have used over and over again is called "Nutted Rice."  I love this recipe and so does everyone that's ever tasted it.  I've tweaked it numerous times but when deciding to make a Wheat Berry Salad I thought of this recipe.  Of course  I've changed most every ingredient in this but, it was the Nutted Rice recipe that inspired me to make my Wheat Berry Salad.  I think you'll enjoy it.


Besides Wheat Berries being packed with protein and nutrition I've added other heart healthy ingredients to this salad.  I love the addition of fresh and dried fruits to my salads whenever I can, which makes them naturally sweet.  If you aren't familiar with  Plum Amazins they're diced dried plums that have 50% more fiber, 19% fewer calories amd 50% less sugars' than raisins and cranberries AND they're delicious!  I decided to opt for these luscious little morsels to add that extra pizazz to my salad.  With the addition of a fresh fruit vinaigrette and almonds it makes it next to impossible to stop eating.

Wheat Berry Salad
serves 6

Ingredients:

1 cup Wheat Berries (found at Whole Foods or Bob's Red Mill),
2 1/2 cups water
1 cup slivered, blanched almonds
1 cup SunSweet plum Amazins
zest of 1 large orange
4 scallions, thinly sliced
1/4 cup olive oil
1/3 cup fresh squeezed orange juice
salt and pepper to taste


Instructions:

Soak Wheat Berries for 8-24 hours in a pot of water covering 2 inches above the grains.  Drain and place in desired vessel with water, following cooking instructions.  Wheat Berries should take about 1 - 1 1/2 hours to cook unless using a pressure cooker.

Transfer cooked Wheat Berries to a bowl adding the rest of the ingredients.  Let stand for at least 30 minutes to absorb the flavors.  Serve at room temperature.

I think you'll love this salad.

Since I've included so much information here I think in a couple of days I'll go ahead and post my Orange Glazed Chicken that I made to go with this.  So stay tuned.

Tuesday, 28 February 2012

Grilled Sea Bass with Black Bean & Corn Salsa


This past weekend I had a dinner party and again the requested dish was my Sweet and Sour Brisket.  We were having a Pot Luck dinner and I was the host so everyone brought a dish.  It was fun getting together with everyone but as always I made more brisket than needed which meant leftovers.  Leftovers are great if it's fruit or vegetables but when it's meat it can be dangerous.  That's why last night fish was on our dinner menu. Light, healthy, and nutritious was what my body was craving.

Whenever I'm in that super healthy  mood I head over to Whole Foods Market.  The produce section alone gives me energy - it's incredible!  Bright colors of every fruit and vegetable you can imagine.  My mind goes crazy trying to come up with dishes I can create. 

Monday evenings meal was going to be Grilled Sea Bass with a Black Bean and Corn Salsa with Sugar Snap Peas.  This simple dish was tossed together in all of 30 minutes.

I love Sea Bass for it's mild yet buttery flavor.  People always ask me how much butter I added to the dish and I smile and tell them none.  It's hard to believe because of the delicate, buttery flavor but it's true.  Of course if you don't like fish or are allergic to it like my blogger friend Ann then go ahead and use chicken or any other meat that strikes your fancy to go with the salsa.

Speaking of the salsa - this was just a matter of slicing and dicing veggies that I felt like adding. You can do a rough chop or do a nice brunoise cut.

Brunoise is a precision cut where the food is first julienned (cut into thin match sticks), then turned a quarter turn and diced again, producing tiny cubes with equal sides (typically under 3mm). This cut is commonly used as a garnish for Consomme, or salsas.

Below is an example of a brunoise cut:

Yellow Pepper
Cut into match sticks
Turn match sticks 1/4 turn and line up ends evenly

Slice ends into even cubes, size can vary depending upon the
effect you are trying to achieve


The sugar snap peas were rinsed, and steamed for all of about 4 minutes until they turned a bright green color.  Remove from heat and serve immediately or plunge in an ice water bath to hault the cooking process to maintaian their bright color.

Grilled Sea Bass with Black Bean and Corn Salsa
serves 4

Ingredients:
4 - Six to Eight ounce Sea Bass, skin on if possible

1 can Black Beans, rinsed to remove salt
1/2 cup fresh or frozen corn
1/4 red onion minced
1/2 red pepper, brunoise cut
1/2 orange or yellow pepper, brunoise cut
1/2 Pablano Pepper, seeded and cut brunoise style
juice of 1 lime
1 tablespoon Extra-Virgin Olive Oil
salt and pepper to taste

Sugar Snap Peas

Instructions:

Turn grill on to preheat.  Rinse Sea Bass, pat dry and place skin side down on a medium hot grill.  Cover and cook 15 minutes.  No need to flip.  After 15 minutes using a metal spatula, place between the bottom of the fish and top of the skin.  Glide gently to remove Sea Bass from the skin.  Repeat with all Sea Bass and place on a platter.  Then remove the skin with the spatula from the grill and disgard.

The Salsa can be made an hour or two in advance.  Place black beans in a mesh strainer and rinse to remove salt and liquid.  Drain and place in a bowl.

Add corn, onion, and peppers to the bowl.  Add juice of a lime and olive oil.  Add salt and pepper to taste.  Blend then cover and place in the refrigerator to chill for later.

Just before removing the Sea Bass from the grill steam the Sugar Snap Peas by simply adding about an inch or two of water to the bottom of a saucepan with a steamer insert.  Add the sugar snap peas, cover and steam approximately 4 minutes or until they turn bright green.

Place Sea Bass on a plate, spoon generously with the salsa and place sugar snap peas along side.  Simple, easy and very nutritious.

Enjoy!

Monday, 20 February 2012

Arsenic - in Baby, Organic and Energy Foods!


It's been all over the news this past year but last week Brian Williams of the NBC Nightly News shared Arsenic findings in Baby and Organic Foods, Energy Gels and Bars.  Just when you think you're eating healthy this airs on television and the world wide web.  The culprit is Brown Rice Syrup.


After scanning ingredient labels on packages in my pantry I found far too many containing Brown Rice Syrup.

How does the Arsenic get into the Brown Rice Syrup?


Back in the 1940s farmers used arsenic as a pesticide to treat soil, ward off moths, caterpillars, as a preservative for pressure treated wood, animal hides, in some glass manufacturing, and as an additive to harden lead and copper.   It was also used to ward off diseases such as syphilis and psoriasis from the 1800s to early 1900s, while some arsenic is still used to treat an uncommon blood cancer known as acute promyelocytic leukemia .  Although many years have come and gone it wasn't until 2009 that the EPA banned it from being used as a pesticide.


However, our soil has absorbed the arsenic and remains contaminated to this day. How is arsenic getting into Brown Rice Syrup, which claims to be a healthier substitute for sugar? 

Rice is grown on farms where soil has previously been sprayed with arsenic to protect plants from insects.  High levels of arsenic still present in the soil are then absorbed into our plants, grains, etc.  later to be harvested. 

Arsenic occurs in several forms, some thought to be more dangerous than others. Organic forms of arsenic can be found naturally in the soil, along with arsenic-based pesticides used before the EPA banned them in 2009. Rice, takes up more arsenic than all the other grains.

Inorganic arsenic is considered much more toxic than organic arsenic, causing cancer, skin lesions, cardiovascular disease, neurotoxicity and diabetes. 

Brown rice is produced when the outermost layer of a grain of rice (the husk) is removed. To produce white rice, the next layers underneath the husk (the bran layer and the germ) are removed, leaving mostly the starchy endosperm. Brown rice has a larger concentration in total arsenic and inorganic arsenic than white rice because the outer layer that's removed in white rice contains the inorganic arsenic. However, another form of arsenic can be found inside the grain of both white and brown rice.

Brown rice syrup, or rice syrup, is then made by culturing cooked rice with enzymes (to break down the starches), then straining off the liquid and reducing it by cooking until the desired consistency is reached. The final product is 45% maltose, 3% glucose, and 52% maltotriose. Even still, the arsenic in the brown rice remains after being converted to brown rice syrup.

Arsenic is found from baby foods to our water supply.  The EPA sets standards for levels of arsenic allowed in water but there are no standards set for our foods - that needs to change!  The question is, knowing that arsenic exists in these foods - will you continue to purchase them or eliminate them from your diet? With so many products and foods on the market it's hard to know what's safe anymore, even after reading the labels, and what to eliminate in my opinion.  People still smoke, eat and drink foods known to have health risks. In the end, it's your decision what to do once informed.

What are your thoughts? What will you do, if anything?

I've only touched on one issue while there are so many out there.

I'd love to hear your thoughts!