Pages

Monday, 30 January 2012

Ooey Gooey Cheese Dip & Homemade Tortilla Chips


This coming Sunday is the Super Bowl.  Whether or not you're a big football fan there's a good chance you're invited to a party, having one at your home or you'll flip to the channel now and again to check the score or watch the much waited for commercials.

OK, so some of you may not even turn on the TV that day, but if you're one of those that I've described above, then you're probably going to be cooking up some grub for the game.  One dish that's almost always on a Super Bowl game day table is a hot cheese dip. 

This dip that I'm sharing IMO, is positively the most incredible dip you'll ever try.  It's so quick and easy to put together you'll be surprised at how sensational it tastes.  Your guests won't be able to stop eating it and you won't either!

If you're still not sure you're getting together with friends, I suggest picking up this simple list of ingredients, just so you're prepared.  It will take all of 10 minutes to toss together. 

Oh, and if you forget to pick up the chips try making my simple Homemade Tortilla Chips (below) with those tortillas sitting in your refrigerator. They're better for you than the store bought - but then who's counting when the cheese dip is packed with fat and calories!

Ooey Gooey Cheese Dip
Makes 2 cups

Ingredients:
8 oz. mild Cheddar and Monterey Jack cheese mix (2 cup package)
4 oz. cream cheese
½ cup whipping cream
½ cup canned diced green chilies
1 Tbsp. hot sauce (or to your taste)
1 clove garlic, finely minced
Serve with home baked tortilla chips  (below) or your favorite brand

Directions:


Place all of the ingredients except the chips into a small saucepan.  The recipe can be completed to this point up to 8 hours before heating.


Place the pan over low heat and warm the dip, stirring constantly, until the cheese is melted.  Be careful not to let it boil, or the oil will separate from the cheese.

Taste and adjust for spiciness.


Transfer to a warm serving bowl or a mini Crock Pot.


Home Baked Tortilla Chips:


Take flour tortillas and cut in pizza wedges.  Lay on foil covered pan and spray with Pam.  Sprinkle with cumin, S& P or desired spices and bake for 8-10 minutes in 350 degree oven until crisp.


Both recipes are so simple.  In fact, if you have any leftover cheese dip, pour it over your burger or use as a dip for your fries or pretzels.  Pour it over a plate of chips with chicken, olives, sour cream, etc. for a great Nacho appetizer.

Trust me your friends will be raving about this dip.  IT'S OUT OF THIS WORLD DELICIOUS!

ENJOY!!!

Friday, 20 January 2012

Homemade Dulce de Leche and Chocolate Macarons


Ever since I went to Paris with my daughter 9 years ago and had a Macaron at  LadurĂ©e Pâtisserie, I've wanted to try making them. Although it's only recently that they've become the rage in the United States.


For those of you that aren't familiar with Macarons NOT Macaroons they come in an infinite array of colors with fillings from the ordinary to unimaginable. 

Macarons are made with few ingredients: almond flour, sugar and most importantly aged egg whites.  The process is precise to achieve perfection for simple and few ingredients. 


Since chocolate is my favorite flavor I decided to attempt to make Chocolate Macarons. 


After thumbing through the pages of numerous cookbooks like Mad About Macarons and Macarons and reading various blogs I decided to tackle Helene's recipe from Tartelette.  Many of the recipes in the Macaron cookbooks are in large quantity and although I could scale them down I decided to try her version for 30 Chocolate Macarons to get my hands wet, so to speak. Mad About Macarons does have a scaled down version with different quantities in the back of her book that's very helpful, which I'll use next time.

In addition, I thought I'd make some homemade Dulce de Leche which turned out positively superb!  Soft, silky and gooey with just the perfect caramelized flavor.  If you're not familiar with Dulce de Leche it's a thick caramel-like mixture.  In Spanish it translates to "sweet milk," or "milk candy."  A simple preparation of sugar cooked with goats' and/or cow's milk for hours over low heat until thickened and deep golden in color.  However, the taste is similar to sweetened condensed milk when cooked the same way.  For details read below.

I hate to admit it, although I could have guessed, my first attempt at Macarons did not achieve perfection - though I learned from my mistakes and I'm ready to try again.  The shells weren't as hard and crisp as I would have liked - more time was needed in the oven, still, the taste of this delicate cookie stuffed with Dulce de Leche and some blended with Nutella was more flavorful than I could have asked for!  Mmm I could have eaten the entire batch, but restrained myself to share with my family.

Below is the recipe for the homemade Dulce de Leche. There are several ways one could make this using a can of Sweetened Condensed Milk but I chose the safest way.  Many choose to place the unopened can in a pot of hot water to cook for hours.  The risk of pressure building up causing an explosion or burning yourself is extreme - my way is safe and quicker.


Take 2 cans of Sweetened Condensed Milk and place the contents in the top of a double boiler.  I used regular although you could use the lower fat version. 


With the pot filled 1/2 way with water, bring to a boil and then reduce to a medium active simmer.  Place heatproof bowl on top of simmering water with contents of Sweetened Condensed Milk.  Cook low and uncovered for 2 1/2 - 3 hours or until thick and caramel-like. 

Check the water every 30 minutes and refill until milk reaches Dulce de Leche consistency and color.


Cool and spread onto Macarons, over ice cream, in desserts, etc.  Store in a covered jar in the refrigerator.

Yum, this is so good.

Note: Once I perfect my Macarons I'll share the details with you.

Enjoy!

Wednesday, 11 January 2012

Double-Chocolate Meringue Cookies


I know it's been quite some time since I've posted any recipes but I needed a bit of a break from all the holiday food.  I love sweets and as always I overdo it during the holidays - or rather from Halloween right up to New Years.  I just can't help myself.  Fortunately I didn't gain any weight this year - how?  I have no idea!

It use to be that each New Years Eve I'd make a resolution but I'm wiser now that I'm older.  Forget about not eating sweets, that's never going to happen.  However, the quantity at which I eat them will be smaller and paired with exercise for my health, heart and temperament. 

I love to bake so when I came across this recipe given to me by a friend who attended Miraval Resort & Spa in Arizona, I knew I had to try them.  A luscious low fat, low calorie chocolate meringue cookie with a mere 59 calories per serving.


A meringue is a mixture of stiffly beaten egg whites and sugar.


With just 6 ingredients in this recipe they're made in a jiffy.  These tiny little wonders are light, airy, have a delicate crunch on the outside with a gooey, chewy chocolate marshmallow-like center.  Simply delicious! 

It's easiest to separate the eggs while they are cold, then set aside until room temperature.  To insure your egg whites reach their maximum volume have a clean, dry, grease free mixing bowl and wire whisk.  Line your cookie sheet with parchment paper or foil and when meringues are done they should release easily.  Don't use wax paper since the meringues have a tendency to stick.

Keep your heat low and don't try to rush the cookies.  The egg whites need time to dry out slowly.  Upon completion of your meringue cookies turn off the oven and open oven door slightly allowing the cookies to cool.  This could take up to 1-2 hours or leave overnight.  You can also remove them from the oven and allow to cool.  You'll find you have less cracking if left to cool in your oven.  I took mine out for this recipe - not for any particular reason.  Either way they're delicious, however, a few of mine fell.


If you're a cookie lover I know you'll love these, low-cal or not.  Everyone in my family adores them. 

I divided this recipe in 1/2 but feel free to make the entire batch.  Place the finished batter in a pastry or zip lock bag and cut a 1-inch opening in the tip of the bag makes for easy piping and a pretty peak.  However, using a heaping tablespoon will work just as well.

MIRAVAL'S DOUBLE-CHOCOLATE MERINGUES

YIELD: Makes 8 dozen


INGREDIENTS:

10 egg whites

1 t. cream of tartar

¼ t. salt

7 C. powdered sugar

1 C. cocoa powder

1 C. mini chocolate chips

DIRECTIONS:

Preheat oven to 300F.


 With a mixer, beat the egg whites, salt, and cream of tartar (acts as a stabilizer allowing the egg whites to reach maximum volume) and beat until you have soft peaks.


Add the sugar and cocoa powder at low speed; when combining add the chocolate pieces.


Prepare a sheet pan lined with parchment and sprayed lightly with cooking spray. Drop 1 ounce of meringue mix 2 inches apart on the sheet pan and bake in the preheated oven for 20-25 minutes until golden. Allow to cool on sheet pan. When cookies are cool gently peel them off parchment.


Delicious with a cup of tea or coffee!

ENJOY!


NUTRITION INFORMATION:

Per serving

Calories 59

Protein 1g

Total Fat 1g

Carbohydrates 12g

Saturday, 7 January 2012

Happy New Year!

I've missed blogging for the past couple of weeks to devote my undivided attention to my family, since it's so rare now for all of us to be together.


I hope you had a happy holiday filled with lots of joy and laughter!  I had a wonderful time with my family.  We left for a couple weeks and escaped from the cold to the warm tropical climate of St. John, U.S. Virgin Islands.  We stayed at Caneel Bay a beautiful resort where seven secluded beaches border 170 lush Caribbean acres.  This was our 4th visit to Caneel Bay and loved it, as always. 


The purpose of this vacation was for total rest and relaxation.  Our days were spent at the beach, lying in the hot sun, squishing our toes in the sand, swimming in the crystal clear turquoise ocean waters with the turtles, stingrays, sand sharks and fish, with the occasional iguana walking by.   Taking breaks to snorkel, play tennis, exercise, have lunch and ice cold pina colada's. Our routine was the same almost daily and so restful.

The evenings were spent having dinner in one of the 4 restaurants at the resort.  Years prior we ate in town often, but decided this trip we'd stay put and enjoy what luscious meals Caneel Bay had to offer.  All meals were a delight with an abundance of fresh seafood, fruit and veggies.  I had fish daily at lunch and dinner, while my family often had beef and chicken.  It was heavenly!

I thought I'd taken photos of so many dishes but apparently not!  A few of the dishes I enjoyed were:


Lobster Salad

Grilled Scallops on Sweet Potato Puree'

Beet Salad with Watermelon, Arugula & Pistachio Encrusted Goat Cheese


 A favorite of my husband, daughter and son was the Espresso Encrusted Beef Tenderloin while we all adored each and every dessert - which we indulged in nightly.  Our favorite was the Banana Cheesecake with Foster Sauce!  I plan to post that recipe soon.

A highlight of my trip was when I found myself lying next to Eric Ripert on the beach, then chatting with him while we both cooled ourselves off in the cool waves of the sea. 


He's very nice, tall and handsome with a charming accent! He looks identical to his photos and what I've seen of him on TV.  I asked him a few questions about work and food, then we both continued on with our day.  I saw him several times after that at the beach and we exchanged our hellos.  Although I would have loved to have invaded his space asking him millions of questions I chose not to since he was vacationing with his family.

New Years Eve was delightful, unfortunately my husband and I didn't make it to midnight, but had a great time dining and drinking champagne with our children.  They of course went on to make it to the strike of 12:00 while we were off in slumber land. 

The smiles, laughter, sunshine, rest, swimming, snorkeling, exercising and dining were plentiful and a glorious way to end the year and start off the new year! 

My tummy is still full from our trip but it's time to get back in gear.  This year I plan to add a number of new menus to my culinary classes, that are sure to excite you.  I'll be posting those in the near future.  Plus, creating more videos for my blog, sharing techniques I know you'll find helpful in your kitchen.

In 2012, I look forward to working with new clients, making new blogging friends, while continuing my relationship with clients and friends from the past. 

I'd like to wish my cousin Bob and his son Alex all the best in 2012.  Bob lost his wife and Alex his mommy on New Years Eve.  I love you both and will always be there for you - whatever you need!

Wishing each of you the best of health and happiness in the year to come.  Bringing you more delicious recipes, tips, videos and all things foodie in 2012.

Here's to A New Year!


Thursday, 22 December 2011

Happy Holidays!

I would like to thank YOU for visiting my blog in 2011 and posting your comments, especially when there are so many blogs out there in the blogosphere to choose from. 

I feel so fortunate to have made so many friends, many of whom I've never met personally but feel a connection to.

I want to wish you and your families a very Happy, Healthy and Safe Holiday and a Happy & Prosperous New Year!

I will be taking time off posting on my blog this holiday to spend time with my family who are all in town now.  I will be back after the first of the year to share lots of recipes, tips, videos and everything food related in 2012.

In the meantime, here are some recipes I've posted in past holidays that you might enjoy.

Overnight Caramel Pecan Rolls - perfect for Christmas morning or New Years Day morning

Peppermint Bark - the perfect holiday treat or gift

Zucchini Latkes - for Chanukah

More Homemade Gifts for the Holidays

Cranberry Tea - a warm soothing beverage for the holidays

Gorgonzola & Brie Torte - my all time favorite for a crowd

As the years have come and gone I have learned a lot when it comes to blog posting. Please keep that in mind when reading older posts.

All the best to you and your family in 2012.

Until then, from my home to yours,


Happy Holidays, Happy New Year & Happy Cooking!

Vicki Bensinger

Sunday, 18 December 2011

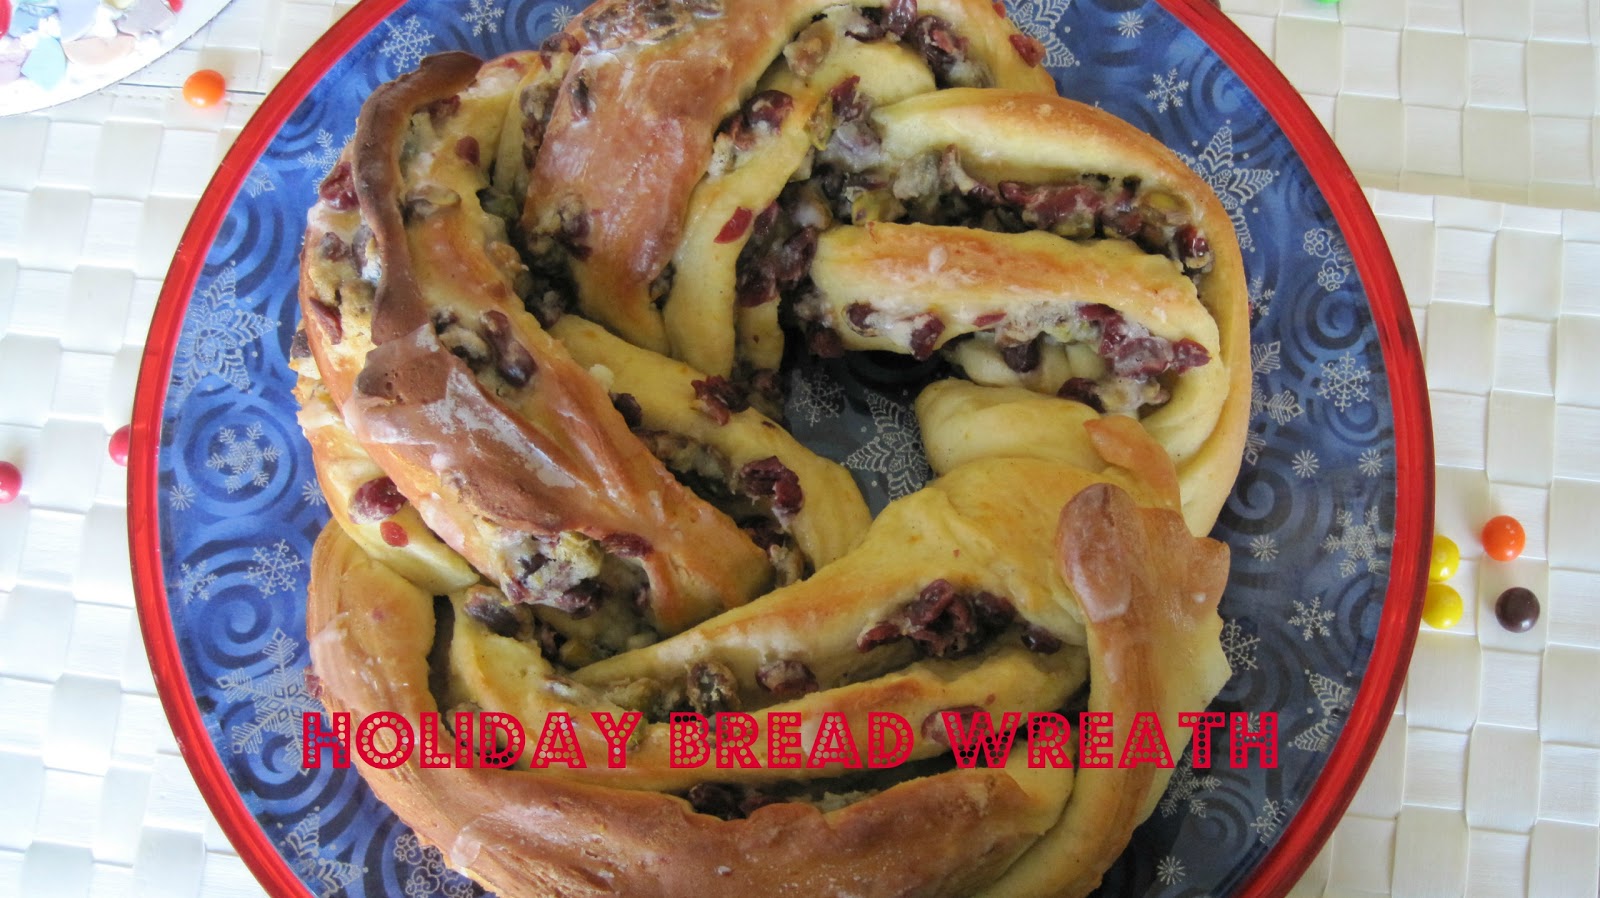
Holiday Bread Wreath!


I enjoy creating new dishes especially when the holidays come around.  The old tried and true are wonderful but every so often you need to break out of your comfort zone and try something different. 

When I saw this post on Sara Kate's blog I knew I had to try some version of this Holiday Bread Wreath.  I've never been much of a bread baker and as I'm getting older I find I shy away from eating bread altogether because of the carbs and calories.  All that flew out the window when I laid my eyes on this spectacular loaf of swirling bread.

Much to my surprise it wasn't difficult at all.  In fact it was easy and turned out tasting delicious!  My husband thought it was pretty but didn't want to indulge so I decided to share it with my mom and sister.  When I unveiled my creation they were all oohs and ahhs, just what I'd hoped.  We all dug in, had a slice and loved it.  The rest was left for my mom to share with her friends who would be stopping by later.

This beautiful Holiday Bread Wreath would be a lovely gift to give someone or perfect served on Christmas morning.  Warm and cozy with some coffee, tea or hot cocoa.

The recipe below comes from the December 1978 issue of Sunset Magazine.  However, Sara Kate Gillingham-Ryan made some changes to it and I made some changes to her recipe. 


Below is my step by step version and this is Sara Kate's of The Kitchn:

Holiday Bread Wreath with Cranberry-Pistachio Filling
adapted from Sunset Magazine, December 1978
makes about 12 servings

1 packet (1/4oz) active dry yeast (2 1/4 teaspoons)
1/4 cup warm water (about 110° F)
1/2 cup warm milk (about 110° F)
3 tablespoons sugar
1/4 cup butter, softened to room temperature
1 1/2 teaspoons salt
1 teaspoon cardamom powder
2 large eggs
2 teaspoons orange zest
3 1/2 cups unbleached all-purpose flour

For the Cranberry-Pistachio Filling:

3/4 cup dried cranberries or cherries, soaked in 1/2 cup Calvados (I used) or other liqueur
6 tablespoons butter, softened to room temperature
1/3 cup unbleached all-purpose flour
3/4 cup shelled pistachios
3 tablespoons sugar
1 teaspoon orange zest
1 teaspoon orange extract

For the Sugar Glaze:

1 cup powdered sugar
2 tablespoons water
1 tablespoon fresh squeezed orange juice
1/4 teaspoon cardamom powder

Instructions:

In a large mixing bowl, dissolve the yeast in the water and let it foam up for a minute or two. (looks like fireworks going off in the water)

Blend in the milk, sugar, butter, salt, cardamom, eggs and orange zest.

Stir in two cups of the flour, one cup at a time. Beat for 2 minutes. (I used my stand mixer) Add remaining flour 1/2 cup at a time until you have a soft, workable dough. (dough will pull away from the sides of the bowl)

Note: You might not use all the flour.

Dump the dough out onto a lightly floured board and knead until smooth, shiny and elastic, about 5 to 10 minutes, adding more flour if needed to prevent sticking. (You know it's ready when dough becomes smooth, shiny and if you poke the dough it springs back)


Place in a lightly oiled mixing bowl (I spray with non-stick spray) large enough to accommodate dough when doubled in size. Cover with plastic wrap and let it rise in a warm place until doubled (about 1 1/2 hours).

Meanwhile, prepare the Cranberry-Pistachio Filling:


Drain the dried fruit of its liqueur and reserve for another use. In a small bowl, combine the drained fruit with remaining filling ingredients. Cover and refrigerate.


When dough has risen and doubled in size, punch it down and turn it out onto a lightly floured board, kneading just enough to release any air bubbles.


Roll the dough into a 9- by 30-inch rectangle.


Crumble the filling over the dough to within 1 inch of the edges. (forgot to take photo but can view Sara Kate's photos for reference) Starting along a long side, tightly roll up the dough, pinching edge against loaf to seal.


With a sharp knife, cut roll in half lengthwise, carefully turn cut sides up,


and loosely twist ropes around each other, keeping cut sides up. (An extra set of hands would have been nice here)


Carefully transfer the wreath to a greased and floured baking sheet (I used Pam Baking Spray) and shape into a wreath, pinching ends together to seal.


Let it rise, uncovered, in a warm place until puffy, about 45 minutes.

Preheat oven to 350° F. Bake wreath until lightly browned, about 25 minutes.

While wreath is baking, Prepare Sugar Glaze by stirring together ingredients until smooth.


When wreath is done, transfer to a cooling rack with wide spatulas or a pizza peel.


Cool for a few minutes then drizzle the glaze over the warm wreath. Serve sliced with extra butter if you're feeling decadent.

The wreath can be prepared up to 2 days ahead of time, cooled completely and wrapped tightly in foil.

Store at room temperature then re-heat at 350° for 10-15 minutes, drizzling the glaze just before serving.


Note: Next time I'm planning to make this using chocolate chips, coconut, and macadamia nuts.  In place of the milk I'll use coconut milk and vanilla or coconut extract.

This bread can be adapted to use any type of dried fruit and ingredients you like.  I think even adding cream cheese to the filling would be sensational.  Be creative and don't be afraid to experiment.   Afterall, that's the fun part of cooking!

Enjoy!

Tuesday, 13 December 2011

Homemade Irish Cream Whisky!


With the holidays just days away, many of us will still have another party to attend or gift to give. If you're like me, I always like to bring a hostess or service provider (hair dresser, manicurist, etc) a gift. However, the expense of gift giving during the holidays can sometimes be daunting on the pocketbook.  That's when a homemade gift is perfect and more personal.

I enjoy creating gifts for the holidays.  From homemade plates, candies, cookies and even wreaths - the list is endless.  One of my favorite homemade gifts is Irish Cream, a unique gift that almost everyone loves!  I posted this last year but thought I'd share it again.

I've never been much of a drinker but always loved Bailey's Irish Cream, especially in my coffee after dinner. There's something about the flavor that for me, is the perfect ending to a perfect meal. So of course when I found out I could make Irish Cream I thought, why not try it!

I couldn't believe how delicious it tasted. In fact, I think it's even better than the store bought Bailey's Irish Cream.  Plus if I want to, I can add as much or as little Whisky to the recipe as I like.

Whether you serve it straight up on the rocks, over coffee, or even in a milk shake it's amazing! Your friends will be begging you for this recipe.

Best of all, you can make several bottles for gifts, at a fraction of what it would cost to purchase Bailey's Irish Cream in the store.

So what are you waiting for? Try this recipe today, if not to give as a gift, then for yourself, or as a special treat for St. Patrick's Day. I'm sure you'll agree with me, it's heavenly!

Oh, and one other thing - if you're not a fan of almond extract try using coconut. It gives it a whole new flavor that you may like even better.


Homemade Irish Cream Liqueur

1 cup of Jameson’s Irish whiskey (or any Irish whiskey you like)
1 (14-oz.) can sweetened condensed milk
1 cup heavy cream
2 Tbsp. chocolate syrup
2 tsp. instant espresso
1 tsp. vanilla extract
1/2 tsp. almond extract

Place all ingredients except the whisky in a container and blend. Once blended add the whisky and blend again. That's all there is to it.


Before pouring into bottles you may want to strain the Irish Cream through a fine mesh strainer to be sure there aren't any larger coffee grains left.


This recipe was able to fill 2 (330 ml) Perrier bottles. They come in a 4 pack. I just removed the labels and washed them well. Then using a funnel, pour the Irish Cream into the bottles and tie a bow around it stating what it is, that it needs refrigeration, and when it expires.

This is best served after it's had time to chill in the refrigerator. The homemade Irish Cream can be stored in the refrigerator for up to one month. However, it's so delicious I'm sure it won't last that long.
Enjoy!

Other homemade gifts you might like to try: