When the weather gets warmer do you find yourself craving more fresh fruits and vegetables? I know I do! In fact, right before I go out for a run or bike ride I love to make this luscious and nutritious green smoothie.
Don't turn your nose up until you've tried it. After sharing this recipe in many of my culinary classes, I've literally turned 100% of the "oh I don't think I want to try a green smoothie" comments to, "is there enough for seconds?"
In this brief video I'll show you how to make this simple emerald green smoothie. For written instructions you can view a previous post.
If you try this, please let me know what you think. Do you have a green smoothie recipe you'd like to share? Please post it in my comments section for everyone to see.
Nothing makes you feel better than when you nourish your body from the inside out. I even turned my 91 year old mother onto this beverage. If she loves it, you will too!
Enjoy life to the fullest by eating well, exercising, laughing and spending time with those you love and who make you happy.
There's nothing like a great burger prepared on the pit but, as we all know, grilling the perfect burger can be challenging. Back in 2011 I posted some grilling tips, in the event you need to hone your skills for the upcoming season.
That said, even if you are a master at the grill, a burger is just a boring burger unless you know how to jazz it up, changing it from ordinary to extraordinary!
My favorite burger is a Kobe Beef Burger!
What's Kobe Beef?
Kobe beef refers to the meat originally cultivated from the Wagyu cattle breed in Kobe, a Japanese region. The Wagyu cattle breed produces a more tender, flavorful meat than other cattle breeds. Although Wagyu cattle are now raised in areas other than Japan, such as the United States and Australia, it is available in a limited quantity compared to other beef, and is considered a delicacy.
Kobe beef provides a rich, complex beefy flavor, it's marbled with fat and has a looser texture than Angus beef. Although the meat has a higher fat content, its ratio of monounsaturated fat over saturated fat is higher than Angus meat, thus making the meat a healthier choice.
Since the fat content is higher, you have to be careful not to overcook the Kobe burger or all the flavorful goodness will disappear with the cooking.Therefore, special care should be used when grilling. Here are some simple tips:
Remove Kobe burgers from refrigerator - set out until they reach room temperature, insuring even cooking.
Preheat grill, and place burgers on "medium high" heat. To enhance their flavor, season with only salt and pepper. Grill Kobe beef until it reaches an internal temperature of 145F-150F degrees, appproximately 5 minutes per side. Lower heat once flipped to avoid flare-ups, and continue cooking to desired temperature. For the juiciest and best flavor cook until medium-rare.
Now that you understand how to grill your Kobe beef burger, let me show you how to jazz it up! Here's my recipe for a Kobe & Smokey Cheddar Burger with Beer & Hoisin Caramelized Onions on a Brioche Bun!
Kobe & Smokey Cheddar Burger with Beer & Hoisin Caramelized Onions on a Brioche Bun serves 4
Ingredients for Kobe Beef:
11/3 lbs. Kobe Beef, ground (serves 4)Season with salt and pepper
Ingredients for Onions:
2 tbsp. canola oil ½ tsp. butter 4 large yellow onions, sliced 2 cloves garlic, crushed 2 tbsp. brown sugar ¼ cup hoisin sauce ½ cup beer 1 tbsp. tomato paste (tube) 1 tbsp. soy sauce freshly ground salt and pepper to taste
Brioche Bun
Directions:
Heat oil and butter in a large sauté pan.Add onions, S&P, cook 10 minutes, then stir in brown sugar.
Combine garlic, hoisin, beer, tomato paste, and soy sauce.Once blended, add to onions. Continue cooking for approximately 15 minutes until liquid is reduced and glossy, stirring occasionally.Keep warm until ready to serve.Makes 2 cups
If you've ever been to Italy I'm sure you'll remember the delicious bread brought to your table at lunch and dinner. Dark, crunchy, crisp crust, light airy dough inside, too difficult to slice with a knife, but perfect for tearing and dipping into rich green extra-virgin olive oil. There's something rustic yet magical about the moment, that can only be experienced in Italy - until NOW! Now YOU can bake this bread, and have it hot from your oven, at home.
Unlike many breads, artisan bread making takes time, and specific techniques: fermentation, pre-ferments,autolysing (resting), proofing, punching down and folding. Accurate measurements, time, and temperature are crucial. These small batches of handcrafted breads with a thick and hearty crust, can be made with white or whole wheat flour, generally consisting of yeast, sugar, salt, corn oil, milk or water, requiring the dough to rise twice before baking.
The recipe below from Matt Carlson of Big Sky Bread and Pastry with its short list of ingredients - flour, water, yeast and salt, is best measured with a food scale for accuracy, then baked in a Dutch Oven. After reading about this recipe in an article posted by Sydne George, I was instantly intrigued and knew I had to try it.
My family avoids overloading on carbs these days, but this recipe was hard to resist. After reading over the detailed instructions 4 times, adding my own side notes, I was ready to tackle it.
I was nervous that it wouldn't turn out perfect, it wouldn't proof long enough or end up underdone or dry - I'm not a bread baker! Instead, the recipe, truly easy to follow, was perfection - dark, crispy crust, with soft fluffy interior. Oh, and my family gobbled it up for dinner!
You must try this Dutch Oven Baked Artisan Bread!
BASIC WHITE FRENCH BREAD Recipe by Matt Carlson
You will need a food scale for this recipe, as measurements are listed in grams. (I've added U.S.measurements if you don't have a scale but for best results a scale is recommended).
863 grams King Arthur all-purpose flour (3 3/4 cups) 634 grams water (at 80 degrees Fahrenheit) (2 3/4 cups) 3 grams instant yeast (1 tsp.) 17 grams salt (1 Tbsp.)
Preheat your oven and Dutch oven at 450 degrees 45-60 minutes before baking.
1. Mix flour and water until combined. Let rest for 30 minutes. This is called an autolyse (resting).
2. Add yeast and 2 tablespoons water (although it didn't state this I used 110F degree water, perfect for activating yeast) and using a wet hand begin to work it in by hand. Then add salt, and continue folding and pinching the dough between your thumb and index finger, until dough comes back together, about 5-10 minutes. Dough should be nice and smooth.. (Remember to keep a pitcher of water handy to wet hands so they don’t stick to dough.)
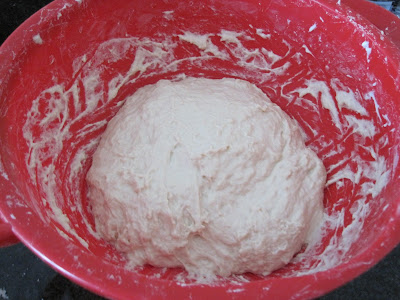
Dough left to rise for 5 hours
Dough after 5 hours
3. At this point, we’re giving dough what's called a "bulk rise". This will take four to five hours. Fold dough every 15 minutes during the first hour. This will develop strength. Dough will puff up and be double the size when it's ready.
4. Divide dough in half (750 grams each). Then round them into balls placing them seam-side down in two bread-proofing baskets or two bowls with towels in them. (If using the latter, be sure to dust towels with a decent amount of flour so dough doesn't stick.. Cover baskets with plastic wrap).Leave bread to proof for 1½ to 2 hours. It will hold an indentation but also spring back about halfway after being poked.
Note: I started this at 10:00am and had to leave for the evening at 4:30pm. I allowed loaves to proof for two hours then prior to leaving, placed both bowls, covered, in refrigerator until morning. Removed from refrigerator at dawn, giving 1 1/2 hours to proof again, and come to room temperature before placing in oven..
5. Now that your Dutch Oven has preheated for 45 - 60 minutes at 450F degrees, remove it from the oven - you're ready to bake! Set pot on top of a hot pad, remove lid and set aside. Sprinkle inside bottom of Dutch oven with a dusting of flour. Working quickly, lightly dump your dough onto a floured counter. Seams should be up - you should see a cracked looking surface. (DO NOT flip dough over - you want cracks.) Using both hands, pick dough up gently, placing inside Dutch oven - remember it's hot!Place lid back on, and return to oven.
Bake for 25 minutes. Remove lid and bake for another 15-20 minutes until bread is dark brown and beautiful.
During the holidays my friends at Melissa's Produce sent me their new cookbook, "50 Best Plants on the Planet" The Most Nutrient-Dense Fruits and Vegetables, in 150 Delicious Recipes. Brightly colored pages fill the book with produce ranging from A - Arugula to W - Watermelon each with photos and fresh recipes to try.
The photos, so stunning and life-like, make you salivate just viewing them. With 150 recipes, deciding which one to try first was difficult. My family loves salmon, and after receiving a box of Melissa's Ojai Pixie Tangerines I opted for the Salmon with Orange and Fennel Salad.
Simple to prepare, with a light, refreshing vinaigrette, tossed with the crisp fennel salad to top a perfectly roasted salmon - this dish was a winner!
I wish I could show you every page of this extraordinary cookbook but instead, if you're of fan of fresh fruit and vegetables, I highly recommend purchasing one of your own. Eating a rainbow of foods on your plate each day is key to a healthy and long life. "50 Best Plants on the Planet" by Cathy Thomas, Angie Cao and Cherl Forberg, is sure to deliver just that.
To get the recipe for this heart healthy, refreshing dish, please read below........
Salmon with Orange and Fennel Salad
serves 4
Ingredients: Four 4-ounce skinless salmon fillets salt Freshly ground black pepper 1 tsp. ground fennel seed 2 large *oranges, 1 zested and juiced; 1 cut into supremes** 1 tsp. Dijon mustard 2 Tbsp. extra-virgin olive oil 1 small red onion, cut in 1/2 from top to bottom, thinly sliced 2 medium bulbs fresh fennel, untrimmed ***Canola oil or vegetable oil for brushing grill pan or grill (see #1 directions) 1 cup baby arugula Directions:
Place salmon fillets in a single layer on a large plate. Season with salt, pepper, and the fennel seeds. If using a grill, preheat to medium-high heat and clean the grate. (I roasted my salmon instead, due to cold weather, in a 500F degree preheated oven for 10 minutes. If done this way, leave skin on, place on heavy-duty foil lined pan. No oil is needed.)
In a medium bowl, whisk together the zest, orange juice, and mustard, then season with salt and pepper. Whisk in oil in a thin stream. Add onion and toss. Set aside.
Trim off dark green stalks and feathery fronds from fennel bulbs. Roughly chop fronds and set aside for garnish. Quarter bulbs lengthwise; cut out and discard cores. Cut the quarters into very thin crosswise slices with a mandoline or sharp knife. Add fennel slices, chopped fronds, and orange sections to vinaigrette. Gently toss.
If using a grill pan, heat it on medium-high heat. Brush grill grate or pan with oil. Add salmon, seasoned-side down. Grill about 5 minutes per side, or until just barely cooked through. Grilling times vary depending on the thickness of the fillets and heat of the grill.(I roasted my salmon instead of grilling - see #1 above)
Place salmon on four dinner plates. Add the arugula to fennel mixture and toss; spoon the salad over salmon and serve.
Notes:
* I used Ojai Pixie Tangerines in place of oranges. Not only are they delicious, juicy and sweet but they're easy to separate - perfect for this dish.
** Supremes - To cut citrus fruit into supremes (peeled segments): Cut the top and bottom off through the white pith to reveal the flesh. Place fruit cuttside down on a work surface. Following the contour of the fruit, cut off the peel and pith in strips with a sharp knife, starting at the top and cutting down. Working over a bowl (to collect juice), use a small sharp knife to cut parallel to each section's membrane, cutting toward the center. Repeat until all the sections are removed. Squeeze the "skeleton" membranes over the bowl to remove any remaining juice.
*** I didn't use any canola oil since I roasted my salmon in the oven. When roasting or grilling if you leave the skin on it's not necessary, in my opinion, to use oil. When removing salmon from the oven or grill, simply take your spatula and gently slide it above the skin and under the salmon - lifting salmon up and placing onto your plate. This method is quite simple and avoids the fish sticking to the grate or pan. That said, I do not flip my salmon using this method. If you prefer flipping your salmon then follow step #4 above.
I love cooking, baking and decorating for any type of holiday or celebration. I have to admit decorating isn't always my strong suit, but love the way it jazzes up a room and perks everyone up.
Pinterest is a great place to find ideas. While browsing the site I saw so many darling Easter decorations, but Easter Peeps Centerpieces were plentiful. I'd love to say this was my creation but it's not. Although based on the variety on Pinterest I'm not sure who created these.
Here's my version, although I have to say my jelly beans were with all the Easter candy, so I would have thought them to be pastel colored - they're not. Even still, I think my centerpiece is darling! What do you think?
Easter Peeps Centerpiece
makes one
Materials Needed:
3-inch cube vase
5-inch cube vase
Jelly Beans Gerberas Daisies
Hyacinths
1 pack of Peeps
Directions:
Center smaller vase inside the other and insert jelly beans (colors of your choice) between the walls of the cubes.
Place Peeps on top of jelly beans. Don't be afraid to squeeze them into the space. Fill the gaps if possible.
Gerberas are sold with plastic tubes on the stems, perfect for supporting them. Keeping the plastic in place, cut the Gerberas and plastic if needed, to desired length along with Hyacinths, and arrange in vase. Flowers around exterior should be cut shorter than those towards the center of the vase....Select your favorite flowers!
Note: I used a 3 and 5 inch vase but you could also use the 4 and 6 inch vases or even rectangular vases. Whatever suits you.
I'm lousy when it comes to floral arranging but this is easy. These vases can be used all year with various colored marbles, rocks, shredded colored paper or jelly beans. Then fill with your favorite flowers. The perfect low centerpiece anytime.
Are you tired of the same dry sponge cake with berries and non-dairy whipping cream for your Passover dessert? Try this quick and delicious Flourless Chocolate Cake; your guests will be thrilled they stayed for dessert!
This Flourless Chocolate Cake can be served for Passover or any occasion. Since it's extremely rich, one cake makes 16 servings. Be sure to bring to room temperature before serving!.......
Flourless Chocolate Cake with Macaroon Pecan Crust
In a food processor, blend nuts and macaroons until finely chopped. Spray the bottom and sides of a 9-inch springform pan with non-stick cooking spray. Press mixture onto entire bottom of pan to insure crust is firmly in place.
In a saucepan, melt butter, when hot, add chocolate. Using a wooden spoon, stir continuously until chocolate is smooth, add liqueur and blend.
In a large bowl, whip the eggs and sugar until doubled in volume.
When chocolate mixture is fully melted, incorporate it slowly to egg mixture and blend well.
Pour batter into prepared springform pan. Bake for 30 minutes or until center no longer wiggles. Remove from oven and let cook at room temperature. Place cake in refrigerator. Thirty (30) minutes prior to serving remove from refrigerator and allow to get to room temperature.
*Note: You could also use a coffee liqueur and if not keeping Passover - Kahlua will work as well.
Serve with berries and Raspberry Coulis.
Raspberry Coulis
makes 1 1/2 cups
Ingredients:
2 cups fresh raspberries, or 1 (10 oz) pkg frozen, thawed and drained
1/4 cup fine sugar
1/4 cup orange juice
2 Tbsp. lemon juice 2 Tbsp. Sabra Chocolate Orange Liqueur
Directions:
Place berries, sugar, orange and lemon juice in a blender - puree until smooth. Strain through a fine mesh sieve into a glass bowl, discarding the seeds. Stir in the liqueur, taste, and adjust sugar if necessary.
Place in a squirt bottle and decorate plate and cake as desired.
It's still not too late to add more fun treats for Easter. Here's an adorable Chocolate Pretzel Basket that even your kids will have fun creating. Fill with your favorite goodies or fresh fruit, for all to enjoy. Before you know it the entire basket will disappear!
Watch my video below, then head to the grocery store to gather the few supplies needed to make this special treat. Whether for Easter, a fun or elegant centerpiece - you'll have everyone smiling when they feast their eyes on your creation.
For detailed recipe view below........
Chocolate Pretzel Basket
Adapted from Chocolate Holidays by Alice Medrich
Ingredients for large basket:
12 oz. package chocolate chips (whatever type you prefer)
7 oz. thin salted pretzel sticks
Equipment:
2 quart bowl or other container to use as a mold
2-3 quart bowl for mixing
Chocolate-coated pretzel "twigs" lend themselves to elegant centerpieces filled with plain or chocolate dipped fruit, chocolate truffles, or meringue mushrooms. Or make a little nest for each child filled with jellybeans or chocolate robin eggs. Let the kids play with the sticky chocolate-coated pretzels on sheets of waxed paper...and don't be surprised to see miniature log cabins, stick figures, and edible skyscrapers.
Directions:
Prepare the mold:
Spray bowl (mold) with non-stick spray. Line entire bowl with plastic wrap allowing for plenty of overhang. You may need two sheets to cover the entire bowl, just be sure to overlap plastic wrap. Press wrap as smoothly as you can, covering bottom and sides of bowl.
Bring an inch of water to a simmer in a saucepan. Set other bowl over simmering pot and place chocolate chips in bowl. Using a silicone spatula stir until chocolate has just melted and is a fluid consistency. Remove bowl from heat. Wipe moisture off bottom of bowl with a towel - be sure not to get any moisture or water in the chocolate. The chocolate should be warm and fluid, not hot. Add pretzels to chocolate. At this point the chocolate will be cooler. Using a rubber or silicone spatula carefully fold the pretzels in the chocolate, adding more pretzels if necessary, until all pretzels are lightly coated. It's okay if some of the pretzel shows through the chocolate. If needed, use your fingers!
If chocolate is too warm, pretzels will slide down sides of mold rather than staying in place when building your basket.
Put a handful of pretzels into the lined mold (bowl) and spread them out to form bottom of basket. Build sides of basket by adding handfuls of pretzels and arranging them against sides of mold.
When pretzels are arranged to your satisfaction, refrigerate until chocolate has hardened, at least an hour, or until needed. To unmold, lift ends of plastic liner to remove basket from mold (bowl). Set basket onto counter and gently peel off plastic wrap. Store, basket on plastic sheet and return to mold, cover, and refrigerate until needed.
To serve, place on serving platter - fill with Robin Eggs as shown in video, or strawberries - plain or chocolate dipped, truffles, jellybeans, etc.
For a more decorative look, surround with fresh leafy branches or sprigs of green, if desired.