Wednesday, 4 April 2012
Easter Bunny Cupcakes
Back in 2009 I appeared on KMOVs, "Great Day St. Louis" to demonstrate how to make bunny cupcakes. It's been 3 years since it aired and thought with Easter this Sunday some of you may like to try to create these cute and tasty little bunnies for your family and friends.
Here's the video, with the recipe below. I hope you like it!
Here's the recipe:
Bunny Cupcakes
What you will need:
Cake: 12 cupcakes (can use whatever recipe you like or a box mix if wanting to save time)
Icing: recipe for Chocolate Glaze below
Decoration: 1/4 cup white confectioners coating (pink candy color) and 1/2 cup white confectioners coating to make ears, eyes, smile, cheeks and whiskers;
1 1/2 cups of white nonpareils
(all online at kitchenkrafts.com or at Michael's Craft Stores or Sallie’s on Manchester Road)
Miscellaneous: one 12-mold muffin pan, pastry cones or zip lock baggie, bunny ear templates, parchment paper
How to do:
1. Bake the cupcakes and let them cool completely. Freeze for 1 hour to overnight.
2. Prepare the glaze.
3. Melt the ½ cup confectioners coating for outside of ears and ¼ cup confectioners coating(to be colored pink) for inside of ears, separately. (this can be done in the microwave for 30 seconds, then check if needed for 15-30 more seconds by stirring)
Pour the ½ cup white confectioners coating (cc) into a pastry cone then blend the ¼ cup of melted white cc with pink candy color for the insides of the ears. Keep the cc warm on a heating pad or a pan placed over a hot water bath, since they will be needed in various steps throughout the directions.
4. Place the bunny ear templates that you have drawn on a sheet of parchment on a sheet pan or counter and tape down. Lay another sheet of parchment paper or cellophane on top (you do this so the pencil marks don't come off onto your design). Lightly secure the parchment paper with one or two pieces of tape. Using the templates as a guide, pipe out 12 sets of white cc exterior bunny ears. For added impact, pipe the center with the pink cc. Set aside to harden. Don’t make these too thin or when you remove them they will break. Remove gently with offset spatula.
5. Glaze the cupcakes.
Take the cupcakes out of the freezer - just a few at a time so they do not sweat. Hold the cupcake firmly by the paper liner and invert it into the pot of melted glaze. Submerge the cupcake just up to the paper line and move it about to insure the entire surface is covered. Pull the cupcake straight up and gently spin it above the bowl by rotating your wrist, to allow any excess glaze to drip off. Flip the cupcake and carefully place it on a wire rack to set. Allow the glaze to set for 3 to 5 minutes at room temperature.
6. Pour the nonpareils into a small bowl. Carefully dip entire cupcake or three quarters of the cupcake into the nonpareils, depending on the look you are trying to create. If only dipping ¾ of the cupcake into the nonpareils, try to create a straight edge where the glaze and nonpareils meet. The glaze will act as the bunnies head.
7. Pipe 2 white dots for the eyes (or use ½ white jelly bean for each) and dot with pink for eyes. To pipe a dot, hold the chocolate pastry cone perpendicular to the surface of the cupcake. Keeping the tip stationary, squeeze and hold in place until the dot is the desired size. Release pressure and pull straight up.
8. Pipe a pink nose, white cheeks if you like and a little pink heart for the mouth. Then use the pink confectioners coating to pipe whiskers.
9. Use the tip of a knife to score the cake where the ears will be inserted. Press the ears gently halfway into each cupcake.
10. For fullest flavor, serve the cakes at room temperature.
Chocolate Glaze Makes 2 ¾ cups
This glaze covers cakes smoothly and beautifully and is an absolutely delicious chocolate icing. The icing can be made with semisweet or milk chocolate; the semisweet has a darker, richer glow.
The icing can be used immediately or cooled and stored in the refrigerator in an airtight container for up to 2 weeks. Reheat slowly in a double boiler before using if chilled. This recipe can be doubled.
In a double boiler or in a medium metal bowl placed over a hot-water bath, melt:
• ¾ pound semisweet chocolate or milk chocolate (can use bag of choc. chips)
In a small saucepan, heat over medium-high heat:
• 1 cup heavy cream
• 5 tablespoons unsalted butter
• ¼ cup light corn syrup Stir until the butter melts, then continue to heat to just before the boiling point (bubbles will form around the pan’s rim).
Slowly pour the scalded liquid over the melted chocolate, whisking constantly until smooth. Strain the icing through a fine sieve.
How to make a pastry cone (or you can use a zip lock baggie with small cut in the tip)
You can make them out of cellophane, wax paper, or parchment paper.
If using parchment paper, to start, roll your parchment paper out. You want to get a perfect square, and actually you’re going to cut that square right in half to make a triangle.
One trick is to just fold one edge up until it meets the top edge, then crease it, and then cut along the outside or unfolded edge. Now open it up, and you’re going to use the crease that was formed when you folded the parchment as a guideline to cut your triangle out.
Now it’s time to form the cone.
Draw a line right in the middle of the longest side of the triangle. And that’s where your point is going to form. To do this, take one corner, and roll it in on itself, so that the corner lines up at the point of the triangle. Wrap the other side around to the back, and you’ll see that the two sides will line up right down the middle.
Now you want to tape, and wrap it around the tip. This will prevent the bag from opening while you’re squeezing it. So there’s your pastry cone.
To fill it, hold it in your hand, take a spatula, put some frosting on it, and place it slowly into the bag. Then, pinch your fingers down on it and slide the spatula out. Now, fold the edges down, and you have your pastry cone.
You can cut a small hole, or even a large hole depending on what kind of piping you’re doing. You can always use a zip lock bag as well to put your icing in and then cut a hole in one tip to pipe.
I hope you have fun making the cupcakes. As with any recipe, make sure prior to starting that you have all of your ingredients in place. This is called Mise en Place.
I hope you enjoy this recipe and would like to wish you and your family a Happy Easter!
Here are some other Easter recipes you might like to try:
Various Easter Egg Recipes & Tips
Easter Ham Leftovers Recipe
Sunday, 1 April 2012
Meyer Lemon Tart with a Layer of Chocolate
It was probably back in 2004 that I first experienced the smooth, sweet, citrus, buttery flavor of homemade lemon curd. Prior to that the word "curd" made me feel sick for some reason, until I discovered what went into it.
If you like lemons, limes, oranges or any type of fruit in most cases, you can create your own fruit curd. If you've only tasted the jarred kind, then IMO, you haven't tried true fruit curd. The flavor is ecstacy. I can eat it plain, over berries, with cake, berries and whipped cream or in a tart - like the photo above.
Many years ago I purchased the book Sunday Suppers At Lucques, by Suzanne Goin, solely for this recipe, but soon discovered many more luscious recipes in this cookbook. I'm embarrassed to say that it wasn't until last week that I finally made the recipe. It was everything and more than I imagined!
I'm not sure why it took so long to make this tart, but an old roommate of mine from college, Cathy, sent me fresh meyer lemons and passion fruit from her garden for my birthday, which was yesterday. Trying to come up with ideas to utilize the fruit I remembered the Meyer Lemon Tart with a Layer of Chocolate. I knew these meyer lemons were destined for this tart.
Although there are several stages in the recipe, it's really quite simple. Unfortunately, I was so immersed in creating the tart only a few photos were taken. Hopefully it will be enough of a tutorial.
Meyer Lemon Tart with a Layer of Chocolate will be a superb choice for the end of your Easter meal.
Meyer Lemon Tart with a Layer of Chocolate
serves 6
For the pâte sucrée (makes enough for two crusts):
1/4 cup heavy cream
2 extra-large egg yolks
2 3/4 cups plus 2 tablespoons all-purpose flour
1/4 cup plus 3 tablespoons granulated sugar
1/4 teaspoon kosher salt
1/2 pound unsalted butter
For the tart:
1 recipe pâte sucrée
2 ounces bittersweet chocolate (I used 3 ounces)
4 extra-large eggs
3 extra-large egg yolks
1 cup plus 1 tablespoon granulated sugar
1 cup Meyer lemon juice (or regular lemon juice is fine)
10 tablespoons cold unsalted butter, cut into small pieces
A pinch of kosher salt
1 cup heavy cream
Directions
Make the pâte sucrée:
Whisk the cream and egg yolks together in a small bowl.
In a stand mixer fitted with the dough hook, combine the flour, sugar, salt, and butter on medium speed until you have a coarse meal. Gradually add the cream and yolks and mix until just combined. Do not overwork the dough.
Transfer the dough to a large work surface and bring it together with your hands to incorporate completely. Divide the dough in half, shape into 1-inch-thick discs, and wrap one of them to freeze and use later.
If the dough is too soft, put in the refrigerator for 5 to 10 minutes to firm up a little. If the dough is manageable, place it on a lightly floured work surface, sprinkle a little flour over the dough, and roll it out into a 1-inch-thick circle, flouring as necessary. Starting at one side, roll and wrap the dough around the rolling pin to pick it up. Unroll the dough over an 11-inch tart pan. (The recipe calls for a 10" tart pan but they don't make one - at least I couldn't find one). Gently fit the dough loosely into the pan, lifting the edges and pressing the dough into the corners with your fingers. To remove the excess dough, roll the rolling pin lightly over the top of the tart pan for a nice clean edge, or work your way around the edge pinching off any excess dough with your fingers. Chill for 1 hour.
Make the tart:
Preheat the oven to 375°F (190°C).
Take the tart pan with the pâte sucrée from the refrigerator. Prick the bottom with a fork and line it with a few opened and fanned-out coffee filters or a piece of parchment paper. Fill the lined tart shell with beans or pie weights and bake 15 minutes, until set. Take the tart out of the oven and carefully lift out the paper and beans. Return the tart to the oven and bake another 10 to 15 minutes, until the crust is an even golden brown. Set aside on a rack to cool completely.
Melt the chocolate in a double boiler over medium-low heat. Spread the chocolate evenly on the crust and chill in the refrigerator for at least 15 minutes, until the chocolate has solidified completely.
While the crust is chilling, make the curd. Whisk the eggs, yolks, sugar, and fresh squeezed meyer lemon juice together in a heavy-bottomed saucepan (regular lemons will work too).
Cook over medium heat, stirring continuously, alternating between a whisk and rubber spatula (see note below), until the lemon curd has thickened to the consistency of pastry cream and coats the back of the spatula.
Remove the lemon curd from the heat. Add the butter a little at a time, stirring to incorporate completely.
Season with salt. Let curd cool about 8 minutes, then strain into the prepared tart shell. Chill tart in the refrigerator for at least 3 hours.
Just before serving, whip the cream in a stand mixer fitted with the whisk attachment (or by hand) until it holds soft peaks. Cut tart into six wedges, plate them, and serve with dollops of whipped cream. (I didn't use any whipped cream - it tasted incredible without it)!
Note: This tart should be served cold, so make it at least a few hours before serving. When you make the lemon curd, you need to stir it the entire time. For an ultra-smooth curd, I use both a whisk and a rubber spatula, alternating between the two as I stir. Start with the whisk, and as the mixture begins to get frothy, switch to the spatula (which helps get rid of the froth), scraping the bottom and sides continuously. Remove the curd from the heat and let it cool slightly before pouring it over the hardened chocolate layer. Don’t cool the curd completely before pouring or it will lose its nice sheen. You can also make this tart with regular lemon juice.—Suzanne Goin
Enjoy this luscious dessert. It's the perfect ending to your Easter dinner!
Labels:
Chocolate,
Dessert,
Easter,
Fruit,
lemons,
Meyer Lemons,
pâte sucrée,
Tarts
Monday, 26 March 2012
Vegetarian Pasta with Roasted Campari Tomatoes
Do you ever have those days where all you want are veggies? That was me today. I'd been doing a lot of work at home and was craving fresh vegetables. I checked to see what ingredients I had on hand and fortunately I was well stocked.
I had some beautiful Campari Tomatoes that I purchased yesterday, and zucchini, among other items, so decided to make a vegetarian pasta with roasted Campari tomatoes.
This dish is so simple to prepare and can be doctored up by adding chopped nuts, fresh herbs, freshly grated cheese and other roasted veggies. In addition I added grilled chicken for my husband to round out the meal for him.
So light and luscious served as an entree or side you won't believe how incredible it tastes. This isn't pasta in the true sense - I think it's better!
Vegetarian Pasta with Roasted Campari Tomatoes
serves 2
Ingredients:
2 large Zucchini
1 (16oz) container Campari Tomatoes
olive oil
kosher salt
Tools Needed:
Mandoline
Directions:
Remove tomatoes from their stems and rinse. Cut in half and place on a sheet pan lined with heavy duty foil.
Drizzle olive oil lightly over tomatoes and toss to coat. Lay tomatoes cut side up. Roast in 400 degree oven for approximately 20 minutes or until start to wilt. View details for Roasting Campari Tomatoes.
While tomatoes are roasting rinse then cut ends off zucchini.
Lay zucchini on mandoline fitted with thin julienne slicer. Slide zucchini back and forth creating thin spaghetti-like pieces.
Place julienned zucchini on individual plates and top with roasted Campari tomatoes.
Garnish with fresh grated cheese, chopped pistachios or other nut, or fresh herbs, if desired.
This will quickly become your new favorite.
Enjoy!
Wednesday, 21 March 2012
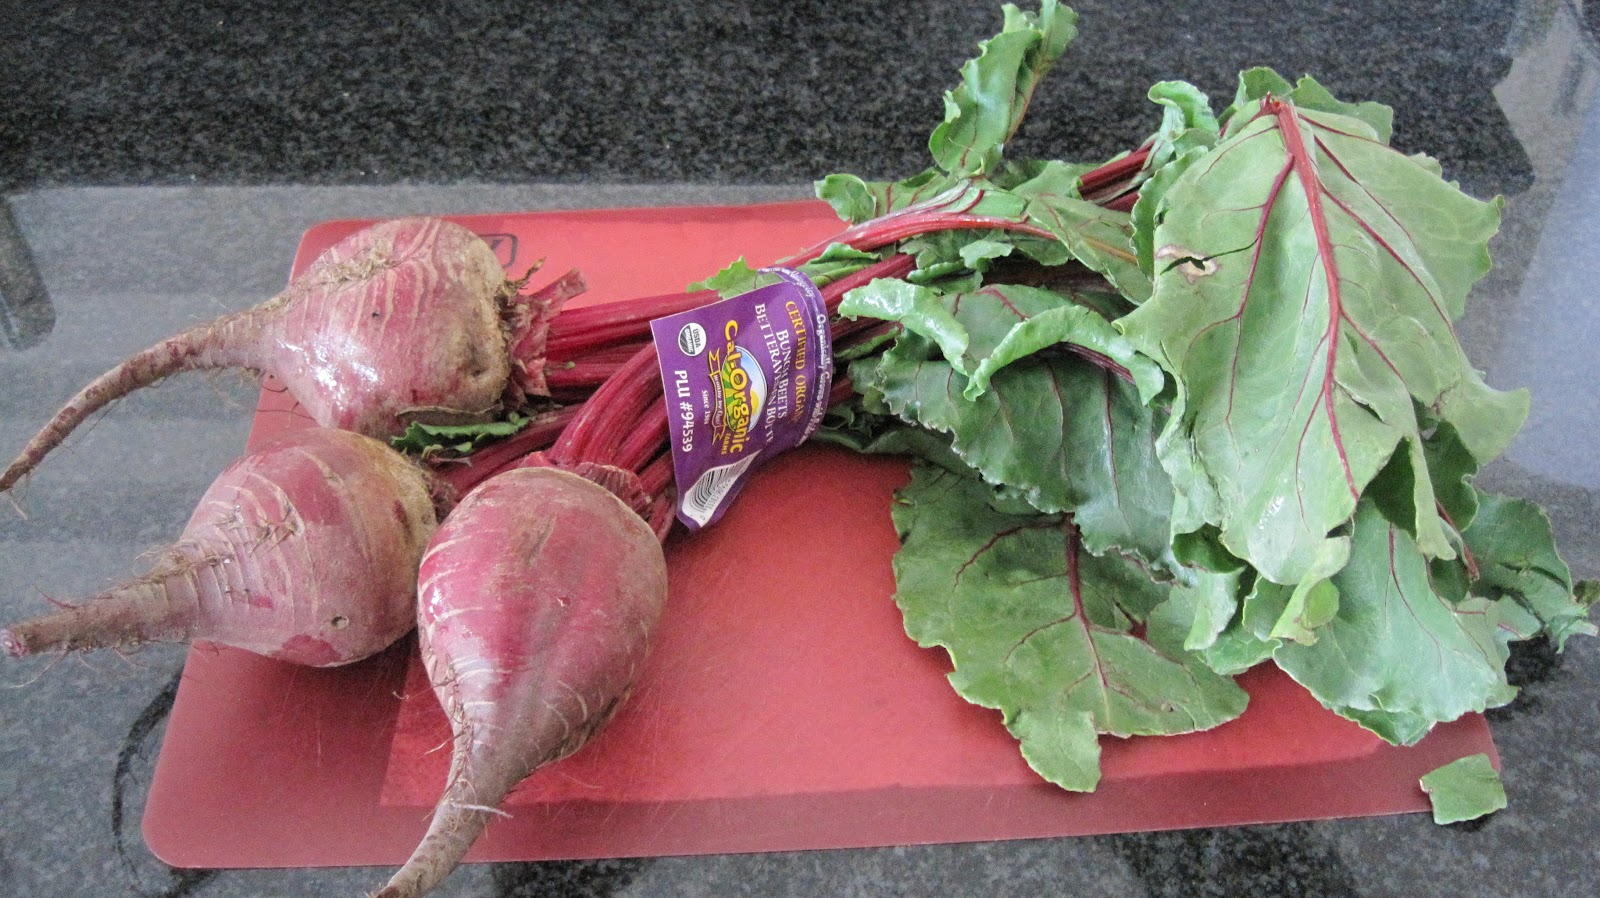
Roasted Beets and Butternut Squash Salad!
For years I hated beets. As a child I use to eat Borscht and loved it, but then one day I had a bad batch and well, I don't even want to tell you what they tasted like, let alone smelled like.
It wasn't until this past year that I had the pleasure of tasting fresh Roasted Beets. They're delicious and highly nutritious. It's been found red beets help lower blood pressure the same way nitroglycerin does –by relaxing blood vessels lowering it by as much as 10.4 points within one hour of drinking 2 cups of beet juice and maintaining that over a 24 hour period.
Nearly half of all adults have high blood pressure, putting them at risk for developing heart disease. If you have high blood pressure, you may be able to avoid the use of drugs by including blood pressure-lowering foods like beets in your diet. You can do that by drinking beet juice, eating canned beets or best of all roasting your own.
In addition to being heart-healthy beets contain vitamin A, C, K, E and small amounts of vitamin B. They also host a list of minerals and are high in essential amino acids. Despite having the highest sugar content of any vegetable, beets are low in calories, at about 35 calories per half cup. As you can see this unpopular vegetable should find a place on everyone's table.
Below is a simple recipe for a Roasted Beet & Butternut Squash Salad with Arugula, Goat Cheese and a simple Champagne Vinaigrette.
If you're not a fan of beets please give them a try anyway.... from one who detested them until trying fresh roasted beets. The blend of both veggies with goat cheese makes for a very light, nutritious lunch or side salad.
How to Roast Beets
Directions:
Rinse beets and trim off the leafy tops (save tops for other uses).
Wrap each beet loosely in aluminum foil and place in the oven. You can rub the beets prior to placing in the oven with olive oil or simply wrap dry, in foil. Roast until tender and easily pierced with the tip of a paring knife, about 1 hour.
Remove from the oven and take off foil. Set aside to cool.
When cool enough to handle, slice off leaf end and remove skin. If skin doesn't pull away easily place in oven for an additional 10 minutes.
Your fingers will get stained with beet juice but it does wash off with soap and water. However, I highly recommend wearing an apron when doing this. Removing beet juice stains from clothing is difficult!
Slice beets in strips or cubes like I did and place on greens.
I didn't measure ingredients for this salad so just eyeball it. Use your favorite greens or a blend. I used Arugula topped with the cubed Roasted Beets, cubed Roasted Butternut Squash, Goat Cheese and a simple Champagne Vinaigrette.
Champagne Vinaigrette
serves 2
3 tbsp. Extra-Virgin Olive Oil
1 tbsp. Champagne Vinegar
1 tsp. honey
1/2 tsp. Grey Poupon
salt & pepper to taste
Blend and serve over salad.
Note: Beet greens and stems can be used in pesto, soups, smoothies. They can be sauteed, braised, steamed, boiled and pureed. The list is endless with 100s of recipes to be found online.
ENJOY!
ENJOY!
Tuesday, 13 March 2012
Ultimate Rice Cooker Cookbook Giveaway
Last week I posted a recipe for Wheat Berry Salad with Orange Glazed Chicken. Many of you are well aware when cooking certain types of grains it can take hours. It wasn't until I prepared this Wheat Berry Salad that I learned I could utilize my rice cooker to do the task. I thought rice cookers were just for rice!
Babysitting my stove for 1 1/2 hours isn't my idea of fun, especially if walking away can lead to stuck burnt grains on the bottom of my pot. But, I was thrilled to read that there is a cookbook dediciated to all the foods you can prepare in your rice cooker. Now my rice cooker doesn't have to be an appliance that collects dust most of the time but one that can be used often.
Beth Hensperger and Julie Kaufmann who wrote "The Ultimate Rice Cooker Cookbook" share 250 No-Fail recipes from breakfast dishes straight through to dinner and dessert all using your handy little rice cooker.
For those of you that don't have a rice cooker I highly recommend getting one. Up to now I used mine most often when teaching sushi classes to make sushi rice or at home for jasmine rice. Rice comes out perfect every time, and all I have to do is put in the rice with water and turn on - the machine does the rest.
Rice cookers come in a broad range of prices however, you don't have to purchase the most expensive one. In fact, I've seen them for as low as $7 at Walgreens and Target and have personally used those with great success. The one I currently own was given to me as a gift from my sister. It was a bit pricey but works like a charm. I've had mine for probably 20 years.
If you cook any type of grain at all, do yourself a favor - purchase a rice cooker and sign up for my giveaway. Of course if you've already got one you definitely want to enter for your chance to win this fantastic cookbook.
In it's 10th Anniversary edition Hensperger and Kaufmann will help you make Risotto, Polenta, Chilis, Soups, Porridges, Puddings, dishes like Steamed Halibut Steaks and Scallops with Sweet Red Pepper Sauce, Tamales, Poached Dried Figs in Red Wine Sauce among so many others. Who knew your rice cooker could be so versatile? No me!
For your chance to win The Ultimate Rice Cooker Cookbook simply post a comment letting me know why you'd like to win this cookbook, and if you own a rice cooker what dishes you currently prepare in it?
For a second chance to increase your odds of winning, "Like Me" on Facebook and post in the comments section below.
For a third chance of winning, "Follow By Email" in the top right of my blog and post a comment letting me know.
The giveaway for The Ultimate Rice Cooker Cookbook will be selected at Random on Monday, March 19th, 2012. Please be sure when posting your comment to provide a link where you can be contacted. This way in the event you win The Ultimate Rice Cooker Cookbook I'll be able to reach you for your mailing address.
Remember, if you don't win you can always purchase the book on Amazon.
Good Luck!
THE WINNER OF THE ULTIMATE RICE COOKER COOKBOOK IS:
CONGRATULATIONS NAMI!
Sunday, 4 March 2012
Part 2: Orange Glazed Chicken with Wheat Berry Salad
Friday I posted Part 1 of my Orange Glazed Chicken with Wheat Berry Salad detailing how to cook and store Wheat Berries along with the salad recipe. Today I'm sharing how to make the Orange Glazed Chicken Breasts. I hope if you take the time to try these recipes you enjoy them as much as my family did.
Orange Glazed Chicken
serves 6
Ingredients:
6 boneless skinless chicken breasts
1/4 olive oil
zest of one orange
juice of one orange
1 tsp. each of salt and pepper
4 Tbsp. orange marmalade
4 Tbsp. Sweet Chili Sauce (found in Asian section at grocer)
Instructions:
Combine 1st five ingredients in a zip lock baggie, squish to coat chicken well and set aside to marinate from 30 minutes - 2 hours.
Combine marmalade and chili sauce and set aside.
Preheat your grill. Once preheated turn to medium heat and place chicken breasts skin side down (skin is removed or left on if you prefer) on the grates. Cook for 3-4 minutes per side depending on thickness. Flip breasts over and after about 2 minutes of grill time on the bottom side, spread the sauce over the top of each chicken breast until chicken is done.
Chicken can be baked, broiled or sauteed as well.
If you have trouble telling when your chicken is done check out my tutorial on how to grill perfect chicken.
Plating:
Once chicken is cooked, place a large scoop of the Wheat Berry Salad on a plate and top with Orange Glazed Chicken. Serve with fresh steamed or grilled veggies on the side.
Leftovers:
If you happen to have any leftovers this makes a great entree salad the next day for lunch. Simply cut the chicken into bite sized pieces and toss into the Wheat Berry Salad. It's positively delicious!
Enjoy!
Friday, 2 March 2012
Nutritious Wheat Berry Salad with Orange Glazed Chicken
Have you ever had Wheat Berries? They are utterly delicious! This whole grain is nutty, chewy, has a hearty flavor and texture, slightly sweet and so nutritious.
Wheat Berries contain the entire wheat kernel (except for the hull), comprising the bran, germ, and endosperm. The germ contains natural oils that can go rancid when exposed to air, so proper storage is necessary.
Wheat Berries have a tan to reddish brown color and are available as either a hard or soft processed grain. Containing beneficial minerals such as iron and magnesium, B vitamins, vitamin E, antioxidants, and fiber. While fiber isn't digested easily it does help with your digestion and keeps you feeling full longer which is helpful if you're trying to lose a few pounds.
Having a diet rich in whole grains significantly reduces the risk of heart disease, type 2 diabetes and stroke in addition to reducing the risk of certain cancers and obesity while lowering cholesterol levels..
Wheat Berries are often added to salads, baked into bread to add a crunchy texture or added to stews. It's important to plan ahead when preparing whole grains since many require hours of soaking.
Hard Red Wheat Berries require soaking 8-24 hours ahead. I covered mine with water - with about 2 inches above the grains, first thing in the morning. Two hours before dinner I drained them and placed 1 cup Wheat Berries with 2 1/2 cups water in a rice cooker. You can cook them in a crock pot, pressure cooker, on the stove top or microwave. For various cooking methods and instructions view here. I'm lazy and don't like to stand over them so I used my rice cooker and let it do all the work.
To bring out their nutty flavor you can even toast them in a skillet prior to cooking.
I cooked 1 cup of dry Wheat Berries (that had been soaked) yielding approximately 3 cups cooked. If you'd like to make a larger batch to save for later, it would be necessary to store the cooked Wheat Berries in a jar with tight fitting lid, for up to 5 days in the refrigerator. You can also freeze them for up to 3 months then simply defrost in the microwave or refrigerator overnight. To reheat in the microwave place in 1/4 inch of water, cover and heat over medium-low until they are softened and warm.
Note: If you forget to soak the Wheat Berries ahead of time you can also use the quick soak method like you would with beans. Placing Wheat Berries in a pot, covered with an inch of water, bring to a boil and cook for 2 minutes. Remove from heat, cover and let stand for 1 hour. Drain and cook as directed.
If you're like me and only cook what you're eating, then I recommend you store your dry Wheat Berries in a jar or container with a tight fitting lid. Store in a cool, dry pantry for up to several months. Since whole grains can go rancid, you could store them in the refrigerator but it's not necessary
Hopefully these tips will help insure that you make perfect Wheat Berries. On to the recipe!
Back in the late 70s, Julee Rosso & Sheila Lukins came out with The Silver Palate Cookbook which became a bible in everyone's kitchen. One recipe I have used over and over again is called "Nutted Rice." I love this recipe and so does everyone that's ever tasted it. I've tweaked it numerous times but when deciding to make a Wheat Berry Salad I thought of this recipe. Of course I've changed most every ingredient in this but, it was the Nutted Rice recipe that inspired me to make my Wheat Berry Salad. I think you'll enjoy it.
Besides Wheat Berries being packed with protein and nutrition I've added other heart healthy ingredients to this salad. I love the addition of fresh and dried fruits to my salads whenever I can, which makes them naturally sweet. If you aren't familiar with Plum Amazins they're diced dried plums that have 50% more fiber, 19% fewer calories amd 50% less sugars' than raisins and cranberries AND they're delicious! I decided to opt for these luscious little morsels to add that extra pizazz to my salad. With the addition of a fresh fruit vinaigrette and almonds it makes it next to impossible to stop eating.
Wheat Berry Salad
serves 6
Ingredients:
1 cup Wheat Berries (found at Whole Foods or Bob's Red Mill),
2 1/2 cups water
1 cup slivered, blanched almonds
1 cup SunSweet plum Amazins
zest of 1 large orange
4 scallions, thinly sliced
1/4 cup olive oil
1/3 cup fresh squeezed orange juice
salt and pepper to taste
Instructions:
Soak Wheat Berries for 8-24 hours in a pot of water covering 2 inches above the grains. Drain and place in desired vessel with water, following cooking instructions. Wheat Berries should take about 1 - 1 1/2 hours to cook unless using a pressure cooker.
Transfer cooked Wheat Berries to a bowl adding the rest of the ingredients. Let stand for at least 30 minutes to absorb the flavors. Serve at room temperature.
I think you'll love this salad.
Since I've included so much information here I think in a couple of days I'll go ahead and post my Orange Glazed Chicken that I made to go with this. So stay tuned.
Subscribe to:
Posts (Atom)


.jpg)
.jpg)