Pages

Tuesday, 31 May 2011

Cheddar Scallion Cornbread Madeleine's


Last night, although it was just my husband and I celebrating Memorial Day, I decided I'd make a fun meal.  So I made some incredibly delicious Asian BBQ Kobe Beef Ribs which I'll be posting in my newsletter next week, Asian Rainbow Slaw, BBQ Baked Beans and Cheddar Scallion Cornbread Madeleine's. To finish off our dinner we had some refreshing iced cold watermelon.

I know it sounds like a lot for just the two of us, but we like leftovers, and I'm sure my son will be popping over in the next day or so and open the refrigerator to see what might be in there that he can nibble on.  Not too much goes to waste in my house.

The meal was superb and while neither of us over indulged we licked our platters clean. 

I especially loved the Cornbread that I put in my Madeleine Pan.  It made for a perfect serving and of course if you wanted more there was plenty to go back to.

Although you can make these in a regular 9x13" pan why not go for the WOW factor and make them in something different?  If you like cornbread you'll love these, and with BBQ season here, they're perfect for large gatherings and easy to pick up.

If you try these please let me know what you think.

Cheddar Scallion Cornbread Madeleine's
Makes about 36 Madeleines or 18 squares


Ingredients:

Nonstick cooking spray or unsalted butter for preparing pan

2 cups all-purpose flour
1 cup yellow cornmeal
1 1/2 teaspoons baking powder
1 teaspoon baking soda
1/2 teaspoon kosher salt
Pinch of freshly ground pepper

2 large eggs
1/2 cup sugar
1/2 cup (1 stick) unsalted butter, melted and cooled
3/4 cup sour cream
1/2 cup whole milk

2 cups shredded sharp white Cheddar cheese
1 cup thinly sliced scallions, white and tender green parts

Directions:

Preheat the oven to 350 degree F. Spray 36 madeleine molds or one 9-by-13-by-2-inch baking pan with nonstick cooking spray, or grease with butter.

In a large bowl, stir together the flour, cornmeal, baking powder, baking soda, salt and white pepper. In a medium bowl, whisk together the eggs and sugar until thickened and smooth. Add the melted butter and whisk until incorporated. Then add the sour cream and milk and whisk until smooth.

Add the egg mixture to the flour mixture and stir until just until combined. Add the cheese and scallions and mix gently just until evenly incorporated. Do not overmix. Using a spoon, fill each prepared madeleine mold half full with batter. Or, pour the batter into the prepared baking pan.

Bake for 12 to 15 minutes, or until the corn bread is golden. Let cool in the madeleine pans or baking pan on a wire rack. Invert the pan onto the rack, or if using a rectangular pan cut into squares and remove from the pan. Serve warm or at room temperature.

Note: This recipe can easily be divided in half.

Enjoy!

Friday, 27 May 2011

Holiday Grilling Tips!

Memorial Day is just days away and traditionally starts off the grilling season.  With so much volatile weather I hope everyone gets the chance to celebrate it outdoors with family and friends.


Many of us will be grilling hamburgers, hot dogs and chicken and although you've probably been grilling these for years do you really know the best way?  Is your food juicy or dry?

Here are some tips to insure you have perfectly grilled hamburgers:
  • For the most tender and flavorful burgers get the freshest meat.  In fact, have your butcher grind you a combination of brisket and chuck about 45-55% ratio.  Brisket provides the richness while the chuck, a rich beefy flavor.
  • Keep the fat content at 22% for the best taste.  Although this is higher than the leanest beef you can pick up at the stores it will provide you with superior burgers, not dry, tasteless ones.
  • Make your patties at least 1 inch thick and at least 1 inch larger in diameter than the bun.  This way, when the burger cooks down, it will end up being about the same size as your bun.
  • When forming the burgers, work quickly and with a light touch, packing the meat as loosely as possible.  You will get a lighter texture and less shrinkage if you don't pack the meat.
  • Make a slight depression in the center of  each patty.  Burgers shrink more at the edges than in the center, so the indentation in the center will give you a patty of a more even thickness when the meat is cooked.  (Have you ever wondered why the centers take that much longer than the rest of the burger?  This is why, so don't forget to slightly press in the center of the raw burger with your thumb. It will make all the difference).
  • Store prepped burgers in a single layer in the refrigerator and salt and pepper the tops just before placing on the grill and the other side once flipped.
  • Use a spatula to flip the burgers, but never, ever press the tops with the spatula.  Pressing the burgers serves only to squeeze out the juices, leaving you with a dry burger. Only turn the burgers once.  This give you the best crust.
  • For a rare burger cook 4 1/2 to 5 minutes; for medium-rare 6-7 minutes; and for the safest burger cook to medium for about 8-9 minutes total.  However, grass-fed beef  poses less risk of bacterial contamination and is healthier for the planet if you can find it.  
  • For the best accuracy, check your burgers with an instant read thermometer for an internal temperature of 160 degrees.   
  • Let burgers rest for 2 minutes to allow the juices to relax and disperse.
  • If you don't want to go to the trouble of having your butcher grind the meat for you or doing it yourself, then pick up some KOBE burgers, they're amazing and delicious!  They can be found at fine grocery stores everywhere.
In addition to grilling burgers here is a list of the recommended internal temperatures for various meats.  Using an instant read thermometer will give you an accurate reading however, remember, DO NOT leave your instant read thermometer in the grill or oven.  Take it out after checking the internal temperatures.

USDA Recommended Safe Minimum Internal Temperatures:

Steaks & Roasts - 145 °F
Fish - 145 °F
Pork - 160 °F
Ground Beef - 160 °F
Egg Dishes - 160 °F
Chicken Breasts - 165 °F
Whole Poultry - 165 °F

 
For tips on How to Grill Perfect Chicken view a previous blog post.

Wishing you a safe and fantastic Memorial Day with great food and friends!

Happy Grilling!

Saturday, 21 May 2011

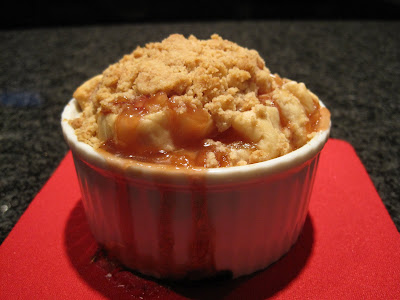
Individual Deep Dish Nectarine Crumb Pies


Yesterday was my 27 year anniversary to my husband, and although we could have gone to a million places for dinner I thought it would be nice to just stay home and have dinner.  My daughter was in town after finishing up her junior year of college and heading back to school for the summer in the morning. So having a nice home cooked meal just sounded better.  I decided to grill some nice Rib Eyes, make a delicious Panzanella Salad with baked potatoes and my daughter who loves to bake, wanted to make something special.

Since we're all fans of dessert, she decided on Individual Deep Dish Peach Crumb Pies, however, when we got to the grocery store the Peaches just didn't look so great, so we opted for the Nectarines which were sweet, ripe and delicious.

There's something about getting your own special serving of dessert.  Not like a slice of pie but your own special portion made especially for you.

This recipe is so simple and creates stunning results that will have your guests oohing and aahing when they see it, then taste it, and wishing they could be such a great cook.  However, you'll be the only one to know just how simple this was to create.

To insure that all goes smooth you just need to prep all your ingredients ahead of time and have them ready when you need to use them ("Mise en Place"). 

*You will need four, 6 ounce (3/4-cup) ramekins plus a 6-7 inch metal ring or round lid for cutting the dough. (I used the top to one of my glass bowls).


Individual Deep Dish Nectarine Crumb Pies
serves 4

Ingredients:
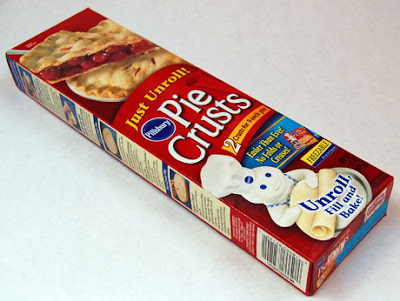
1 box Pillsbury (14.1 ounce) pie crusts (found at your grocery store)


Nectarine Filling:

6 ripe medium Nectarines, pitted, and cut into 1/2 inch cubes
1/2 cup packed light brown sugar
2 teaspoons cornstarch
1 teaspoon pure vanilla extract

Streusel:

1/3 cup plus 1 tablespoon unbleached all-purpose flour
1 tablespoon superfine sugar
1 tablespoon light brown sugar
1/8 teaspoon ground cinnamon
1 1/2 tablespoon unsalted butter, melted
1/8 teaspoon pure vanilla extract

Preheat oven to 350 F. degrees.  Line a sheet pan with parchment paper.  Butter the insides of the four 6-ounce ramekins.  Dust the insides well with flour, being sure they are comepletly coated, and tap out the excess flour.  Set aside.

Filling Directions:

Combine the Nectarines, brown sugar, cornstarch, and vanilla in a medium bowl.  Mix and let stand while preparing the crumb pies.

Streusel Directions:

Combine the flour, superfine sugar, brown sugar, and cinnamon in a small bowl.  Stir the melted butter and vanilla together in another small bowl.  Gradually stir the butter mixture into the flour mixture, just until evenly moistened (you may not need all the butter).  Squeeze the mixture in your hands until thoroughly combined.  Crumble the mixture in the bowl to make fine crumbs with some small lumps.  Set the streusel aside.

On a lightly floured surface, open one of the packages of pie crust, unroll, and with a rolling pin, roll the dough until it's about 1/8 of an inch thick.  Using a 6-7 inch ring, etc. as a template, cut out 4 rounds of dough.  You may have to reroll the scraps together after the first 2 are cut.  Place the rounds into each one of the 4 ramekins and place in the refrigerator so they don't get too soft while working on the others.

Be sure to fit the rounds of dough into the ramekins by pressing evenly into the corners.  Let the excess dough hang over the top and sides of the ramekin. Place ramekins onto a cookie sheet lined with parchment paper.

Scoop the filling into the shells, piling it just above the edge of the ramekin.  One at a time, pleat the pastry over the filling - the center of the filling will be exposed.  Gently press the streusel over the top of the dough and filling.

Bake until the tops are nicely browned, 50-60 minutes.  If the tops start to brown too much you can tent them with foil.  Transfer the ramekins to a wire rack and cool, about 20 minutes.  (Do not let the pies cool completely, or they may stick to the ramekins and be difficult to remove.  If this happens, you can still eat the pies directly in the ramekins.  It's not necessary to remove them, but does make a nice presentation, especially if you decided to serve them with ice cream.


To unmold the pies, carefully run a knife around the inside of the ramekin to loosen the crust, and invert the pie into your hand to unmold.  Place the pie right side up onto the the wire rack or a plate.


Serve warm or at room temperature.

These would also be great made with peaches, apples or blueberries or even a combination of any or all of them.

Enjoy!

Thursday, 19 May 2011

Chocolate Chubbies


If you love extremely moist, gooey and intensely chocolate chocolate chip cookies then these cookies are for you.  However beware! Ration these cookies, and I highly recommend eating them with a tall glass of milk, otherwise, you could seriously overdose on chocolate.

Although there are several steps to making these, they're really quick to put together.  Just be sure to have all your ingredients set out, measured, and in place prior to starting.  This is called "mise en place."  Plus, be sure to use the best possible chocolate that you can find, to truely make these a memorable experience when indulging.

Chocolate Chubbies
makes 2 dozen cookies (using a 2-inch ice cream scoop)

Ingredients:

8 tbsp. (1 stick) unsalted butter, cut into 1/2 inch cubes
9 ounces bittersweet chocolate (no more than 62% cacao), finely chopped
3 ounces unsweetened chocolate, finely chopped
1/2 cup unbleached all-purpose flour
1/2 teaspoon baking powder
1/4 teaspoon fine sea salt or kosher salt
3 large eggs, room temperature
1 1/4 cups superfine sugar
2 teaspoons pure vanilla
2 cups (12 ounces) semisweet chocolate chips
1 1/2 cups chopped pecans

Directions:

Preheat oven to 350 F. degrees.  Line baking sheets with parchment paper.

In a saucepan bring 1 inch of water to a simmer over low heat.  Place a heatproof bowl on the saucepan and place cubes of butter over the hot water bath and melt.


Add the semisweet and unsweetened chocolate, stirring often, until melted and the mixture is smooth.  Remove the bowl from the heat and let stand, stirring occasionally, until cooled slightly but still warm, about 5 minutes.


Sift the flour, baking powder, and salt together into a medium bowl.  Whip the eggs in the bowl of a heavy-duty stand mixer fitted with the whisk attachment on medium high speed until the eggs are foamy and lightly thickened, about 1 minute.  Increase the speed to high and gradually add the sugar, then the vanilla.  Whip until the eggs are very thick and pale yellow, about 3 minutes.  Reduce the mixer speed to medium and beat in the tepid chocolate, making sure it is completely incorporated. 


Change to the paddle attachement and reduce the mixer speed to low.  Gradually add the flour mixture. 


Remove the bowl from the mixer.  Stir in the chocolate chips and pecans, making sure they are evenly distributed.


Using a 2 inch diameter ice cream scoop, portion the batter onto the prepared pans, placing the cookies about 1 1/2 inches apart.  Bake the cookies immediately - if you wait, they won't be shiny after baking.


Bake for 17-20 minutes on bake mode or 10-13 minutes on convection bake.  DO NOT OVERBAKE!


Cool completely on the baking pans.  Store in an airtight container at room temperature, with the layers separated by parchment paper, for up to 3 days.

Enjoy!

Friday, 13 May 2011

Join Me for the Share Our Strength Bake Sale!


Join me this Saturday, May 14th, 2011 along with lots of other St Louis Food Bloggers for the Share Our Strength Bake Sale!

There will be lots of delicious goodies for you to choose from but most of all, 100% of the proceeds will go to Share Our Strength, the leading national organization working to make sure no child in America grows up hungry.

Where:

Sappington Farmers' Market

8400 Watson Road
St. Louis, Mo.  63119

When: 10:00am - 2:00 pm

In addition, Sappington Farmers' Market will also donate a portion of the proceeds to Share Our Strength. 

So what are you waiting for, pack up the kids in the car and head on over to the Share Our Strength Bake Sale.  I'll be there from 11:30-12:30 so please stop by and say hello.

See you tomorrow!

Tuesday, 10 May 2011

Fresh Spinach Salad with Poppy Seed Dressing!

This afternoon I threw together a fresh spinach salad for lunch.  I love spinach.  In fact, when I was a little girl I ate so much of it my family would often refer to me as Popeye.  I thought if I ate enough spinach I could be as strong as Popeye which would have been very cool.  Instead I remained a skinny little tomboy with lots of bruises from being so active. 

To this day, I often crave spinach, as I did this afternoon for lunch.  So I made this refreshing salad with fresh berries that I had leftover from Mother's Day. 


Fresh Spinach Salad with Poppy Seed Dressing
serves 6

Ingredients for Dressing:

1/4 cup rice vinegar (not rice wine vinegar)
2 tbsp. sugar
2 tsp poppy seeds
1/2 tsp. dry mustard
salt and pepper to taste
3/4 cup canola oil

Salad ingredients:

6 cups baby spinach leaves
2 cups strawberries, hulled and sliced
1/4 cup thinly sliced red onion
1 yellow bell pepper, thinly sliced
1/4 cup toasted almonds

Directions:

In a small bowl, whisk together the vinegar, sugar, poppy seeds, dry mustard, salt and pepper.  Whisk while slowly adding in the canola oil until the vinaigrette is well combined.

In a large bowl, toss together the spinach, strawberries, onion slices, peppers and almonds.  Add a portion of the vinaigrette and toss gently.  Taste and adjust by adding more vinaigrette if needed.  Serve immediately.

Enjoy this light and nutritious salad!

Don't forget to enter my OXO Mandoline Slicer Giveaway, for your chance to win this incredible kitchen tool!  Giveaway ends this Friday, May 13th.

Sunday, 8 May 2011

Lemon Cake Roll with Lemon Curd Filling


Happy Mother's Day to those of you celebrating today!  Although I hope you all show your moms how grateful you are to have them in your lives everyday, it's still nice to devote a special day to them.

Happy Mother's Day Mom.  I LOVE YOU!

As I mentioned in a previous post, I'll be doing Mother's Day at my home.  My mom, sister and in-laws will be coming over for dinner to celebrate with my family.  Since everyone's coming over I like to make a special dinner.  I'll be making a glazed salmon with spinach and grape tomatoes along with some sides and a salad.  In addition, I thought it would be fun to make a Lemon Cake Roll with a Lemon Curd filling.  I love making roulades whether they're for an appetizer, entree or dessert, just because they are so pretty.  They look difficult but are really quite simple.  I also adore lemon curd.  The flavor is so smooth and mellow that I salivate just thinking about it.  So together I know they'll be a hit.

However, just to play it safe I'm going to whip up a batch of chocolate chip cookies.  For those who desperately need some chocolate to finish they're meal.

Whether you're making Mother's Day dinner at your home or going out I hope you have a wonderful day.

My Mother's Day gift to you is to share this wonderful recipe.  It takes no time to prepare and if you're still contemplating what to make for dessert, you still have time to whip this up and have it ready in time for dinner.

Here's the recipe.......


Lemon Cake Roll with Lemon Curd Filling
serves 10

Ingredients for Sponge Cake:

6 eggs
1 cup sugar
Grated rind of 1/2 a lemon
1/2 teaspoon pure vanilla extract
1 cup unbleached flour
1 teaspoon baking powder
1/2 cup confectioners' sugar

Ingredients for Lemon Curd Filling:

2 eggs
2 egg yolks
1 cup sugar
Grated rind and juice of 2 lemons
1/2 cup (1 stick) butter

Confectioners' sugar for garnish

Preheat the oven to 350 F degrees.

Butter an 8x12 inch baking sheet, then line with buttered parchment paper, and set it aside.


To make the sponge cake, place the eggs, sugar, lemon rind, and vanilla in the bowl of an electric mixer and beat at high speed until the mixture is light and has tripled in volume.  Mix the flour with the baking powder.  Using a rubber spatula, fold this in, being careful not to deflate the egg mixture too much. 


Pour the batter onto the prepared baking sheet with a 1-inch rim. 


Bake for 18-20 minutes, or until the sponge cake is very lightly browned.  Let cool for 5 minutes. 


Then invert the cake onto a damp kitchen towel sprinkled with the confectioners' sugar.  Gently peel off the parchment paper. Carefully roll the cake lengthwise in the towel.  Wrap in foil and let cool at room temperature.  


To make the filling, whisk together the eggs, egg yolks, sugar, lemon rind and juice in a tempered glass bowl, then add the butter and place over a pot of simmering water.  Cook over low heat whisking constantly until the lemon curd starts to thicken.  This could take 20-30 minutes.  Let cool at least an hour. 


Unroll the cake.  Cover with the lemon curd, then carefully roll the cake again, this time without the towel.  Transfer to a serving platter.  Dust with confectioners' sugar.  Chill 1 hour or longer.

Slice and serve with fresh berries and whipped cream if desired.

Enjoy!

Sunday, 1 May 2011

OXO Good Grips Mandoline Slicer Giveaway!


I love this time of year.  The weather is warmer and generally most people tend to eat healthier by eating lots of fruits, vegetables and fish.  I'm not sure if it's just because of the weather or because it's getting close to bathing suit season.

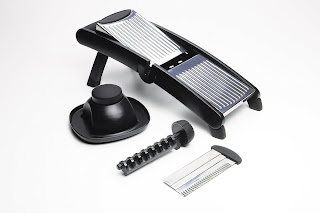
At any rate, I use my OXO Mandoline all year round but find I use it even more from Spring through Fall.  It slices fruits and veggies lickity split, without a fuss and doesn't cut my hands or fingers!  With a variety of attachments, sizes and shapes, it makes slicing a snap. 


In fact, when my children were little I'd have them help me in the kitchen by slicing the fruits and vegetables with the Mandoline.  So long as they used the safety grip handle I didn't have to worry about any injuries.  Best of all they loved helping me, and thought it was fun to use the Mandoline.

I've been using mine for as long as I can remember, and thought it would be nice to offer the OXO Good Grips Mandoline  as a giveaway to those of you that read my blog.  I love mine and I'm sure if you win, you'll love yours as well.  Of course, if you don't win, I still highly recommend purchasing one for yourself.  At just $69.99they're well worth it and also make the perfect gift for a friend, college student or bride to be. 

If you've never seen how they work before here's a great video that will show you all the details.


I know after watching this video you can't wait to try and win one thru my giveaway.  So here's all you need to do. 

The first 3 things listed are mandatory.  The others (4 & 5) are not mandatory, but each time you do one of the numbers, make sure you let me know by posting it on my blog.  Each time you post that you've joined one of the 5 items, it will increase your chances of winning the OXO Mandoline.
  1. "Like" the OXO facebook page, then post a comment on my blog that you did so.
  2. "Like" my facebook page, then post a comment on my blog that you did so.
  3. Follow me on Google Friend Connect on my blog, then post a comment on my blog that you did so.
  4. Follow my blog by Email which is located in the upper right of my blog.  It says, "Follow by Email."Then post a comment on my blog that you did so.
  5. Lastly sign up for my Monthly Newsletter. This comes out at the beginning of each month with recipes, tips and everything food related. Then post a comment on my blog that you did so.
This contest is open to U.S. residents only.  I'm so sorry to those that follow my blog that live outside of the U.S but due to shipping costs we are unable to ship outside of the United States. 

My OXO Good Grips Mandoline Slicer Giveaway ends on lucky Friday, May 13th.  The winner will be selected at Random and their OXO Mandoline will be shipped directly from OXO.

Please be sure to enter your contact information when following me, so in the event you are the winner, I will be able to contact you.  The winner will have 48 hours to respond otherwise another winner will be selected at Random.

So what are you waiting for.  Try your chances now at winning this incredible kitchen tool, the OXO Good Grips Mandoline Slicer.

I absolutely love the OXO products.  In fact after posting the above post I went on the OXO website to see just how many pieces I have that they make.  I have 23 pieces, all of which I use.  They are:
  • Good Grips Soap Squirting Brush           
  • food storage containers
  • measuring cups in various sizes
  • ice cream scooop
  • mandoline
  • tongs
  • spatula
  • salad spinner
  • corn peeler
  • swivel peeler
  • oil stopper/pourer
  • apple divider
  • dough blender
  • bench scraper
  • 3", 6" and 8" strainer
  • corn holders
  • meat pounder
  • serving tongs
  • pie server
  • whisk
  • can opener
I was amazed.  I think I should consider buying stock in this company.  I love their grip handles that keep your wet hands from not slipping.  In fact everyone of the products that I have work to perfection and have never broken. Take it from me, OXO products are fantastic!  Check out their website for more information on all their products.

Congratulations #26 VickieB from California you have won the OXO Good Grips Mandoline Slicer!