Pages

Wednesday, 28 July 2010

Edamame Salad


The other day I hiked my first 14,000 foot mountain out here in the Colorado Mountains. I was exhausted but thrilled that I climbed the mountain especially after attempting it 2x before. The first time bad weather came in and we had to turn back and the second time my head started to throb. This time I took it slow and I achieved what I set out to do.

When I returned from my hike I was in the mood for some healthy food. So I grilled up some chicken and made an Edamame Salad along with some fresh fruit. It all tasted great, just what was needed after a day of hiking.

Then yesterday for lunch I took my Edamame Salad and sliced up the grilled chicken and put it on top. The two mixed together tasted perfect and light for an afternoon lunch or light dinner.

I'd never made an Edamame Salad before but just gathered up some ingredients at the store that I thought would go well together. I love eating Edamame with the pods or without plus they are so good for you.

Here's how I made my salad. Of course feel free to add whatever ingredients sounds good to you. When I was gathering up my ingredients I had to keep in mind what the rest of my family would eat. They typically aren't as adventurous as I am.

Edamame Salad
(serves 6-8 as a side dish, 4 as a main dish)

1 package frozen Edamame, shelled, and cooked (according to package)
1 cup (approximately) frozen corn, thawed or roasted and removed from the cob
1 red pepper, cut into 1/4 inch dice
2-3 scallions, sliced
6 basil leaves, sliced chiffonade style
zest from 1/2 a medium orange
juice of a medium size orange
1 teaspoon extra-virgin olive oil
1 teaspoon honey
salt and pepper to taste

Mix first 6 ingredients together. Then blend together the dressing and pour over the Edamame mixture and stir until well combined. Cover and refrigerate for at least 2 hours to let flavors meld together.

This is delicious served as a side dish or top with chicken or fish to make a nice entree salad. Cilantro would also be a nice addition to this salad but some of my family members aren't fond of the flavor.

Sunday, 25 July 2010

Foodbuzz 24x24: Blue Corn Encrusted Tilapia with a Raspberry Chipotle Sauce


A few weeks ago Foodbuzz.com a site I frequent where other foodies share recipes sent out an email with this statement:

Since the devastating explosion on April 20, 2010, the Gulf of Mexico has been forever changed. Not only does this affect us now, but we will see even greater long-term devastation to our food system. From fisherman to chefs, everyone is preparing themselves for a magnitude of change.

Since food is so close to our hearts, we wanted to reach out to our passionate community of Featured Publishers to get involved! We are challenging you to come up with your best Gulf Inspired cuisine. Keeping with the past 24x24 Foodbuzz will still pick 24 bloggers to re-create a meal for family and friends, the only twist is that your stipend of $250 will automatically be donated to the Greater New Orleans Foundation, who will donate 100% of the proceeds to the fisherman and their families affected by the spill.


I thought for a minute and then remembered the post I made for my Blue Corn Encrusted Tilapia with Raspberry Chipotle Sauce. This dish was delicious but when I looked at the photo I took it reminded me of those horrific pictures of the wildlife on the Gulf Coast covered in oil. The Tilapia although covered with Blue Corn Chips looks as though it could be covered with oil. The Raspberry Chipotle Sauce to me symbolizes the blood, sweat and tears that the residents, business owners, fishermen, etc. are enduring from this disaster.

Although this doesn't sound like a pleasant meal to share with family and friends on this day it reminds us of what we all need to do to help in the clean-up.

This dish is quite delicious and simple to prepare but I hope that those of you out there reading this will do what you can to help too.

To my surprise my dish was one of the 24 selected to be shared on Foodbuzz and with all of you that read my blog along with my family while we vacation in the Colorado Mountains.

If you too would like to help this is a site I found that offers suggestions as well as this one.

In the meantime, if you would like to make the recipe that I submitted to Foodbuzz for the Blue Corn Encrusted Tilapia with Raspberry Chipotle Sauce here it is. I hope you enjoy it!

Blue Corn Encrusted Tilapia with Raspberry Chipotle Sauce

4 pieces of Tilapia (or your favorite white fish)
1 bag of Blue Corn Chips
egg whites or an egg (I used egg whites since we had those in the house)

Crumble or puree in the food processor the Blue Corn Chips.

Brush egg whites over the fish. After coating with egg whites I took the tilapia pieces one at a time and placed them in one of the zip lock bags, sealed and shook each piece until coated.

I placed each encrusted piece of Tilapia on a heavy duty foil line jelly roll pan, coated with non-stick spray. Then sprayed the top of each piece of encrusted fish with the non-stick spray. This helps for moisture and to brown the coating.

I then placed the pan in a 350 oven for approximately 8-10 minutes. When I prepared this dish previously I only had one oven to work with that was already in use so I decided to put these on the grill outside to cook but sealed the heavy duty foil around the fish. This method took about 6-8 minutes on medium heat. All turning out perfectly cooked and moist.

Prior to preparing the encrusted fish I made the Raspberry Chipotle sauce. This makes about 2 cups and is so tasty. It has a bit of a kick to it but if spice isn't a problem then go with the recipe I have posted below. Otherwise you may want to use a little less of the Chipotle Peppers in Adobo Sauce.

Raspberry Chipotle Sauce
makes 2 cups

2 cups fresh raspberries, rinsed and drained
1/4 cup chipotle peppers in adobo sauce, chopped
1 clove garlic, minced
1/2 medium red onion, minced
1 red tomato, diced
1 tbsp. brown sugar or agave nectar
1 tbsp. lime juice
1 tbsp. raspberry jam
salt and pepper
2 tbsp. extra-virgin olive oil

Heat all ingredients in a saucepan for approximately 15 minutes. Cool for a few minutes and place in a food processor or blender to puree or rough chop (whichever consistency you prefer)

To Serve:

Place Blue Corn Encrusted Tilapia on a plate and drizzle the Raspberry Chipotle Sauce over the top.

Saturday, 24 July 2010

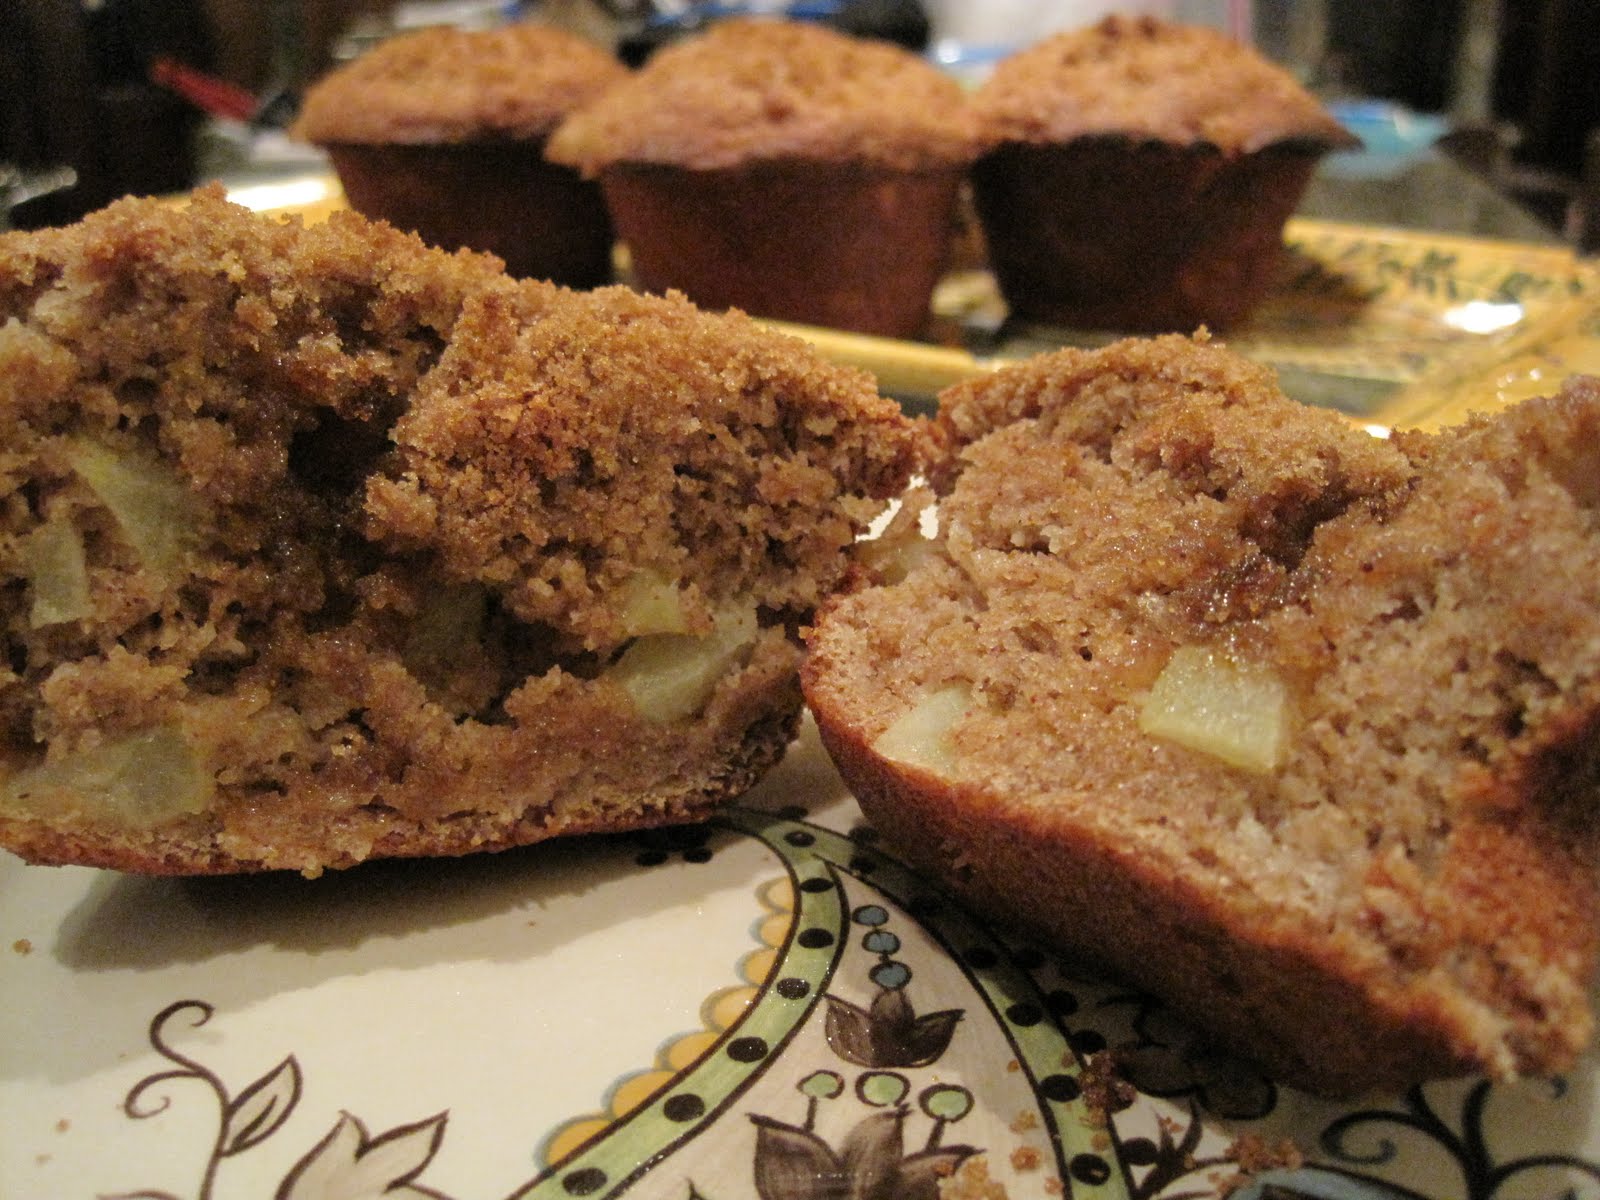
Whole Wheat Apple Chunk Muffins


My daughter and I have been baking far too much while we've been out here in Colorado. I usually come back 5 pounds lighter from all the exercising I do but this year I'm afraid I may come back 5 pounds heavier. At any rate we're having fun and that's all that counts.

Yesterday I summitted my first 14,000 ft. mountain and although I was exhausted we decided since we had some extra apples that we would attempt to make some Whole Wheat Apple Chunk Muffins.

After viewing many recipes and some of my own that I created, I came up with this one. This recipe is sweeter than the previous Whole Wheat Banana Oat Muffins that I posted so feel free to reduce the amount of sugar if you feel it necessary. However, everyone in my family loved these. The extra brown sugar topping puts these over the top plus they are moist and delicious! I think you'll love them!

Whole Wheat Apple Chunk Muffins
(makes 6 large or 12 regular size)

Dry Ingredients:

1 tsp. cinnamon
1 3/4 cup whole wheat flour
1/2 cup sugar
1/4 cup brown sugar plus additional for topping
2 tsp. baking powder
1 tsp. baking soda

Wet Ingredients:

1 Tbsp. honey
2 eggs
2/3 cup vanilla yogurt (used Light & Fit by Dannon)
1 1/2 cup peeled, seeded and chopped Granny Smith Apples, 1/4 inch chunks
1/2 cup natural applesauce

Mix dry ingredients together.

Mix wet ingredients together then add apple chunks. Blend wet and dry ingredients together.

Pour into muffin tins coated with non-stick spray. Sprinkle tops of raw batter with brown sugar.

Bake at 400 degree for approximately 20-25 minutes or until toothpick inserted comes out clean.

*Note: Do not slice apples until both dry and wet ingredients have been prepared. This will avoid the apples turning brown.

Enjoy!

Wednesday, 21 July 2010

Non-Stick Pans


Most of us have at least one non-stick pan. In fact we've been using them for years. There are so many different brands. My mom and mother-in-law have been using the same ones for at least 10 years and have never bothered to replace them even when the coating on them started to peel. But how safe can it be to take a bite of your egg with bits of non-stick coating peeling off onto your egg? For that matter who wants to eat their egg with those black bits scattered throughout looking like pepper? Not me!

Well there's been quite a bit of discussion on this topic of how it can cause cancer, birth defects and a myriad of other illnesses. The chemical in question is PFOA.

However, about 6 years ago I discovered the Scanpan. This non-stick pan has proven the test of time. Not only can you use high heat without any toxic properties peeling or seeking into your food and blood stream but these pans can be put into the oven up to 500 degrees and be used with metal utensils as well. AMAZING!

Here are a few facts about the Scanpan:

•PFOA-free
•Made from 100% recycled, squeeze cast aluminum
•Fry without the use of fat or oils
•Our patented ceramic titanium surface with our GreenTek non-stick allows the use of any utensil, including metal utensils
•Suitable for all stove tops, certain models can be used on induction burners
•Guaranteed not to warp
•Fast and even heat distribution and superb heat retention
•Oven safe to 500°F
•Our pans are easy to clean and dishwasher safe
•Our Stay-cool, bakelite handles are attached via a patented locking system without the use of screws or rivets for maximum durability
•Designed and manufactured in Denmark
•Lifetime Warranty

What's Green Tek?

Scanpan is the world’s first manufacturer of nonstick cookware that was certified PFOA-free. Recent concerns linked to PFOA and its environmental impact prompted them to develop a PTFE compound that would not require a PFOA emulsifier.

Prior to GREEN TEK, PFOA was used to support the polymerization of PTFE though it was always extracted after the production process. By the time the nonstick compound was applied to the pan surface, PFOA was no longer present.

They want to assure their customers that Scanpan cookware is completely free of PFOA during all stages of their manufacturing process.

Their GREENTEK nonstick compound continues to work flawlessly in conjunction with their patented Ceramic Titanium technology and customers will see no difference in Scanpan's superior performance in their Classic, Professional and CTX cookware ranges.

I love this pan so much that I purchased them for both my mom and mother-on-law and they love them.

Last year when my daughter moved into her first apartment at college I told her I was going to get her some Scanpans. She refused to have me buy her such superior cookware and insisted that she was going to get the inexpensive non-stick cookware. She was worried her friends would ruin the good stuff.

You know how kids can be. I was that age before and wasn't much different. So I said fine. Within 2 months she told me the non-stick surface was peeling and chipping into their food. I told her to throw them away and I would get some Scanpan pieces along with some 18/10 stainless cookware.

Of course, I spent a few more bucks having to go back out and get something else but she learned on her own what wasn't good and now she's a better consumer shopper for it.

Scanpans come in several different styles the Classic, Professional and CTX.

Do yourself a favor and don't just listen to me. If you have one of the old non-stick pans purchase just one of the Scanpans and test it out for yourself. I'm sure you'll agree with me. These pans are wonderful! Plus, if there's someone you love that is still using one of the old non-stick pans that's chipping, buy them a Scanpan.

Not only will it be a nice gift but a healthy and thoughtful one as well!

Tuesday, 20 July 2010

7 Layer Magic Bars


Ever since I was a little girl occasionally I would have this delicious cookie bar but never knew the name of it. It was so good that I'd always want to go back for seconds. However, who wouldn't with all the luscious ingredients in this delectable bar.

It wasn't until just recently that I came across a recipe that sounded just like the one I had as a kid. So last night I decided to try and make it. I'm sure many of you have had this and made it before but, not knowing it's name I never had the opportunity to make the recipe.

It's called a 7 Layer Magic Bar and oh my goodness it's to die for!

The recipe can be found in many forms but the original version comes from Eagle Brand Foods.

I can tell you that after making it, the recipe tastes best cold rather than warm, in my opinion. But, you be the judge. Here's the recipe.

I tried the recipe placing the ingredients in this order:

Graham Cracker Crumbs
Chocolate Chips
Butterscotch Chips
Chopped pecans
Eagle Brand Sweetened Condensed Milk
Coconut

However, next time we thought it would be fun to try replacing the butterscotch chips with peanut butter chips. Of course the best part of trying a recipe is to modify it to your taste or dietary needs.

I think this would be a great dessert to bring to a party or have at your own. It's quick and simple to prepare and heavenly tasting!

If you've made this before how have you changed the recipe?

This is so yummy I'm certain by days end the entire 9x13 pan will be gone!

Thursday, 15 July 2010

Coffee Granita with Bailey's Drizzled Whipped Cream


Yesterday morning I made a large pot of coffee only to find out I was the only one drinking it. So with the leftovers I decided I'd make a batch of Coffee Granita's that I knew would be ready in time for dinner.

I took 2 cups of the coffee (any kind will work) and 3/4 cup of sugar. Blended them together until the sugar dissolved and then placed the mixture in the freezer. About 2 hours later I opened the freezer and with a fork I scraped the edges to loosen which were frozen. Then put the glass bowl that the mixture was in back to the freezer.

An hour later I did the same thing again and continued with this process until all the mixture was frozen and had been scraped into what looked like shavings or snowcone-like.

Then after dinner last night I took a martini glass and placed some of the frozen Coffee Granita into it. I then placed some homemade whipped cream on top and drizzled it with Bailey's Irish Cream Liqueur.

All I can tell you was that it was so unbelieveably delicious! It was cold and refreshing plus with the whipped cream drizzled with the Bailey's it put it over the top. It wasn't too sweet but smooth and just right in my opinion.

If you don't want to make homemade whipped cream which is so simple with an "iSi" then just purchase some of the ready-made stuff. However, if you've never used an iSi you might consider purchasing one. It makes making whipped cream a cinch. Just add the whipping cream, CO2 cartrige, shake and you've got the real stuff. You can even doctor it up if you like with various syrups, etc. Use it as a topping for beverages, desserts, use it for sauces and even soups. It's simple and quick! Here's a video demo from the makers of iSi. I think you'll find it entertaining!

At any rate, if you like coffee I know you'll love this Granita. It was like having an after dinner drink and dessert all in one. YUM!!!

Friday, 9 July 2010

Tips for Juicing Lemons, Limes and Oranges


If you're like me when you purchase most fruit you bring it home and put it in the refrigerator. But then when you need to use the fruit juice in a recipe it's next to impossible to get any juice out of it.

What to do?

To get the greatest yield of juice from your lemon, lime or orange, squeeze it when it's at room temperature. If left in the refrigerator, place it in the microwave for about 15 seconds before squeezing. This way yields a greater amount of juice versus trying to juice it when it's cold. Don't over microwave and boil the juice, then of course it won't be good at all.

It's also a good idea to roll the fruit on the countertop pressing firmly between the palm of your hand and the countertop before squeezing. This will help to release the juice.

What do you do if you only need a small amount of juice and don't want to waste the fruit?

Use a toothpick to puncture the skin and squeeze out the amount that's needed. Then plug the hole back up with that same toothpick, place in plastic wrap and store in the refrigerator.

Fresh squeezed juice can be stored in the refrigerator for about one week. If you need to store it longer try placing the juice in ice cube trays and freezing it for later. Then only pop out the amount you need for next time.

Wondering how many lemons, limes or oranges that you'll need for a recipe?

1 medium Lemon =

approximately 2-3 tablespoons of lemon juice
approximately 1 tablespoon of lemon zest or peel

1 medium lime =

approximately 2 tablespoons of lime juice
approximately 1 teaspoon of lime zest or peel

1 medium orange =

approximately 1/3 - 1/2 cup orange juice
approximately 2 tablespoons of orange zest or peel


This is one of my favorite tools for juicing.


Juicer on Foodista