Pages

Wednesday 26 October 2011

Pumpkin Cake Balls/Pops


Halloween is just days away when cute little munchkins run around with scary costumes consuming sugary treats.  Dentists love Halloween but moms and dads dread the weeks that follow when your child is off the wall on a sugar high, unless you manage their intake. 

My folks let me eat chocolate and candy by the bushel maybe because they loved it as well.  I let mine indulge but then rationed their candy after the big day.  Others I know don't allow their kids to have any after Halloween and some don't go out at all. 

Whatever your family does works well for you however, I just had to share this recipe for Pumpkin Cake Balls & Pops in the event you like to celebrate and indulge.


Cake Balls have been around for quite a few years.  I'm not certain of the exact date or year but they were introduced by Angie Dudley the creator of Bakerella and her book Cake Pops.  However, Angie discovered Cake Balls while attending a party and took it from there.  So the mystery is who actually created them?

The basic premise behind a Cake Ball or Cake Pop is simply taking...
your favorite cake recipe plus icing and blending them together.  Make the cake; crumble; make the icing and blend into the cooled and crumbled cake, scoop into balls, then coat with Confectionery Coating and decorate to your hearts content.

Confectionery Coating is used as a dip for candies.  Confectionery, summer coating or candy melts  are a blend of sugar, milk powder, hardened vegetable fat and various flavorings. They come in a variety of pastel colors. Some have lowfat cocoa powder added, but they do not contain cocoa butter.  They taste delicious, but don't require the careful melting procedures of chocolate which makes cooking with them stressless! The Wilton Company has some handy tips when working with Confectionery Coating that you might find helpful.

If you're not into baking from scratch, use a box cake mix and add the prepackaged icing to the crumbled cake......


Whether celebrating a birthday, holiday, bridal shower, baby shower, etc., cake balls are the perfect size.  In a world where so many watch what they eat, Cake Balls or Pops take the guilt out of indulging, the same for dessert shots which are also the rage these days.

Below is my yummy recipe for Halloween Pumpkin Cake Balls & Cake Pops.  With endless decorating possibilities I opted for a simple design.  I'm sure you have some decorating ideas up your sleeve though.  Please share your ideas with us!

Pumpkin Cake Balls & Pops
makes approximately 80

Ingredients:

  • 1 can (15 ounces) solid-pack pumpkin
  • 4 eggs
  • 3/4 cup canola oil
  • 2 teaspoons vanilla extract
  • 2 cups all-purpose flour
  • 2 cups sugar
  • 1 tablespoon pumpkin pie spice
  • 2 teaspoons ground cinnamon
  • 2 teaspoons baking powder
  • 1 teaspoon baking soda
  • 1/2 teaspoon salt
    FROSTING:
  • 6 tablespoons butter, softened
  • 1 package (3 ounces) cream cheese, softened
  • 1 teaspoon vanilla extract
  • 1 teaspoon milk
  • 1/8 teaspoon salt
  • 1-1/2 to 2 cups confectioners' sugar

Directions:

  • In a large bowl, beat the pumpkin, eggs, oil and vanilla until blended. Combine dry ingredients; gradually stir into pumpkin mixture.
  • Pour into a greased 15-in. x 10-in. x 1-in. baking pan. Bake at 350° for 20-25 minutes or until a toothpick inserted near the center comes out clean. Cool in pan on a wire rack.
  • In a small bowl, beat the butter, cream cheese, vanilla, milk and salt until smooth. Gradually add confectioners' sugar until smooth.

Let cake cool completely, then crumble cake and thoroughly mix in cream cheese frosting


Scoop out cake balls with a small ice cream scoop; place on a tray and set in the refrigerator to chill or in the freezer for later.

If removing from the freezer allow about 20 minutes for the cake ballls to defrost.  Pick up balls and individually roll in the palm of your hand to make a round smooth ball.


In a microwave safe bowl, heat confectionery coating for 30 seconds, stir, heat for another 30 seconds, stir and then for a final 30 seconds and stir.  (Do not microwave all at one time or it will harden) At this point the coating should be smooth.  If desired add in Candy Color and if needs  to be thinner you can add Paramount Crystals to the already heated coating.


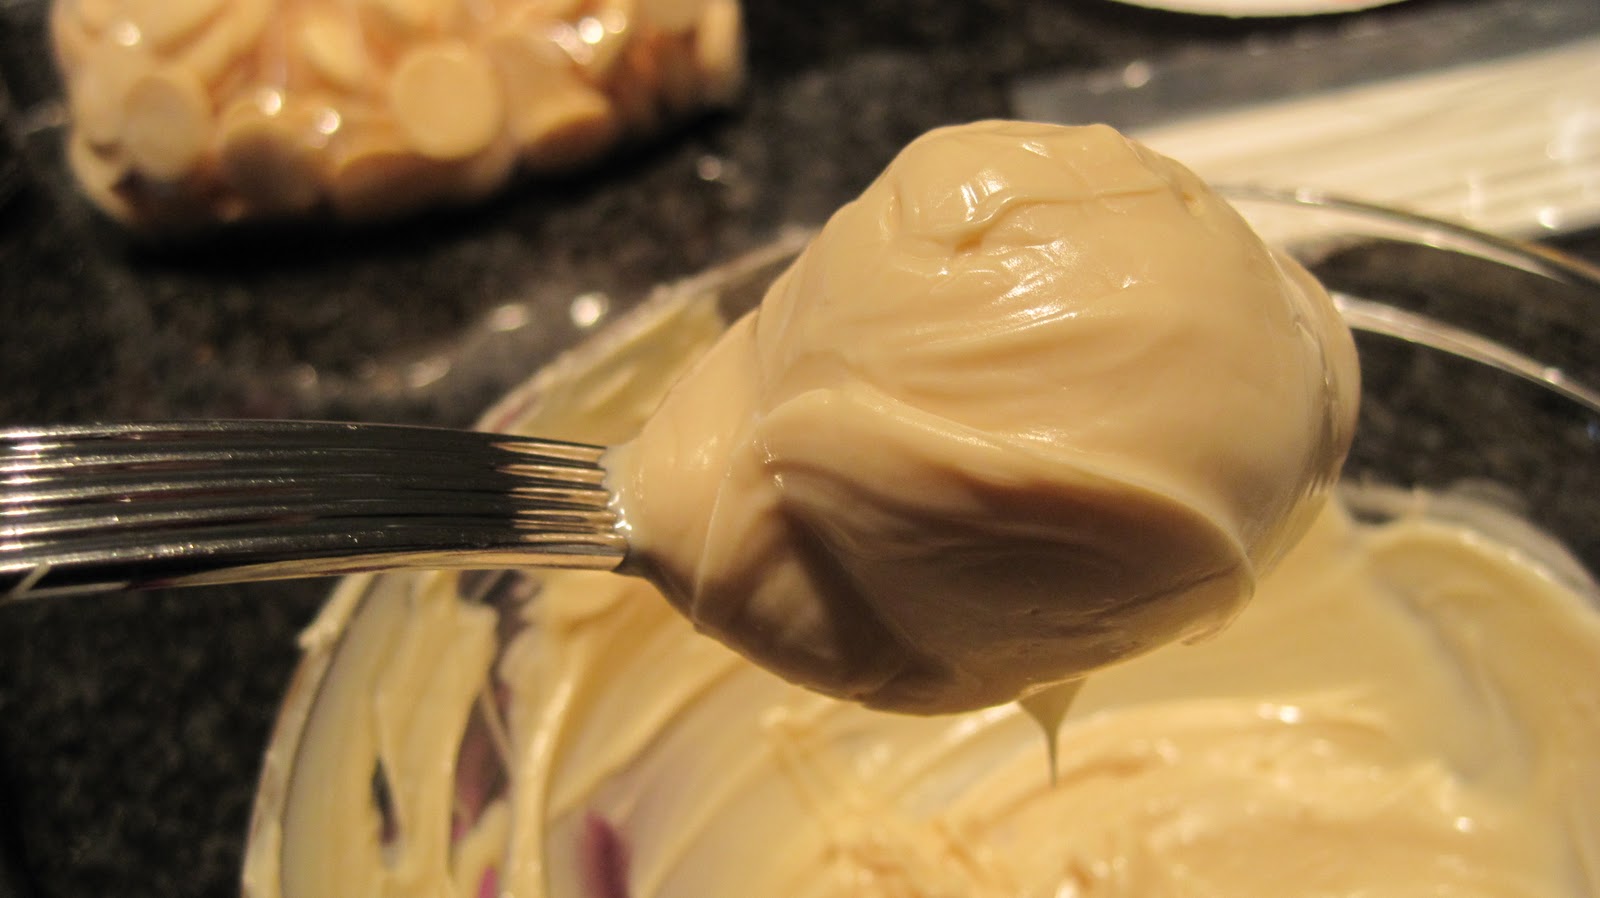
Take one cake ball at a time and set into softened coating.  Thoroughly coat the ball with a spoon and gently lift out.  Tapping the handle of your spoon while the spoon is slightly tilted, knock off excess coating. 


Place coated cake ball onto parchment paper and decorate as desired while coating is still moist.

If making cake pops follow same directions only placing the popsicle stick 1/2 way into the cake ball.  Dip into softened coating and cover with the help of a spoon.  Remove with popsicle stick tapping gently to remove excess being sure not to tap too hard or cake ball may fall off.  Let dry on parchment or can stick into foam or styrofoam cup.


Will last unrefrigerated for up to a week.  However, they won't last that long.

Note: If desired you can always make the cake, ice it and cut into squares.  It's great that way as well!

Enjoy!!!


Sunday 23 October 2011

Roasted Tomato Basil Soup with a Round Grilled Cheese


When I was a little girl it seemed like I was sick all the time with either colds or some sort of virus. Soups became my best friend and comfort food (my favorites were Campbell's Tomato Soup with milk or Chicken Noodle) paired with a round grilled cheese sandwich.

We had what was called a Toas-tite. You'd lay a piece of bread on one side of this contraption, place a couple slices of cheese on the bread, top it with another slice of bread then seal. Place it on the burner and toast on both sides. The end result was an incredible grilled cheese sandwich where the center would swell up making a nice hot gooey cavity of cheese.

When I moved out of my parents home I confiscated the Toas-tie.  I wanted to be certain no one else in my family would take it.  This was mine!    You can read more about the Toas-tite here.

This past week it was raining and cold. My body was screaming for a pot of Tomato soup and a round grilled cheese. So I decided to make some for dinner. Tomato Basil sounded great but wasn't up for anything too creamy or fattening. Checking out various recipes online Ina Gartens Roasted Tomato Basil Soup appeared in more recipes than you could imagine with rave reviews. So I decided I'd try hers. I did make a few minor changes to her recipe and although I wanted to strictly use fresh tomatoes, her recipe called for both fresh and canned. Why not test out the recipe that received great reviews and then change it up next time, if I felt like it.

The Roasted Tomato Basil Soup was fantastic. You would have thought there was cream in it. This recipe is a keeper and one that if you haven't made before but love Tomato Soup, you have to try.

Here's the recipe with the changes I made in blue.


Roasted Tomato Basil Soup
serves 6-8

Ingredients:

  • 3 pounds ripe plum tomatoes, cut in half lengthwise
  • 1/4 cup plus 2 tablespoons good olive oil (EVOO)
  • 1 tablespoon kosher salt
  • 1 1/2 teaspoons freshly ground black pepper
  • 2 cups chopped yellow onions (2 onions) (I used one large yellow onion)
  • 6 garlic cloves, minced (I roasted a head of garlic in EVOO, wrapped in foil with the tomatoes)
  • 2 tablespoons unsalted butter
  • 1/4 teaspoon crushed red pepper flakes
  • 1 (28-ounce) canned plum tomatoes, with their juice
  • 4 cups fresh basil leaves, packed (I used 2 cups)
  • 1 teaspoon fresh thyme leaves
  • 1 quart (32oz. or 4 cups) chicken stock or water
  • 1 teaspoon balsamic vinegar

Directions:

Preheat the oven to 400 degrees F. Toss together the tomatoes, 1/4 cup olive oil, salt, and pepper.


Spread the tomatoes in 1 layer on a baking sheet and roast for 45 minutes along with a head of garlic that's been wrapped in heavy duty foil and drizzled with EVOO). When tomatos and garlic are done, set aside to cool. Then peel the skins off the tomatoes, discarding the skins.


In an 8-quart stockpot over medium heat, saute the onions and garlic with 2 tablespoons of olive oil, the butter, and red pepper flakes for 10 minutes, until the onions start to brown. Add the canned tomatoes, basil, thyme, and chicken stock. Add the oven-roasted tomatoes, including the liquid on the baking sheet, along with squeezing out 6 cloves of roasted garlic into the pot.


Bring to a boil and simmer uncovered for 40 minutes.


Pass through a food mill fitted with the coarsest blade. Using an immersion blender or upright blender puree to your desired consistency. Add Balsamic Vinegar. Taste for seasonings. Serve hot or cold.


Note: You don't have to roast the garlic. I chose to because roasted gives the garlic a sweeter, milder flavor than raw garlic which I prefer. The leftover roasted garlic can then be squeezed out onto crostini or a cracker for a delicious snack!

After pureeing and doing a tase test I felt something was missing.  I added a teaspoon of balsamic vinegar and for me it was just right.

Enjoy!!


Wednesday 19 October 2011

Black Quinoa Asian Slaw


One of my favorite places to grocery shop is Whole Foods Market.  Everything they have in my opinion is incredible.  Walking into the produce section is like walking into a carnival of bright, fresh, fruits and vegetables stacked neat and clean but in perfect view and reach for everyone.  With samples galore and the friendliest staff ever. 

Of course, you do pay a premium for the quality but it's worth it to go when you can.

The other day I arrived just after the lunch hour.  I was starved having not had anything to eat since 6:30am.  I looked at the soups and although it was chilly out I felt like something light and refreshing.  I headed over to the prepared foods section and their Black Quinoa Asian Slaw caught my eye.  It was positively stunning with the black balancing the bright vegetables and fruit mixed in.  The woman behind the counter said it was delicious so I tried it.  AMAZING!!!!

Of course after coming home I looked at the ingredients and then got online to see if that recipe was posted anyplace.  I found it!  I went back out to Whole Foods to get some Black Quinoa and the other ingredients.  I had the regular pale quinoa but the black made this dish stand out. 

A simple dish to prepare and packed with nutrients.  Did you know: 

  • Quinoa is the only grain that is a complete protein, with all eight essential amino acids 
  • Has a rich color and unique texture, adding value to any plate. 
  • Has an earthy somewhat nutty flavor and crunchy texture 
  • It's been called the "Mother Grain" by the ancient Incas, and a staple in their diet
  • Quinoa is Kosher
  • Perfect addition to all cuisines and vegetarian dishes
  • High in potassium which helps control blood pressure
  • Wheat and gluten free which is great for those suffering with celiac disease or wheat allergies
  • Low on the glycemic index, which means it won't spike blood sugar levels because it enters our bodies at an even rate keeping us full longer
  • High in fiber
Note: Some caution must be taken however, when prepping your quinoa. Because the grains are covered with "Saponin"  a naturally occurring chemical compound common to plants, you must be careful to remove it.  (Saponin functions as a natural pest control by being virtually unpalatable, preventing birds and insects from eating it).   If not removed (by simply rinsing it well under water in a fine mesh sieve prior to cooking), it will taste bitter and can have minor toxic effects, causing stomach aches and sometimes vomiting. A good rinse before cooking (being sure the water runs clear) and even after will insure that all the Saponin is removed. Leaving you with a healthy, nutritious and delicious grain to eat.

Black Quinoa Asian Slaw
serves 10-12

Ingredients

  • 8 oz  Black Quinoa
  • 2 c. water
  • 4 oranges, segmented
  • 2 c. red cabbage, shredded
  • 1 c. snap peas, bias cut
  • 1 c. carrots, shredded
  • 1 c. scallions, bias cut
  • 1 mango, small dice
  • 1/2 c. fresh cilantro, rough chopped
  • 2 T fresh ginger, minced
  • 1/2 c. orange juice, reserved from orange segment
  • 1 t Sriracha sauce
  • 1/4 c. rice wine vinegar
  • 1/4 c. sesame oil
  • sesame seeds to garnish, toasted

Directions

1. Rinse Black Quinoa under cold water until water runs clear. Place Black Quinoa in boiling water and simmer for 12-15 minutes. Rinse again.
2. In a small bowl combine orange juice, rice wine vinegar and ginger. Slowly whisk in sesame oil to create an emulsion. Set aside to incorporate flavors in dressing.
3. In a large bowl combine Black Quinoa, red cabbage, snap peas, carrots, scallions,mangos, and cilantro.
4. Fold in dressing and let chill in fridge until ready to serve.  To serve, garnish with toasted sesame seeds if desired.

I think this is delicious on it's own but would be a great addition to any meal as a side dish or with chicken or fish added to it.

Beautiful, Nutritious and Delicious!

Here are more Quinoa recipes you might like to try.

ENJOY!!!


Monday 17 October 2011

Fun & Inexpensive Gifts for the Holidays!


With the economy in the toilet these days it doesn't mean we still can't give gifts to family and friends.  However, the gifts we give may not be as extravagant but that doesn't mean they're still not fantastic.  Here's a fun idea to perk up those incredible treats you plan to share with everyone this holiday season.  All for just under $5.

Have you ever Mod Podged before?  I've been doing it since I was about 8 years old and well, that's a lot of years.  It's the perfect way to preserve something or design a unique gift to give or keep for yourself.

This particular project adds a nice addition to those treats that you plan to make for family, friends and co-workers.  Instead of placing your cookies, etc. on a plastic or paper plate wrapped in cellophane and tied with ribbon why not make a lovely or festive plate to place your treats on.  A plate that you give as a gift with your holiday treats!

I've found that WalMart has great prices on all materials required for this project.  Of course, you can get as fancy as you like by going to specialty fabric stores.  Here's what you'll need.

  • Paper to place under your project to keep your work surface clean.
  • glass plates, chargers or bowls, etc. (WalMart has great prices)
  • Mod Podge ($6.47 at WalMart)
  • paint brush or paint sponge
  • fabric (lots of fun inexpensive prints at WalMart)
Instructions:

Place paper down on counter top and set clean dish on paper bottom up.


Cut your selected piece of fabric out to cover the bottom of your plate extending about 1-2 inches all the way around and set aside.

Brush a thin layer of Mod Podge over the entire bottom side of the plate.


Don't forget my Virtual Cookie Swap!


Lie your fabric over the Mod Podge covered plate being sure to smooth out the fabric onto the plate. Be sure to press out any air bubbles or creased fabric. Let rest a few minutes to adhere.


With a sharp scissors cut off the fabric which extends over the plate being sure to cut next to the edge of the plate to insure a tight even fit.


Cover fabric with another thin layer of Mod Podge. Lift plate up from paper and place on the bottom of a pot or something elevated for the plate to dry completely.  Drying could take up to 30 minutes depending on the thickness of the Mod Podge.


Once dried you have a lovely plate to set cookies on for your own celebration or to give as a gift with cookies or treats.


Remember there are a variety of glass plate shapes to choose from and bowls, so be creative.


Giving a gift to a teacher?  Find fabric with apples, numbers for a math teacher, etc. For Halloween there are tons of fun fabrics. You get the point.

In fact, if you really want to be creative, find designs with flowers or other shapes, cut them out, and paste onto the plate. Once dried lay a colored fabric on top, following the Mod Podge directions.

This fabulous and creative gift can be made for under $5. Hard to believe something this pretty can be so inexpensive.

Note: The plate is not dishwasher safe. When cleaning simply clean the top, without submerging or getting the bottom side, with fabric, wet.

Enjoy!!

Tuesday 11 October 2011

Darkness is closing in on my grilling time!


The days are getting shorter and although Daylight Savings Time doesn't happen until November this year, I feel like my time at the grill is closing in on me.  I know I can still grill when it's dark out, and I do however, I just don't enjoy it as much.

With that in mind and feeling like an Indian Summer day I decided to grill up some chicken breasts with an Asian Ramen Noodle Slaw for dinner.  This meal feels like comfort food to me, light yet, soothing.

I used boneless skinless chicken breasts but feel free to use any type of chicken you like.  The balance of flavors makes this dish great hot or cold.  Plus, the next day I like to slice the chicken up and add it to my Asian Slaw for an entree' salad.  I think you'll like this recipe!


Asian Citrus Chicken
serves 4-6

Ingredients:

zest of one orange
6 tbsp. fresh squeezed orange juice
1/4 cup fresh squeezed lime juice
1/4 cup light soy sauce
3 tbsp. honey
2 tsp Asian Chili Sauce
1 tsp. kosher salt
1 tbsp. minced ginger
1/4 cup cilantro, chopped
2 green onions, minced

Directions:


Combine the marinade ingredients and place in a zip lock baggie and mix well.  Reserve 1/4 of the marinade for basting.  Add chicken to the zip lock bag, mix and refrigerate 30 minutes - no more than 8 hours. 


After time in the refrigerator take out and place on a preheated grill.  Grill approximately 4-5 minutes on one side then flip, brush with additional marinade and grill for an additional 4-5 minutes.  Breasts should register 160F degrees when done.  You can also check using the finger or touch method.

Plate up and serve with Asian Ramen Noodle Slaw (recipe below)


Don't forget to come to my "Virtual Cookie Swap & Giveaway" and share your cookies with us!!!


I was introduced to the Ramen Noodle Slaw about 6 years ago and have been in love with it ever since.  If you've never tried it but love slaw, you'll love this.  Ramen Noodles come in many varieties from Chicken, Beef, Asian (which isn't shown here) and several others. Feel free to change up the type of oil and vinegar you use.  When I use Ramen Chicken, I use Canola Oil and Cider Vinegar - experiment you can't go wrong.

Here's my Asian Ramen Noodle Slaw - trust me this is absolutely delicious!

Asian Ramen Noodle Slaw
serves a lot

Ingredients:

1 pkg cole slaw mix (I used Rainbow Slaw mix here)
1/2 cup roasted & salted sunflower seeds
1/2 cup toasted almond slivers
2 pkgs, Ramen Asian Noodles (crushed)
2 green onions, thinly sliced

Dressing:

whisk all ingredients together

1/2 cup Sesame Oil
1/2 cup water
1/2 cup sugar
1/2 cup Rice Vinegar, unseasoned
2 pkg Ramen Asian seasoning

Keep dressing & dry ingredients separate until ready to serve.  You may not wish to pour all of the dressing on the slaw depending on your tastes.  In fact, in my photo above I halved the dressing proportions since we don't use much, and it was still great. 

This is so delicious that you'll find yourself eating the entire bowl.  Well at least I did!

Enjoy!!!

Thursday 6 October 2011

Virtual Cookie Swap & Giveaway!


AND GIVEAWAY!

The holidays are coming and it's always such an exciting time of the year for me.  Besides teaching  culinary classes for adults and children and going to holiday gatherings I also bake A LOT, and share my baked goods for gifts or with whomever I can. 

Years ago, I heard of something called a "cookie exchange or swap".  Of course I had no idea what this was, nor had I ever been to one, let alone given one. 


A cookie exchange is where you invite a group of friends, relatives, and neighbors over to your house to exchange homemade cookies or even bar cookies, etc.  Every person brings anywhere from one to six dozen of one type of cookie.  The cookies are laid out on the dining room table and exchanged.  The result is that everyone goes home with an assortment of one - six dozen different types of cookies (based on the number brought).  The recipes are also swapped, so that if you take home a new cookie that you really like, you will be able to make it yourself.  The cookie party can be given at any time during the year; however, most cookie exchange parties occur in December. 

I've been researching information about hosting a cookie exchange and found that the Cookie Exchange Queen is a woman by the name of Robin Olsen who has written a book, has a website and newsletter with everything you'd ever want to know on the topic.  Since I signed up for it last year she reminded me a couple of weeks ago to get in gear and get my invitations sent out.

Realizing that I have far too much going on in the next couple of months to try and pull one together I decided to host a "Virtual Cookie Swap" on my blog.  Here all my family, friends, bloggers friends, and anyone out in cyberspace can visit.  Since there's plenty of room for everyone, we can all share our favorite cookie or bar recipes.


In addition, I have a fabulous giveaway to go along with my "Virtual Cookie Swap".  Thanks to Kuhn Rikon they've been nice enough to offer one lucky guest that attends my cookie swap and shares a recipe the chance to win a Kuhn Rikon Stainless Steel Cookie Press.  If you don't have one, well, you don't want to be without this for the holidays. Watch these videos to see all that you can do with this wonderful tool!

So that everyone can be a part of my first "virtual cookie swap" here's what you need to know:

Deadline for all recipe submissions is November 14th, 2011 when a winner for the Kuhn Rikon Cookie Press with be selected at random.

  1. Post your recipe in the comments section  and if you have a photo post that too.  If you have a cookie recipe that you've already posted on your blog feel free to provide the link to that if you prefer.  Tell us why you've selected the recipe you're sharing.
  2. Share in the comments section why you'd like to win the Kuhn Rikon cookie press and "like" the Kuhn Rikon facebook page.
  3. Like the "At Home with Vicki Bensinger" facebook page, and place this widget  

on your blog using this link (http://in-homeculinaryclasses.blogspot.com/2011/10/virtual-cookie-swap-giveaway.html), so others can join in on the virtual cookie swap fun as well.

     4. The winner of the Kuhn Rikon Stainless Steel Cookie Press will be selected at random on November 14th, 2011.  Be sure when you post your comments that you leave your contact information in the event you win.  

Note: If you would like to get a PDF of all the recipes with photos submitted to my first annual Virtual Cookie Swap then please email me your recipe at: virtualcookieswap@gmail.com   Be sure when you email your recipe that you:
  • enter your first name and last initial or blog name if you prefer
  • city and state where you live
  • email address so that I can send you a copy of the pdf when it's done (your email address will not be given out)
  • Name of your recipe, plus a full list of ingredients and instructions along with # of cookies it makes
  • photo of the recipe if you have one.
  • share any information that you can about why you selected this recipe (you can copy and paste what you posted in the comments section of my blog)
Oops!  I almost forgot to post my favorite cookie for the holidays, "Mini Pumpkin Whoopie Pies".  I posted this recipe back in December of 2009.


The recipe can be found here.


Thank you all ahead of time for taking part in my first "Virtual Cookie Swap".  I'm so excited that I'm finally having one.  Maybe next year I'll actually be able to host it in my home.  In the meantime, share your recipes, photos and stories.  Hopefully we'll all have lots of fun, and great cookies and bars to make for family and friends this holiday 2011.
    The Winner of the Virtual Cookie Swap Kuhn Rikon Cookie Press (selected at Random) is #18 - Jill, from DulceDough. 
    Congratulations Jill.  Please contact me at vkb2@hotmail.com.
I hope everyone has a wonderful time baking all these fantastic holiday treats!


Sunday 2 October 2011

Brandied Apple & Brioche Pudding!


Did you know there are over 7500 varieties of apples worldwide, and of those, 2500 are grown in the United States?  That's a lot of apples!  Those 2500 varieties are grown in 36 U.S states and while they come in all shades of red, green and yellow with the smallest the size of a cherry, and the largest the size of a grapefruit, the average packs only 80 calories.

Have you ever wondered how an apple floats when you go bobbing for apples during Halloween?  That's because 25% of an apples volume is air!  It's hard to believe since they're large and appear solid.  Yet, though a 1/4 of the apple is air they are very nutritional.  Apples are naturally fat free, cholesterol free, sodium free and provide many of the important vitamins, minerals, fiber (5 grams), and phytonutrients that you need to stay healthy. 

The best time to pick apples are in the fall when they're largest - one farmer or apple picker can pick up to 5,000 pounds of apples a day - that's just incredible!  With such abundance in the stores, farmer's markets, etc. I try to come up with creative recipes to use them in.

For me, October and the beginning of November are the best times to try new recipes to master in time for the fall and winter holidays.  Having gone through stacks of cookbooks and magazines over the weekend I came across an old recipe from Chocolatier.  I loved this magazine which is no longer in publication and have almost every single issue still.  So when I cast my eyes on this recipe from the October 1998 issue, I knew I had to try it.

Trying to think outside the box, I made them in jam jars, an idea I got from Chris who cooks in jam jars all the time.   I contacted the Ball Company who told me jam jars are guaranteed up to 220F degrees, but Chris who bakes in them often never had an explosion!  So I figured why not try.  Of course, I can't guarantee that an explosion couldn't happen, but it worked for me and Chris.  In addition, I also decided to make just one in a ramekin, to see which way I preferred.  You can make that decision after viewing my finished product. 

Enough talking, here's the recipe!


Brandied Apple & Brioche Pudding
makes six 8-ounce ramekins or eight 8-ounce jam jars

Custard:

2 cups plus 1 tbsp. whole milk
2 cups plus 1 tbsp heavy cream
2 vanilla beans, split length-wise and scraped
5 large egg yolks
3 large eggs
1/2 cup plus 2 tbsp granulated sugar

Sauteed apples:

3 (1 1/4 pounds) large Granny Smith apples
1 cup (2 sticks) plus 2 tbsp unsalted butter, cubed
1 cup granulated sugar
1/2 cup apple brandy, such as Calvados

Assembly:

one small loaf (1 pound) brioche or Challah bread, day old or lightly toasted
1 pint vanilla ice cream, optional

Make the custard:

In a medium, heavy saucepan combine the milk, heavy cream and the scrapings from the vanilla beans. 


Place the eggs and egg yolks in a medium heat-proof bowl.  Add the sugar and quickly whisk to blend.


Over medium heat bring the milk/cream mixture to a boil.   Slowly pour 1/3 of the hot milk into the egg mixture, whisking constantly.  Add the warmed egg mixture to the mixture in the saucepan and continue to cook over low heat


until it coats the back of the spoon and a line drawn through the coating remains, approximately 2-4 minutes.

Strain the mixture through a fine mesh sieve into a medium size bowl. 


Cover the surface with plastic wrap and refrigerate for at least 2 hours.


Make the sauteed apples:

Peel and core the apples.  Cut each into 8 equal pieces.


Place the butter in a large saute pan over high heat.  After the butter has completely melted add the sectioned apples.  Reduce to medium-high heat and saute the apples for 5 minutes.  Add the sugar to the saute pan and toss the apples to coat.  Continue to cook the apples for 5 minutes. 


Turn off the burner and pour the apple brandy in the saute pan.  Using a wooden spoon or spatula scrape the bottom of the pan clean.  Remove the apple mixture from the pan, place in a bowl and reserve until ready to use.


Assemble the apples and brioche pudding:

Butter ramekins or jam jars, coat with granulated sugar and tap out the excess.  Preheat oven to 325F degrees.

Remove the crust from the bread and discard.  Slice the bread into 1/2 inch cubes.  If the bread is not day-old spread the cubes on a baking pan and place in the pre-heated oven for 2-5 minutes, until they begin to dry but have not begun to brown.

Place 1/2 cup of the bread cubes (approximately eight) in each of the ramekins or jars, and top with 3 pieces of sauteed apple.  Cover the apples with another 1/2 cup of the bread cubes.  Divide the cream mixture evenly among the ramekins.

Bake the puddings in a water bath for 30-40 minutes, until the custard has set.


Remove the custards from the oven and from the hot water bath, then wipe the sides clean with a towel.

Place each ramekin/jam jar on individual dessert plates and top with a scoop of ice cream if desired.


Note:  I like both ways of serving this dish.  The ramekin would be more formal where the jam jars more casual and fun.  Although both containers were 8 ounces the jam jar held less. Any leftovers could be covered and refrigerated for up to 2 days.

This is delicious warm or cold the next day.  Well worth the effort!

Enjoy!!!